Bags, Wallets, and Zips

Tiny Treasures Basket & Tray Free Pattern

Tiny Treasures Basket & Tray Free Pattern - Noodlehead

Tiny Treasures Basket & Tray Free Pattern - Noodlehead

Yayyyyy! I’m sharing this fun (and free!) basket and tray pattern that I made up using Carolyn Friedlander’s new fabric collection for Robert Kaufman Fabrics – Euclid. It’s printed on gorgeous essex linen and I think it might be my favorite collection of hers yet.

Tiny Treasures Basket & Tray Free Pattern - Noodlehead

Tiny Treasures Basket & Tray Free Pattern - Noodlehead

I was dreaming up what project to make using Euclid and a basket kept coming to mind. The Euclid designs are perfect for home dec items, have you seen these gorgeous napkins? I definitely need some of those in my life. I think the basket and tray are so useful and you can never have too many places to hold all your favorite things, right?! Plus, this set is perfect for pairing up and displaying on your coffee table, dresser, or even in your sewing space. They’re so great for collecting and displaying small treasures. I especially like to think that the basket is perfect for yarn whereas the tray fits a small scissors, thread, and notions so nicely.

Tiny Treasures Basket & Tray Free Pattern - Noodlehead

They’re a fun almost origami-like shape and the leather handles and rivets look so amazing. You could definitely sew fabric handles or get creative using thick wool felt and hand stitch them on. Either way, I hope you’ll use this free pattern and have some fun with it! I can’t wait to see what you make.

Tiny Treasures Basket & Tray Free Pattern - Noodlehead


Pattern: Tiny Treasures Basket & Tray Pattern
Fabric: Euclid by Carolyn Friedlander (coming to shops in August!)


Tiny Treasures Basket & Tray Free Pattern - Noodlehead

Let me know in the comments if you’d be interested in being able to purchase sets of leather for the basket or tray from my shop. Handles for the basket are now in my shop!

Tiny Treasures Basket & Tray Free Pattern - Noodlehead

Have a great weekend!

Sew Along

Handmade Style Tunic Sew Along – Day 5

Welcome to the last day of the Handmade Style tunic sew along! Today we’re left with finishing the hem. Pretty easy, right?!

Handmade Style Tunic Sew Along - Day 5, Noodlehead

Before we get to the nitty gritty, I figured I might as well show off my finished tunic. I’m really happy with how it turned out. It’s been so hot and humid here, and when I was wearing the tunic, it felt so cool and comfy. I think this particular print kind of hides the pretty details of the tunic, but I still love it anyway. It’s different enough from my coral version that it feels like a totally different top.

Handmade Style Tunic Sew Along - Day 5, Noodlehead

I paired the tunic with some comfy leggings and the most uncomfortable heels. Actually the heels are a really nice shoe, but I’m definitely not used to wearing them. I think they look pretty at least!

Handmade Style Tunic Sew Along - Day 5, Noodlehead

Handmade Style Tunic Sew Along - Day 5, Noodlehead

The finish I chose for the hem uses single fold bias tape. I really like this type of hem finish, it feels a little more fancy, plus it could be a fun place to add a little splash of hidden color. However, you could definitely do a traditional double turn hem. The curved hem is my favorite detail, but you could straighten it or make it more gradual, too. It’s up to you.

Start by opening the single fold bias tape you made on Day 1 and fold the short end to the wrong side by 1/2″. Align that folded edge to the side seam of the right side of the tunic’s bottom raw edge.

hemstart

I start by placing a pin at the beginning and start sewing and work my way around the hem until I reach the beginning, overlapping where I started and trimming any excess bias tape. You’ll be sewing along the fold closest to the raw edge of the tunic, the first fold. Use the natural give in the bias tape to conform it to the curves of the hem.

hemtrim

Press the seam allowance away from the tunic then refold the bias tape so it lays wrong sides together with the tunic completely on the inside of the garment. The seam you had just sewn will now be the bottom edge of the tunic. Press the bias tape in place and pin being sure to neatly tuck in the raw edges where the bias tape overlapped. Pin in place.

hem3

hem2

Sew along the inner fold of the bias tape using a slightly longer stitch length. Be careful not to stretch the hem, but to let it gradually feed through your machine.

hem

That’s all! You’re finished! Now it’s time to try it on and start thinking of the different ways you can wear your new tunic!

Sew along notes: I’ll be spreading out the posts to be once a week, which will hopefully be a nice amount of time to get through each step as well as being easy to get caught up in case your schedule is full this summer! And of course feel free to work at your own pace, the posts will be permanent here on my blog, so reference them any time you need. If you have any questions please let me know in the comments below.

Handmade Style Tunic Sew Along – Day 1
Handmade Style Tunic Sew Along – Day 2
Handmade Style Tunic Sew Along – Day 3
Handmade Style Tunic Sew Along – Day 4

If you still need a copy of my book, you can purchase a copy of Handmade Style at your local quilt shop, Joann’s, local bookstore or Amazon. Or, check with your local library, too.

And that’s a wrap! I hope you’ve enjoyed making your tunic.

Handmade Style Tunic Sew Along - Day 5, Noodlehead

Sew Along

Handmade Style Tunic Sew Along – Day 4

Handmade Style Tunic Sew Along - Day 4

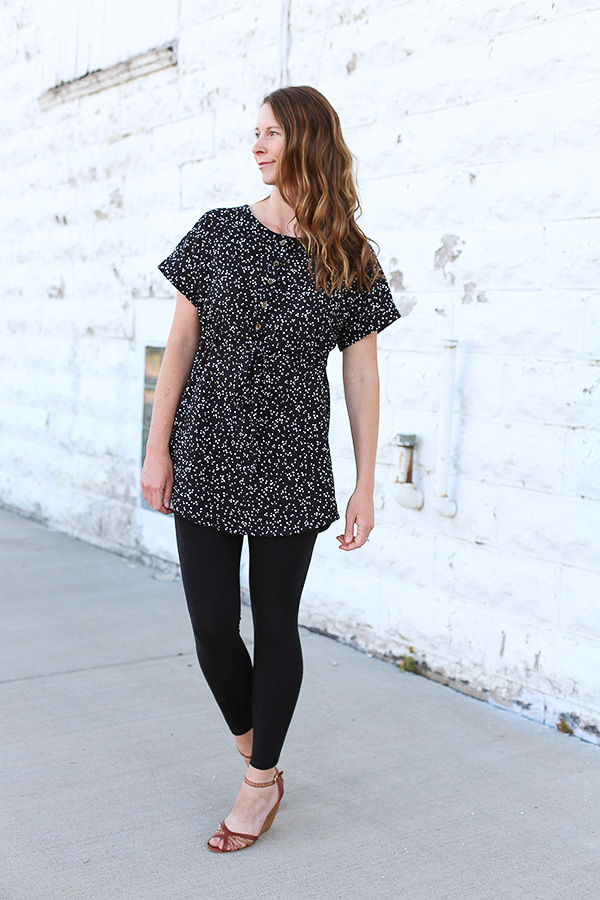
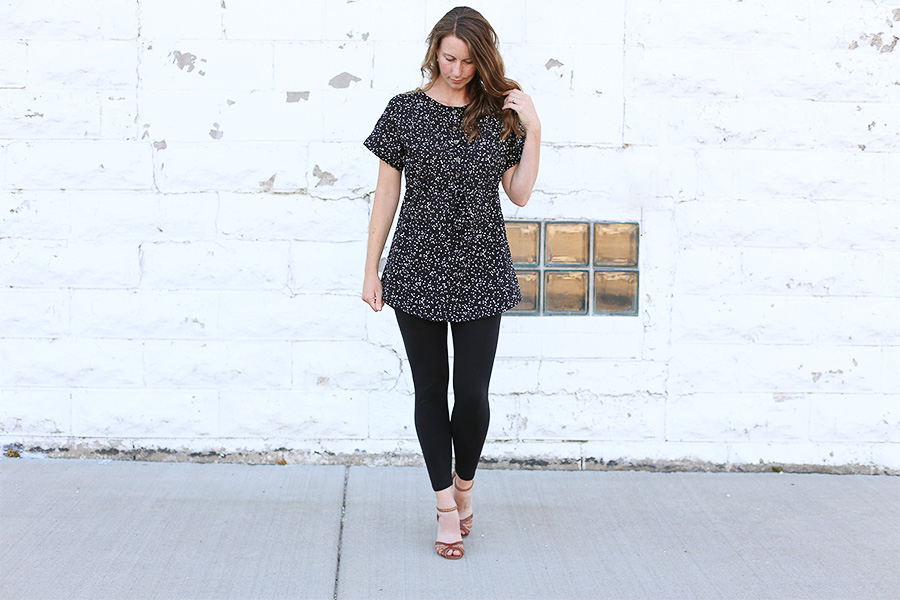
We’re almost there! Welcome back to the Handmade Style Tunic Sew Along. I’m hoping this sew along will be helpful to anyone who’s excited about sewing this tunic, I know it’s been fun for me to sew it again. So it may just have given me the itch to sew yet another with a few more modifications yet!

Today we’ll be sewing the side seams, cuffs, and waist casing/drawstring. Listing it out like that makes it sound like more than it actually is, I promise it’s not too bad! I would guess that it might take you a little over two hours time if you go along at a casual pace. Along the way I’ll mention a few more modifications and those will cut down on time as well. So it’s really up to you! Make it yours, add your own twist, infuse your style.

Start by sewing the side seams just like we did on Day 3 for the shoulder seams. Again, I’ll be using a french seam for this, so you can follow these next few steps or sew it the traditional way by sewing the seams with right sides together and finish your seams with a serger or zig zag stitch – your choice.

Place the tunic front and back pieces WRONG sides together and sew along the both side seams (which is actually the sleeve and side seam all in one) using a 1/4″ seam allowance. Then trim the seam allowance to an 1/8″. Press the seams, turn the tunic wrong side out and sew the side seams using a 1/4″ seam allowance. Press your seam towards the tunic back.Handmade Style Tunic Sew Along - Day 4

The cuffs are optional, so you may choose to leave them off. If you’re not using the cuffs you’ll need to hem the sleeve opening by pressing it to the wrong side by 1/4″ and then again by 1/4″. Sew close to the inner fold to hold the hem in place.

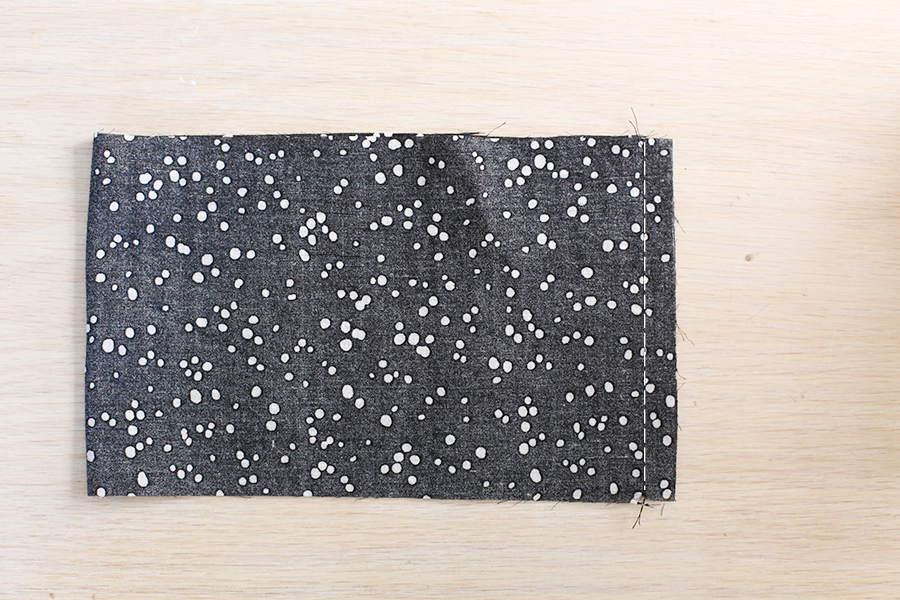
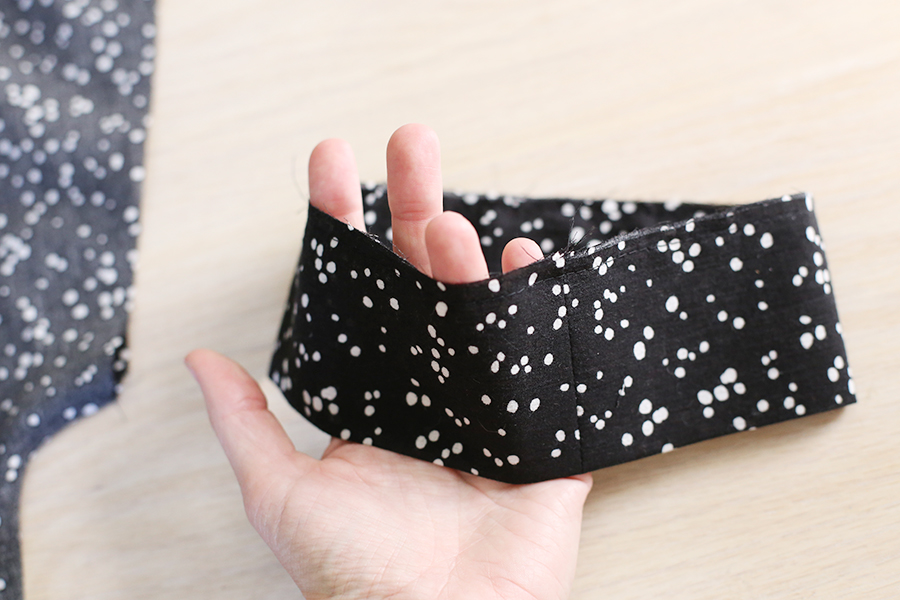
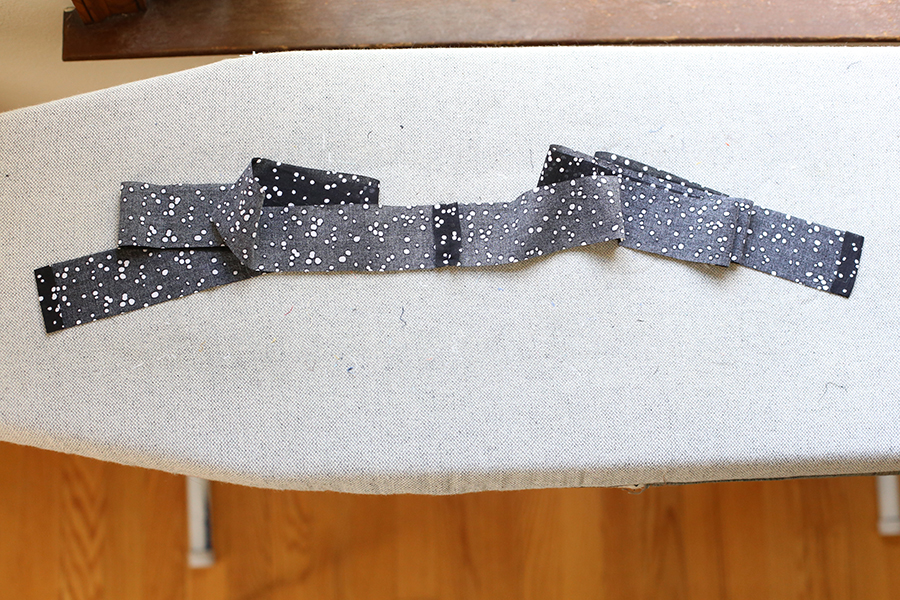
If you’re ready for cuffs, follow along! First match the short ends of the cuffs right sides together and sew. Press seam open.

Handmade Style Tunic Sew Along - Day 4

Next, fold the cuff in half with the wrong sides facing and press. Baste the raw edges of the cuff together.

Handmade Style Tunic Sew Along - Day 4

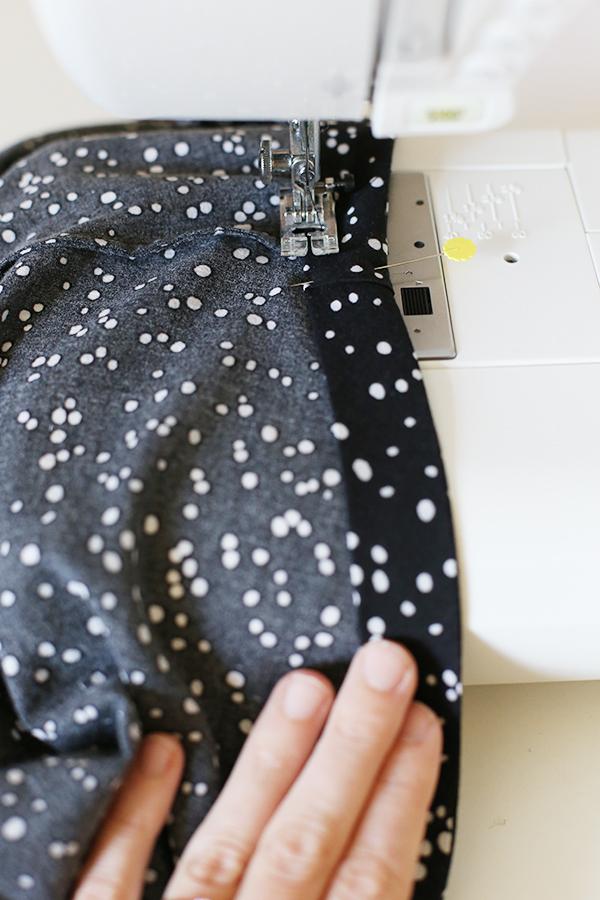
Next, with the tunic wrong side out, align the raw basted edge of the cuff with the raw edge of the sleeve opening. The seam of the cuff should align to the side seam of the tunic. Pin in place and sew. Next you can finish the seam with a serger or zig zag stitch.

Handmade Style Tunic Sew Along - Day 4

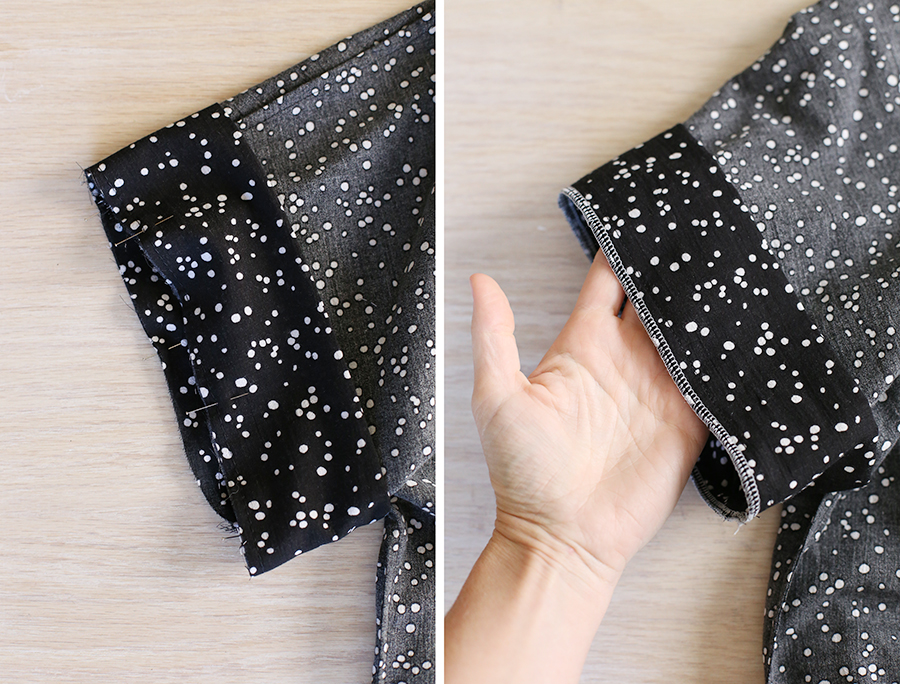
Turn the tunic right side out and press the seam allowance toward the cuff. Fold the cuff in half toward the tunic, the finished fold of the cuff will be past the seam you just finished by about 1/2″.

Handmade Style Tunic Sew Along - Day 4

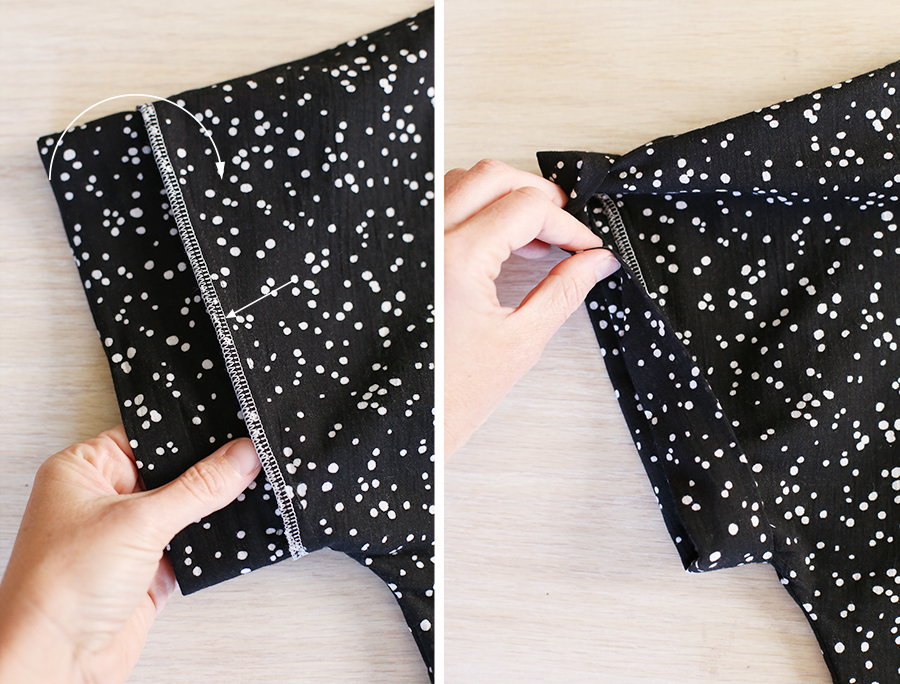
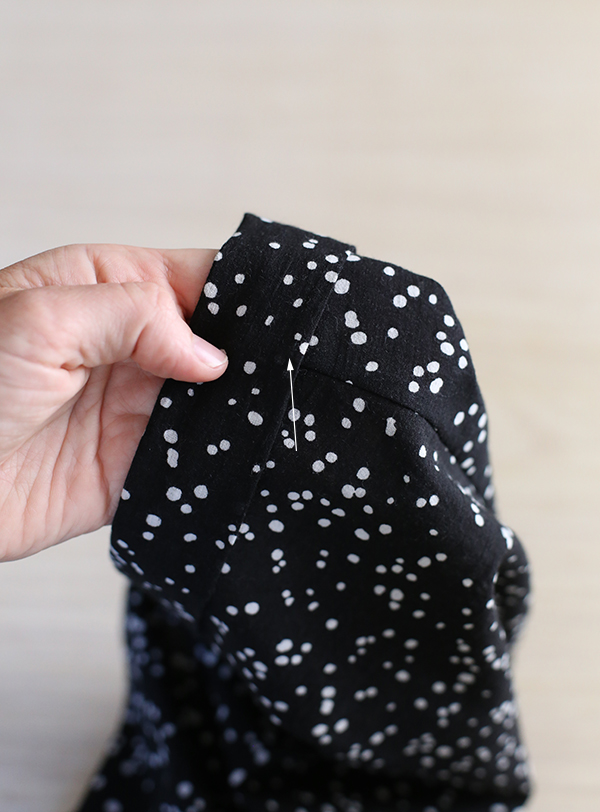
Tack in place along the shoulder seam and underarm seam by stitching a few times back and forth with your machine, or using a tack stitch or by hand. This will help prevent the cuff from coming unfolded and hold it nicely in place. Repeat to make and attach the remaining cuff.

Handmade Style Tunic Sew Along - Day 4

You could skip the waist casing and go for a simpler approach by making the drawstring and tying it around your waist when worn. You could also experiment with adding belt loops at the side seam. Another fun variation to try!

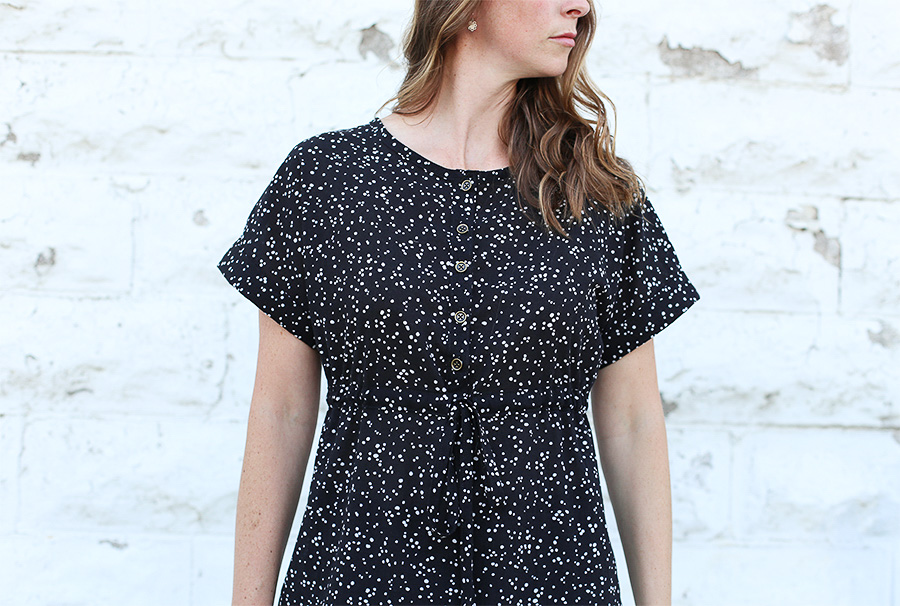
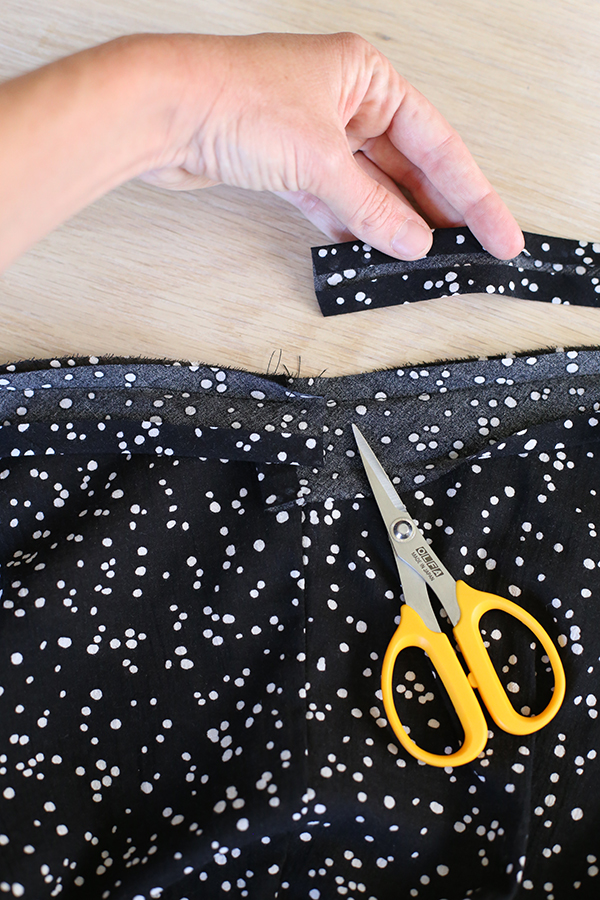
To make the waist casing start by folding the long sides of the casing to the wrong side by 1/2″, then fold both short ends to the wrong side by 1/2″. Topstitch along each short end.

Handmade Style Tunic Sew Along - Day 4

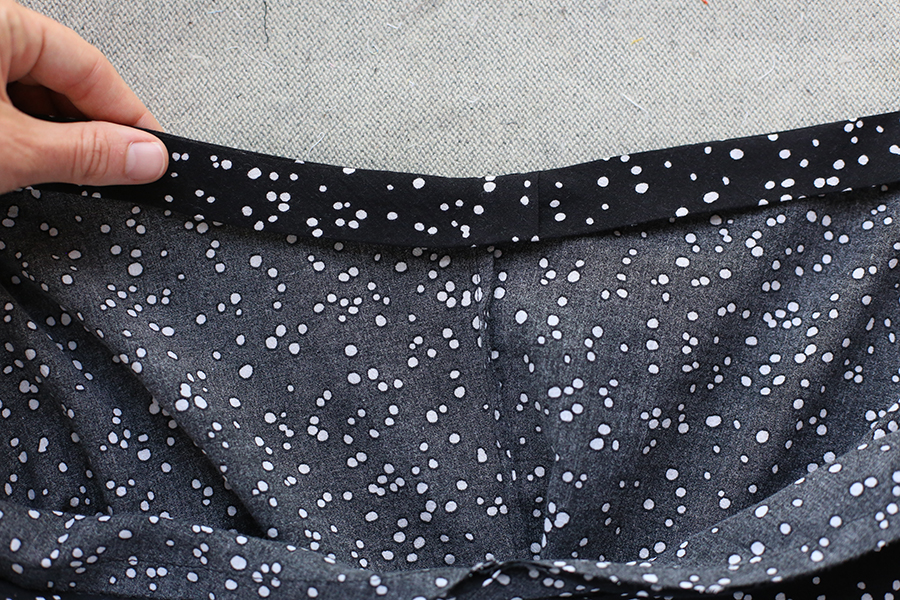
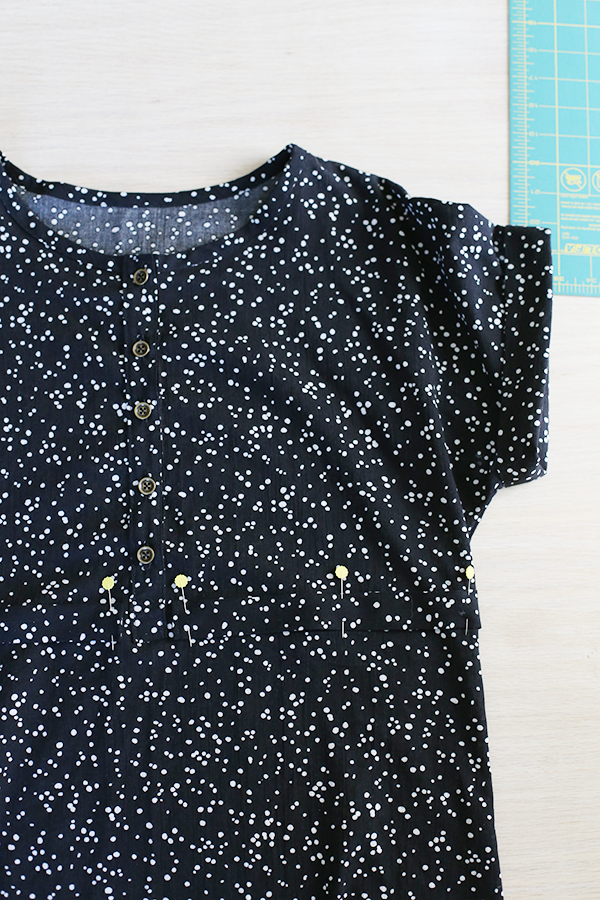
Lay the casing wrong side down on top of the tunic aligned to the transferred placement markings from the pattern. I start by pinning at the one end of the casing and working my way around the tunic. It’s easiest to reach inside the tunic with one hand while doing this. If your casing needs any adjustment by the time you reach the other side of the placket, it’s easy to do. Just shorten it and redo the topstitching. The casing will be ending about 1/2″ to 1/4″ on each side of the placket. If you wanted to make the casing higher or lower on the tunic, it’s pretty easy to move it up or down to your liking. You’ll want to adjust the length of the casing accordingly.

Handmade Style Tunic Sew Along - Day 4

Handmade Style Tunic Sew Along - Day 4

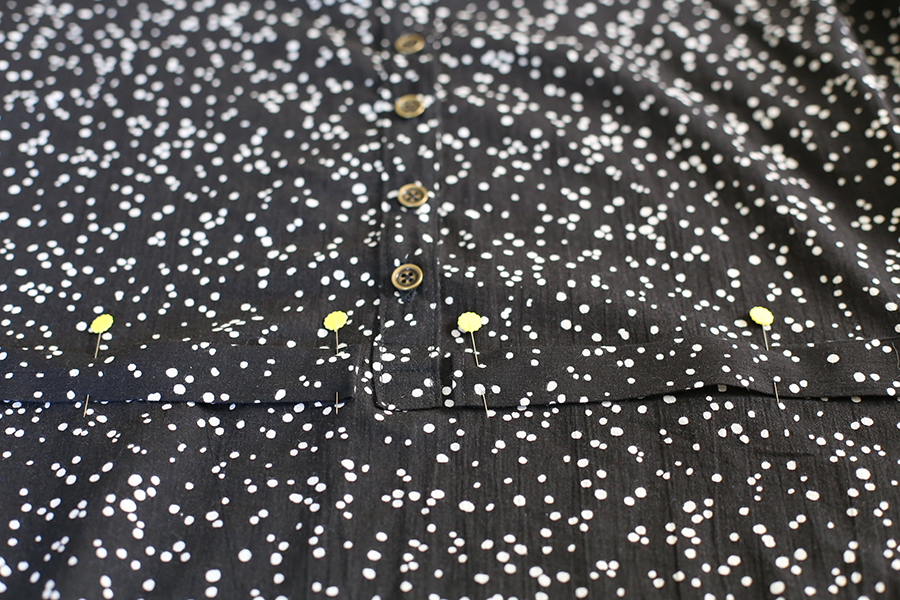
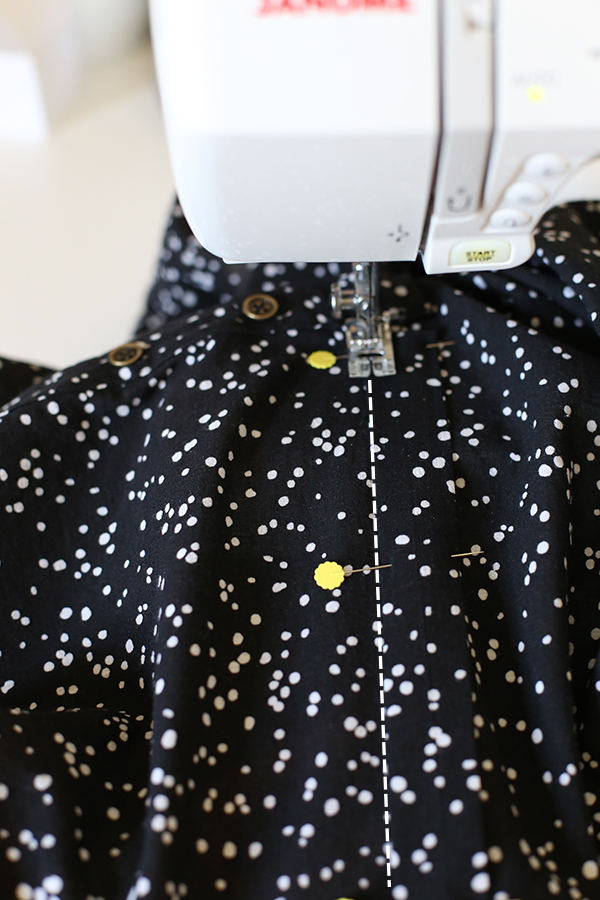
Sew the casing in place by sewing along each folded edge all the way around the tunic being sure to backstitch at the beginning and end.

Handmade Style Tunic Sew Along - Day 4

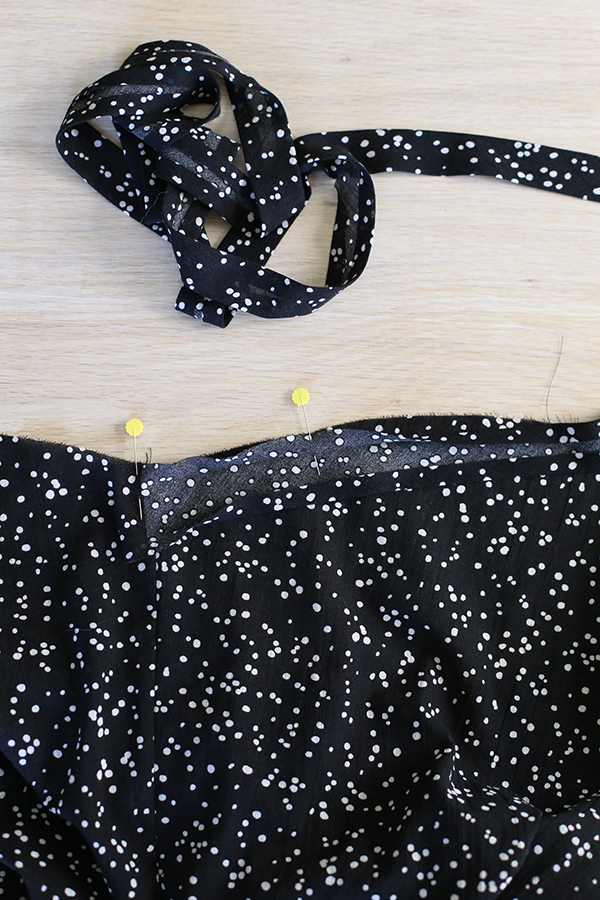
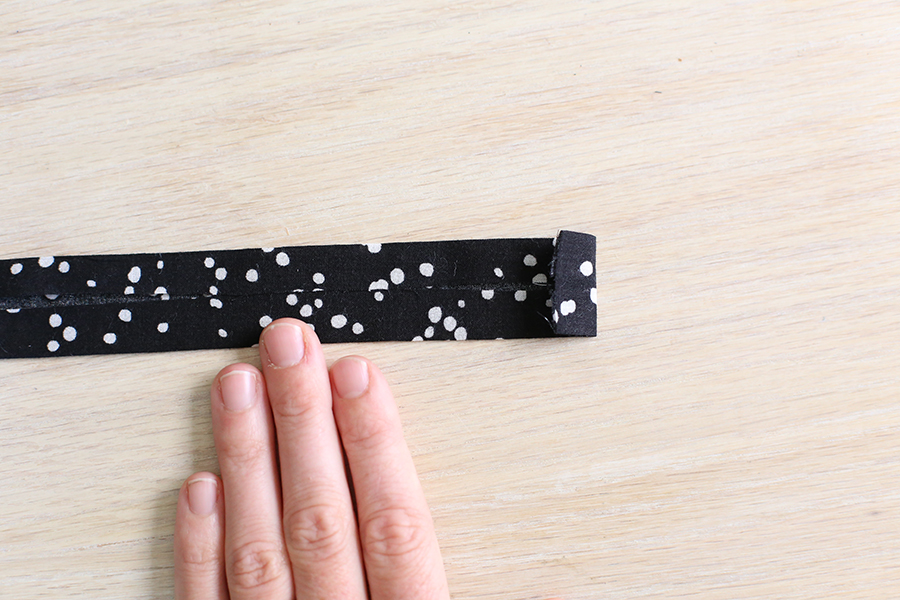
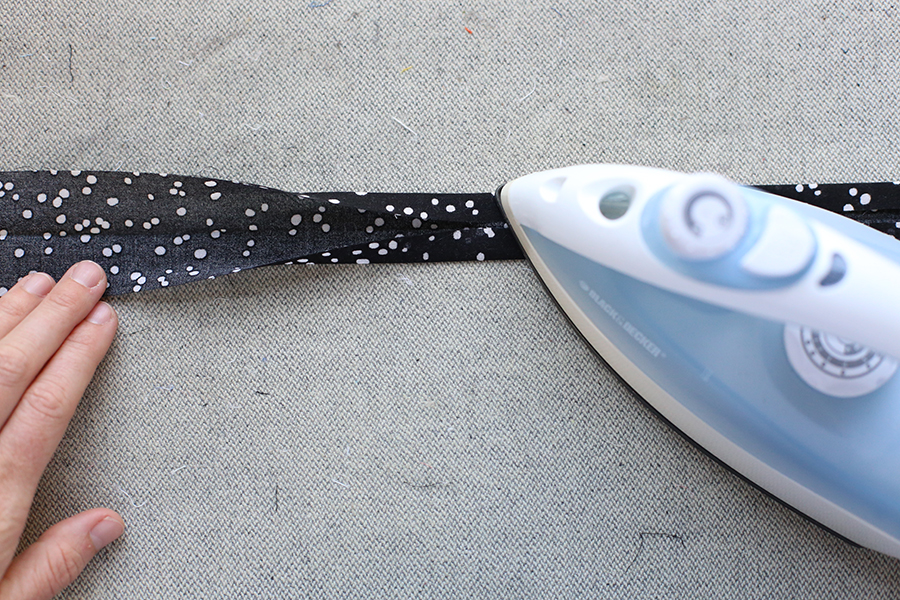
The drawstring is pretty much like making double fold bias tape, but with finished ends. Join the short end together to make one long piece then press the two short ends to the wrong side by 1/2″. Then proceed as you would for double fold bias tape and stitch the open edge closed.

Handmade Style Tunic Sew Along - Day 4

Handmade Style Tunic Sew Along - Day 4

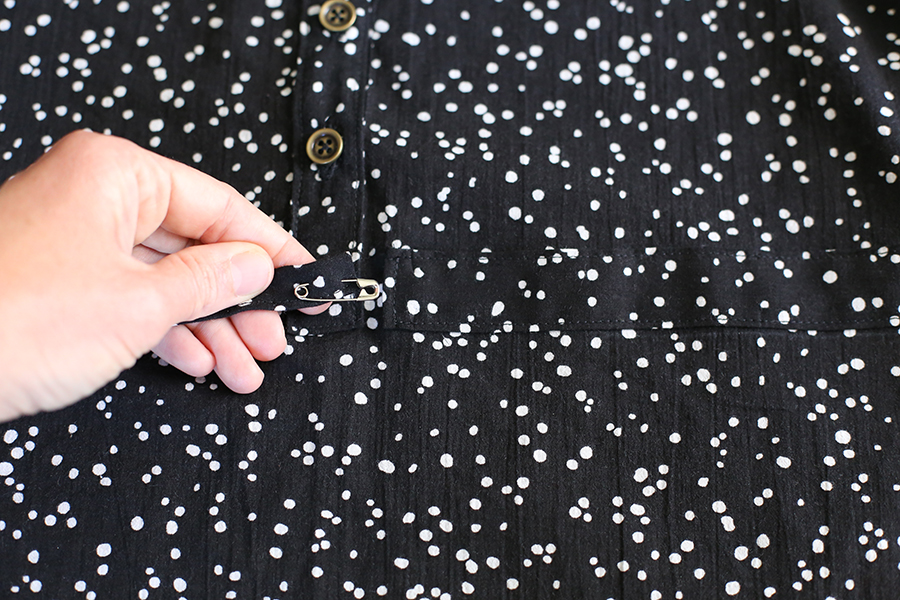
Once the drawstring is complete you can feed it through the waistband casing using a safety pin. Again, it’s easier here to have one hand inside the tunic while feeding the drawstring through.

Handmade Style Tunic Sew Along - Day 4

We’re down to the hem which we will finish next time! Congratulations, you’re almost done! If you’re anything like me I bet you’ve tried it on a time or two already. See you next week!

Sew along notes: I’ll be spreading out the posts to be once a week, which will hopefully be a nice amount of time to get through each step as well as being easy to get caught up in case your schedule is full this summer! And of course feel free to work at your own pace, the posts will be permanent here on my blog, so reference them any time you need. If you have any questions please let me know in the comments below.

Handmade Style Tunic Sew Along – Day 1
Handmade Style Tunic Sew Along – Day 2
Handmade Style Tunic Sew Along – Day 3

If you still need a copy of my book, you can purchase a copy of Handmade Style at your local quilt shop, Joann’s, local bookstore or Amazon. Or, check with your local library, too.