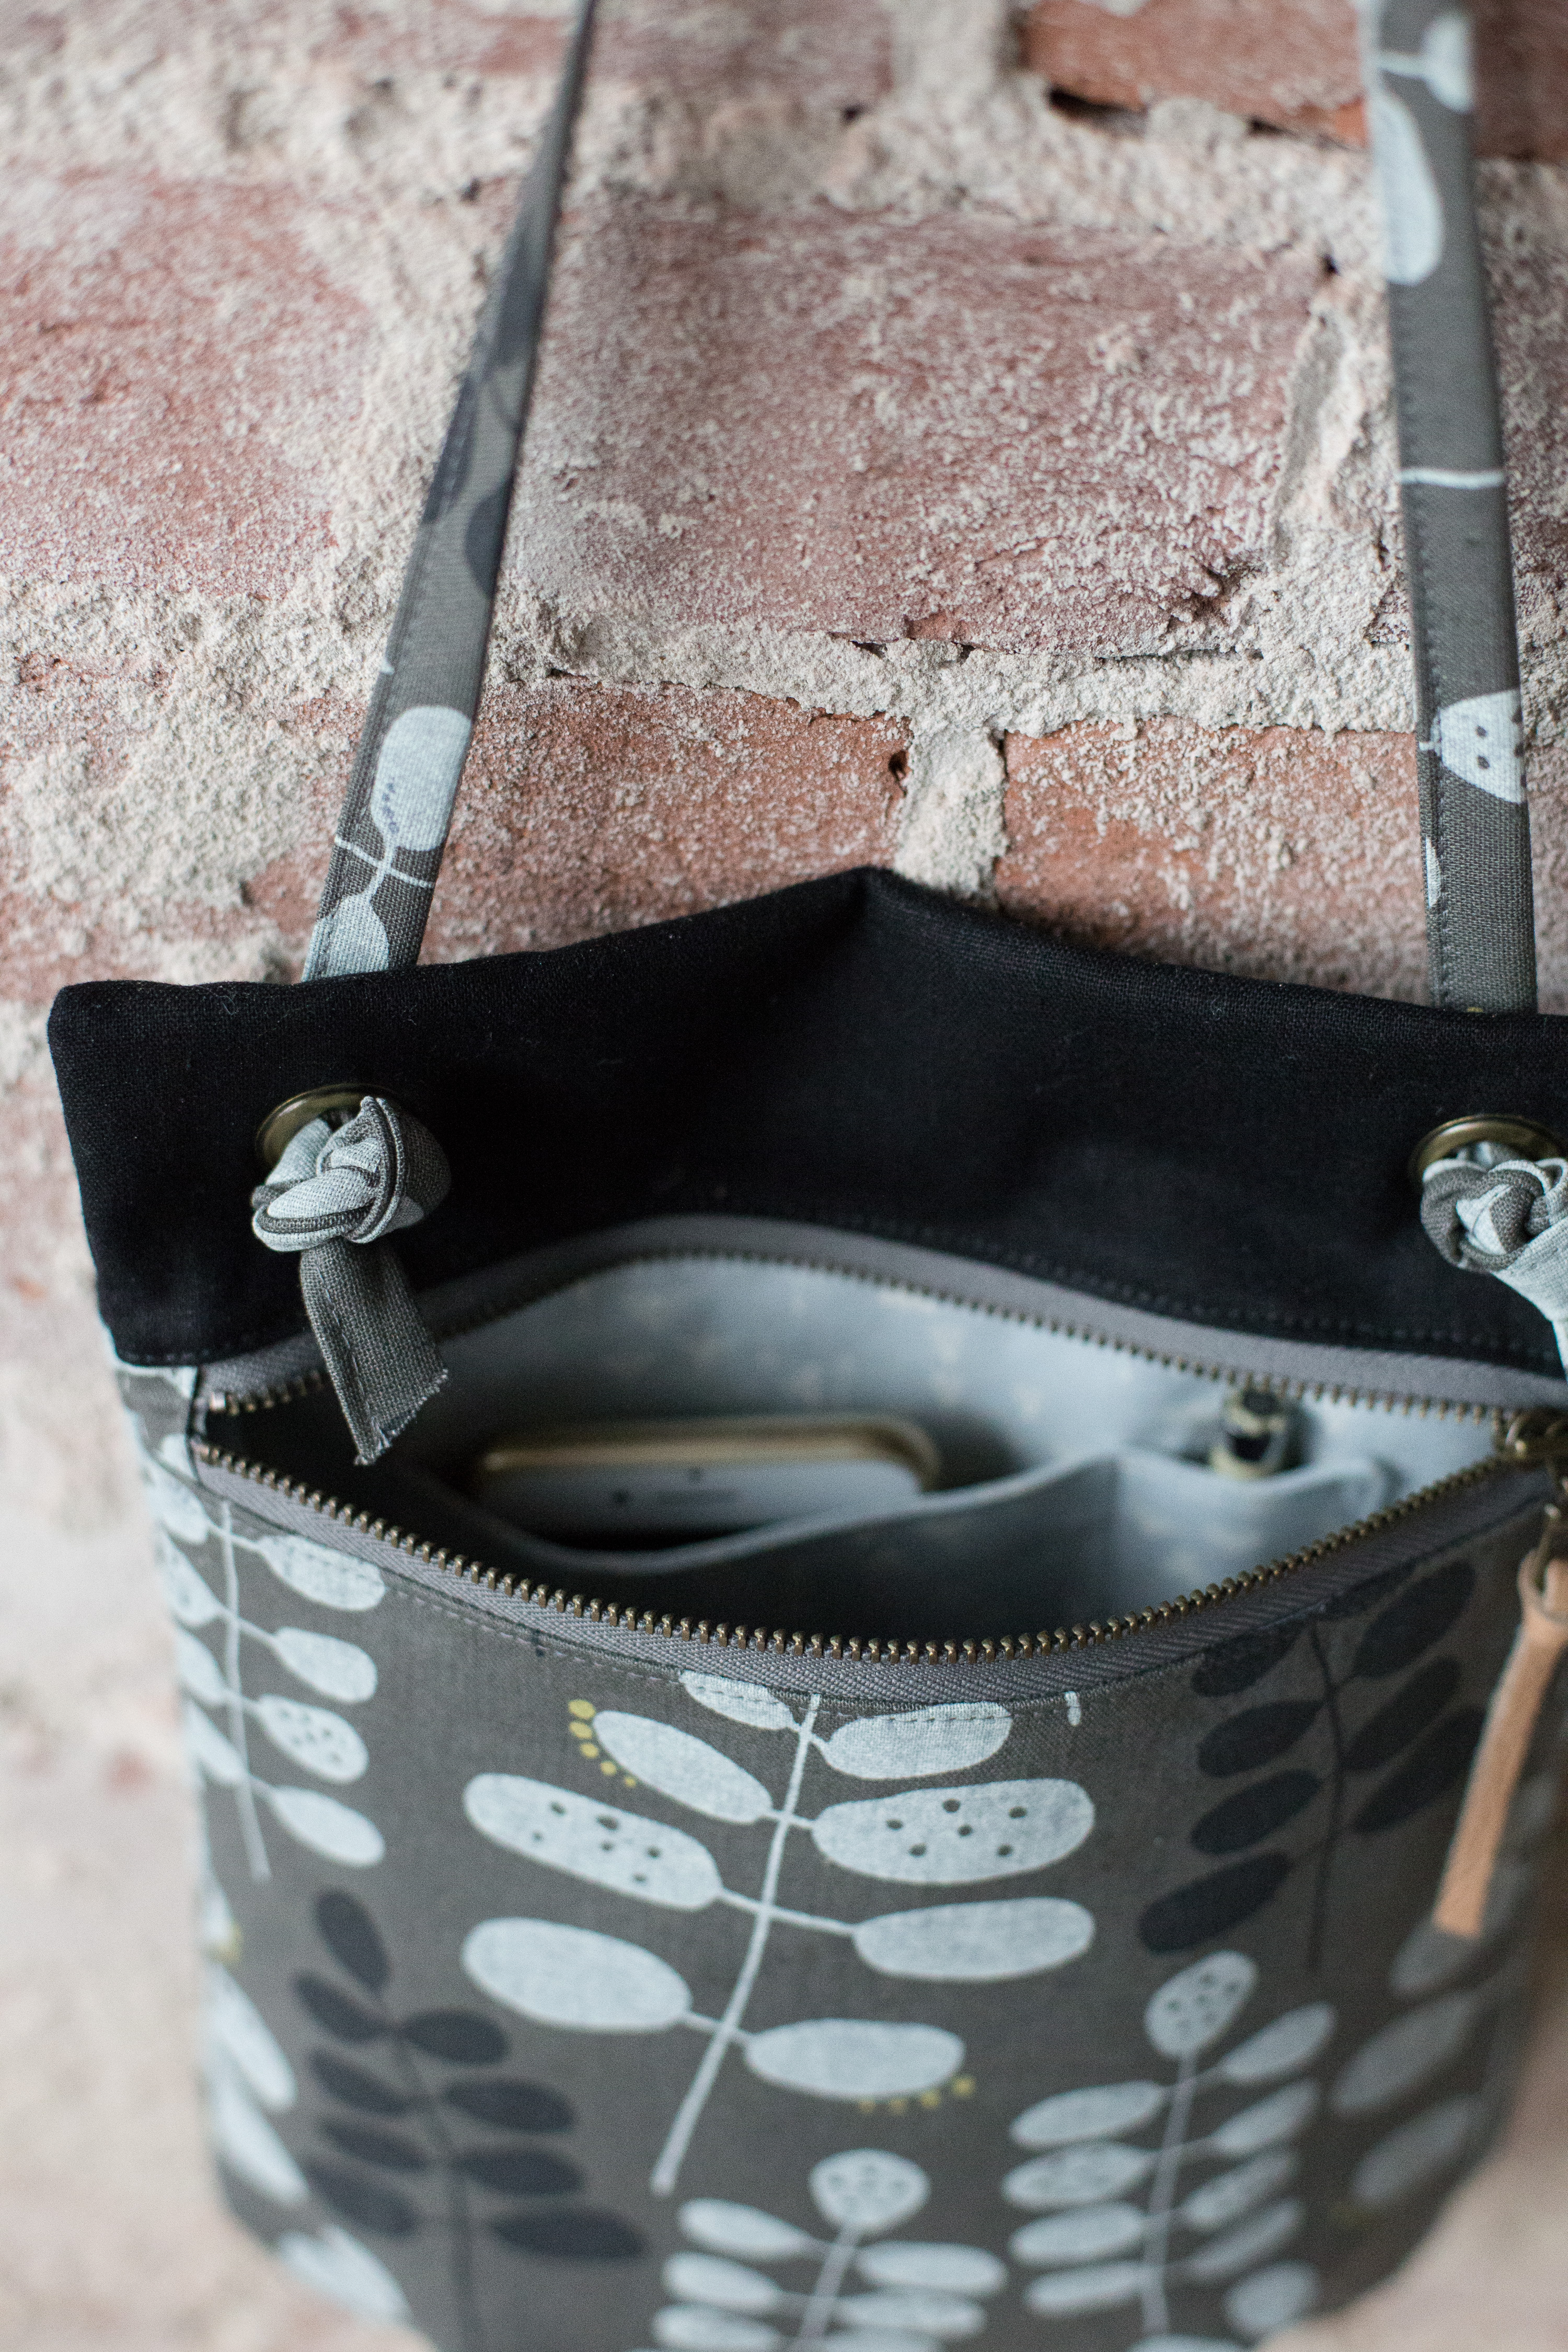
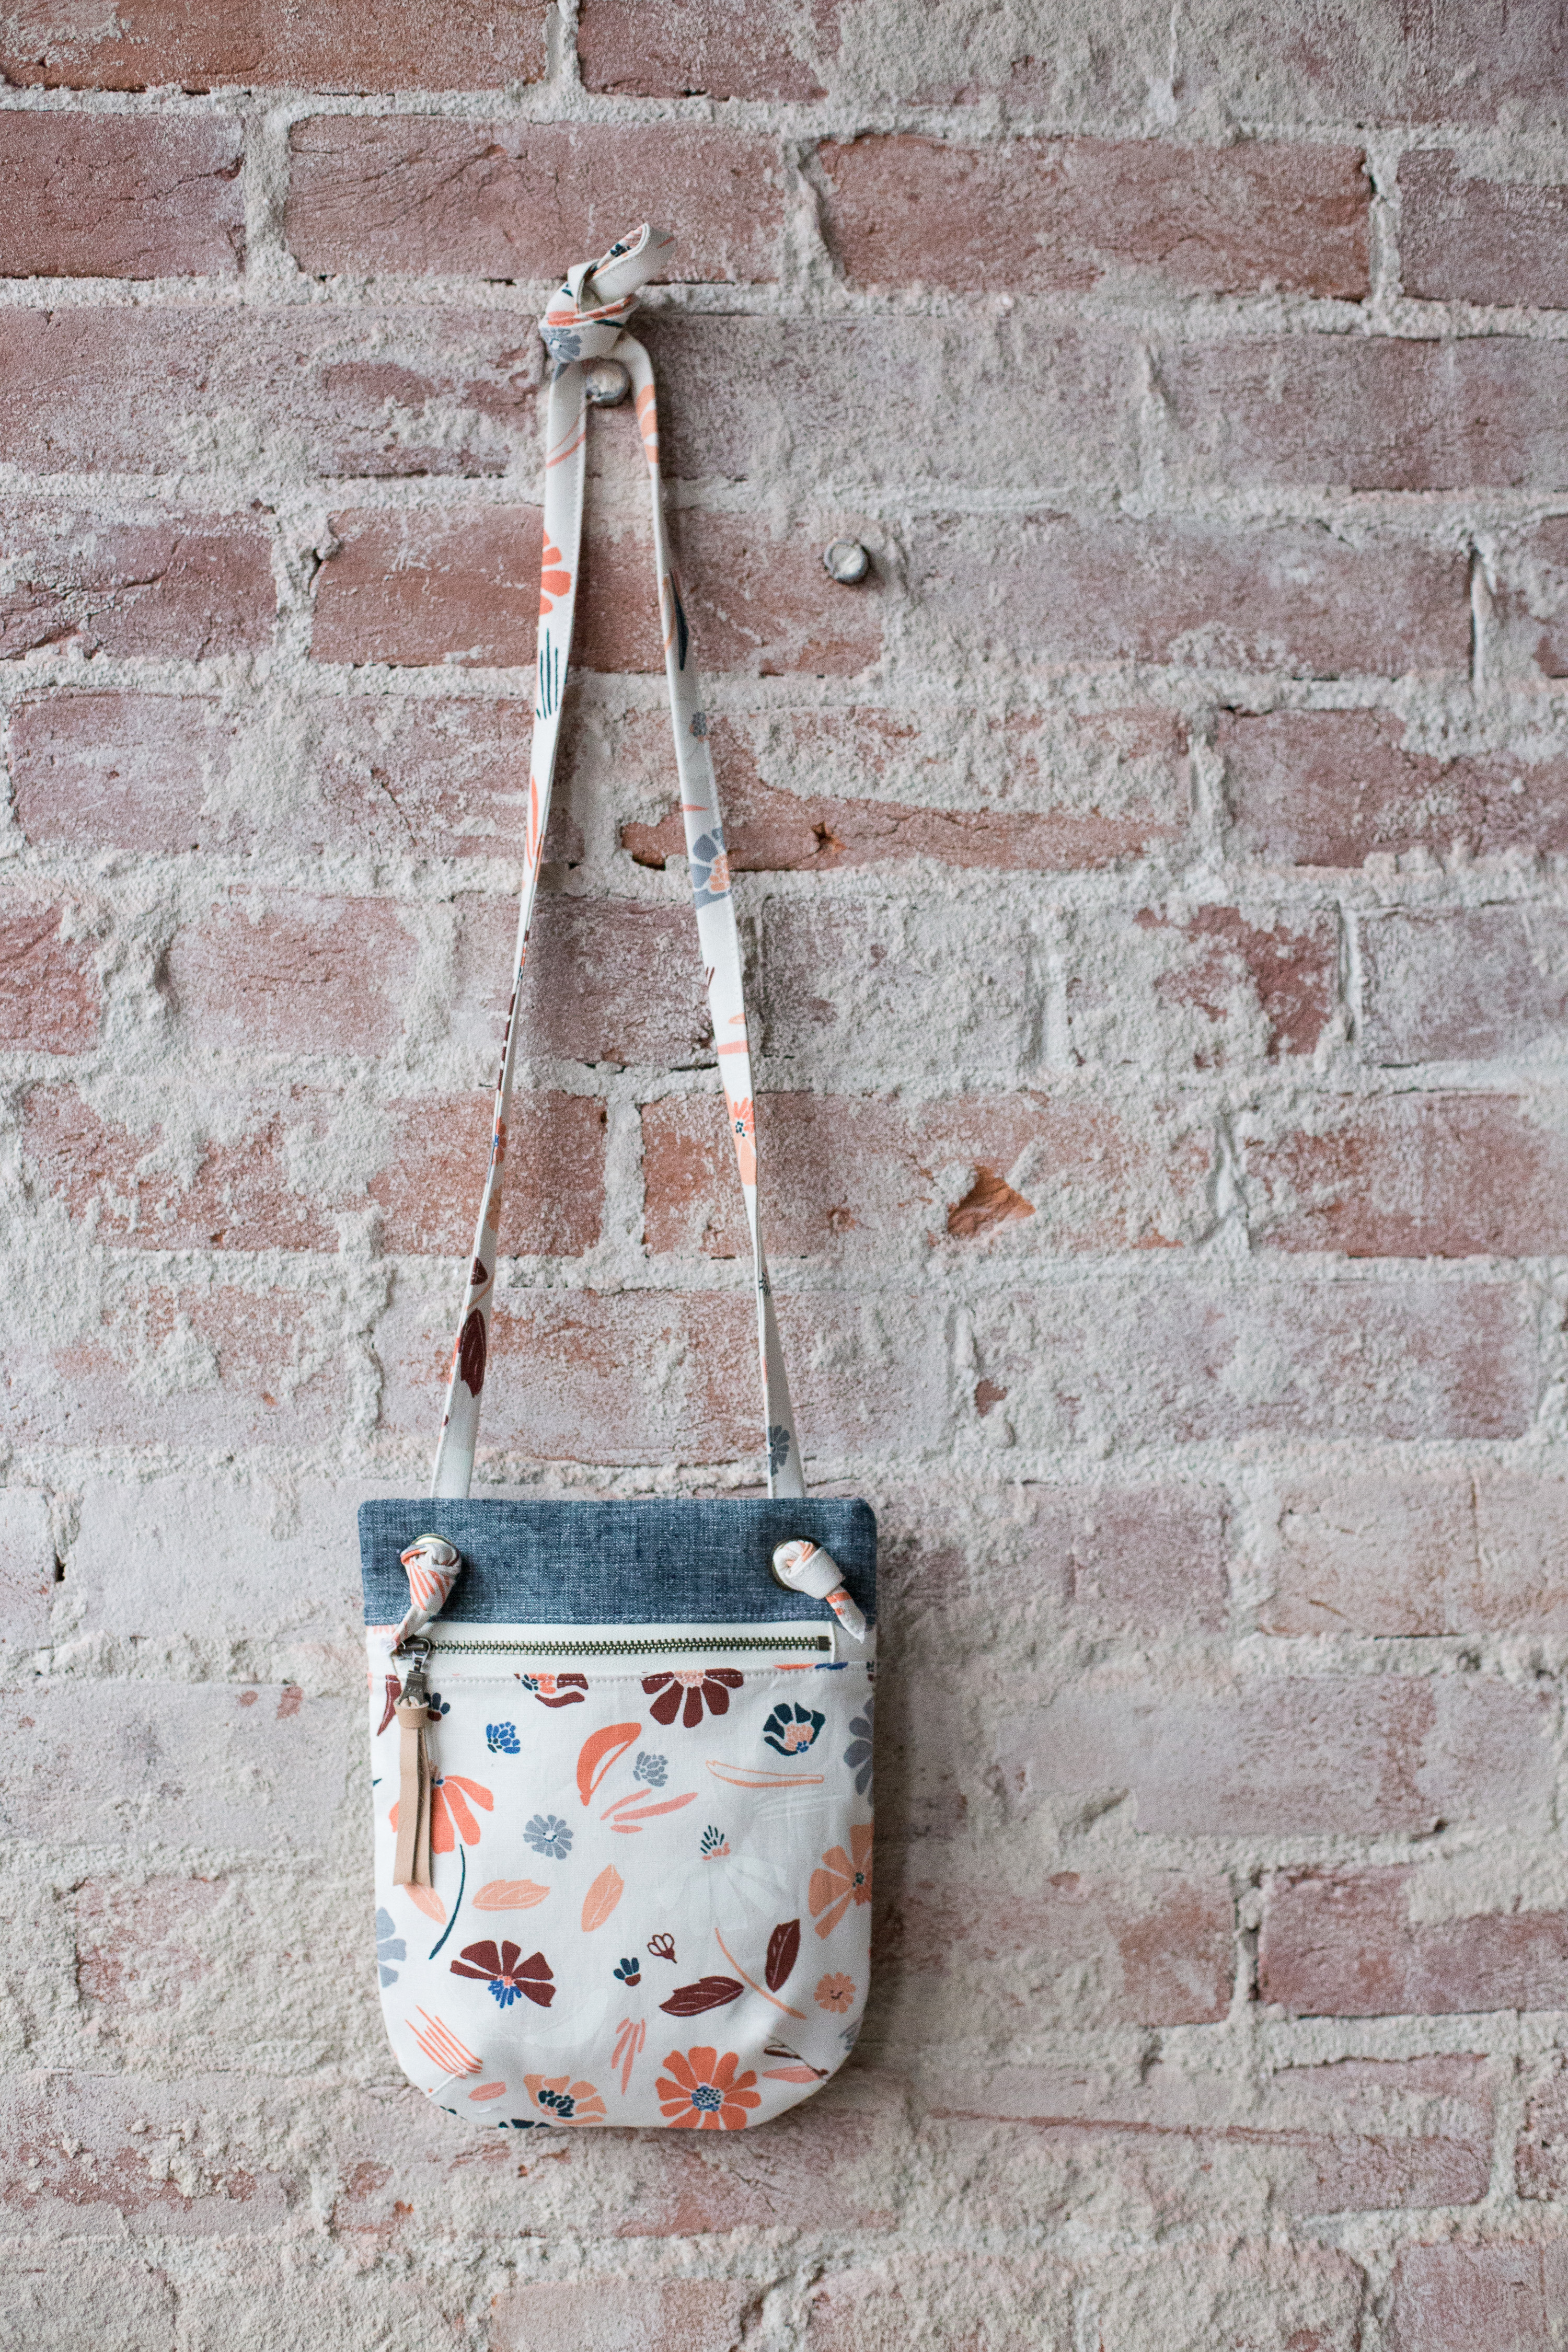
 Hope you are all staying safe and healthy! Because it’s getting closer to Back to School time (even though it’s looking a lot different this year for all) I’ve had requests for my Binder Pouch Tutorial that was formerly published on the Sew, Mama, Sew! website back in August of 2010. Yes! I’ve been blogging more than 10 years and am still at it! I honestly cannot believe it! Because Sew, Mama, Sew! is no longer in business, their website (along with the Binder Pouch Tutorial) is no longer available. The tutorial was published only on their site (not on my blog), so I’m bringing it back home to share with you.
Funny enough, I was able to track down my own instructions that were on an aggregate site, and decided to make a new pouch to make sure everything was okay and to take some new pictures along the way! I hope you’ll enjoy this tutorial. Even if many of us are not going to be in a traditional school setting this fall, it’s still fun to have this pouch to keep organized! Hey – you don’t even have to use it for school stuff!
Binder Pouch for Sew Mama Sew
I had this project saved on my to-do list for a looong time… I’m so glad Sew,Mama,Sew! is doing a Back to School month! I love this project because of course I love zippers, but I think this will be a great project to send to school with your kids. You can even make it super-personalized by having your kids pick out the fabrics, or adding an initial, or you could even embroider a favorite animal– Go crazy! Extra bonus: when you make it yourself you know it’ll hold up to a lot of wear and tear.
Materials:
- Scraps of fabric (or 1/4 yard or fat quarter of the main print will work)
- 10″ zipper
- Scrap of see-through vinyl approx 7″x 3.5″ (see final cut measurement below), find some at your local quilt shop, or grab some awesome transparent vinyl at Sew Hungry Hippie, or glitter vinyl
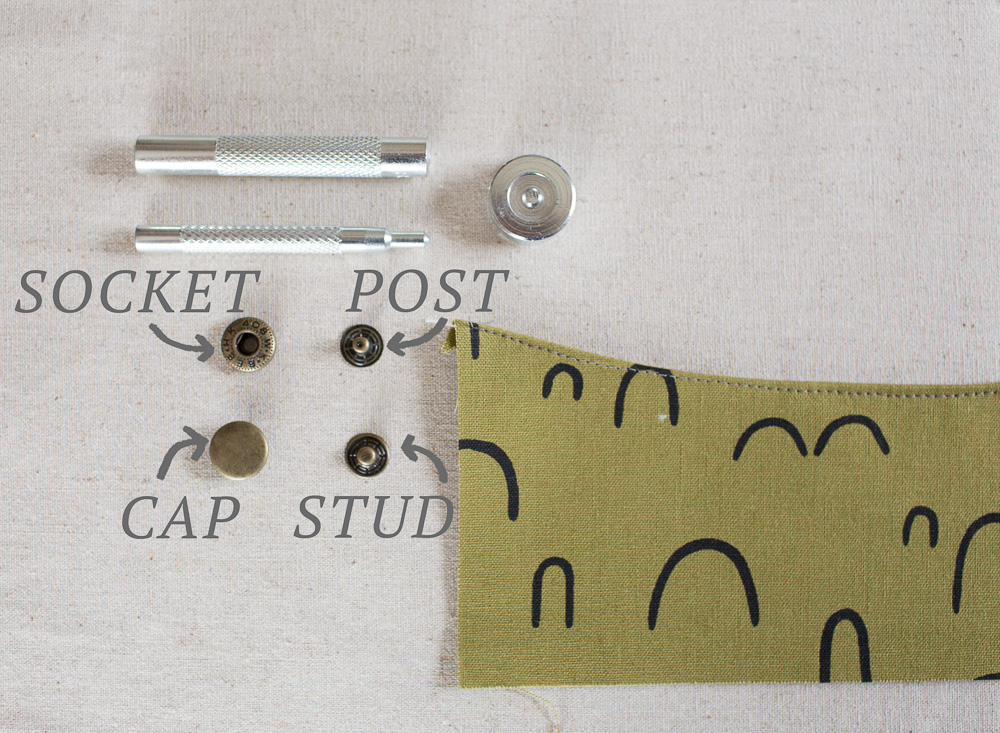
- 3 (3/8″) Grommets (Dritz are my favorite, they install easily and come with the setting tools you’ll need)
- Scrap of interfacing cut to 3.5″ tall by 11″ wide (this will reinforce where the grommets are installed)
- Optional: Binding tape to cover the seams 1/2″-wide (store bought or make your own)
- Sewing machine, thread, etc.
- zipper pull (here and here)
{All seam allowances 1/2″ unless otherwise noted.}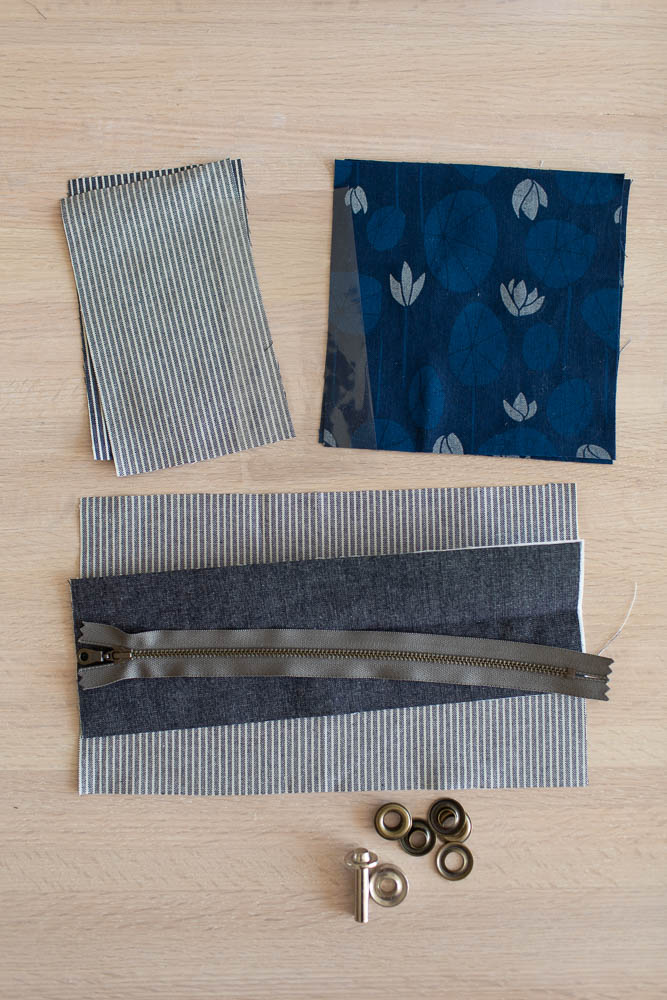
Cut Fabrics:
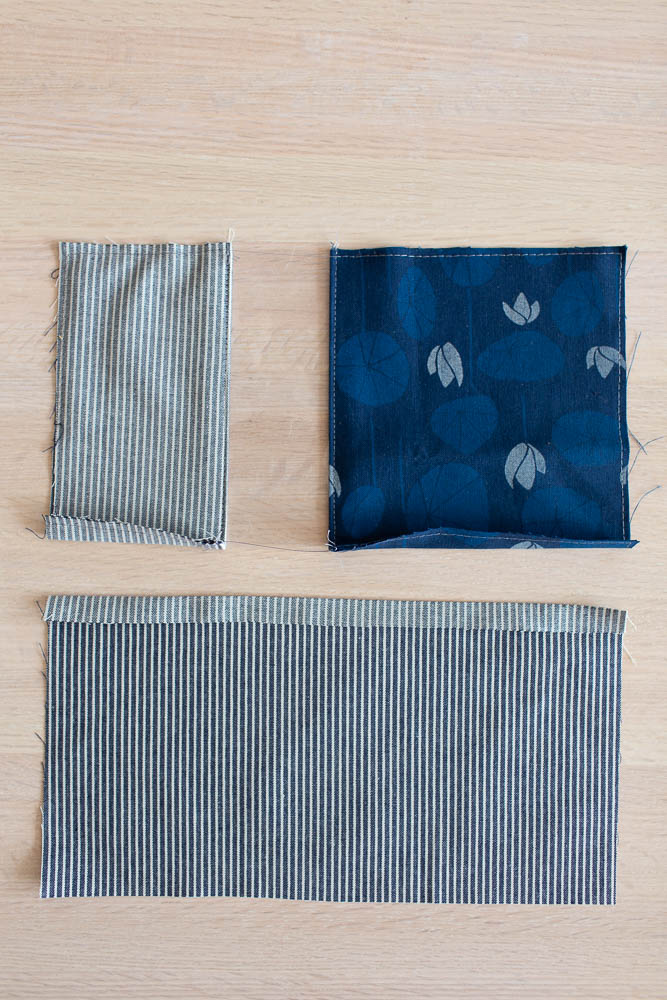
- cut (2) 6.5″ tall by 4″ wide Pouch Front (left)
- cut (2) 6.5″ squares Pouch Front (right)
- cut (1) 6.5″ tall by 11.5″ wide Pouch Back
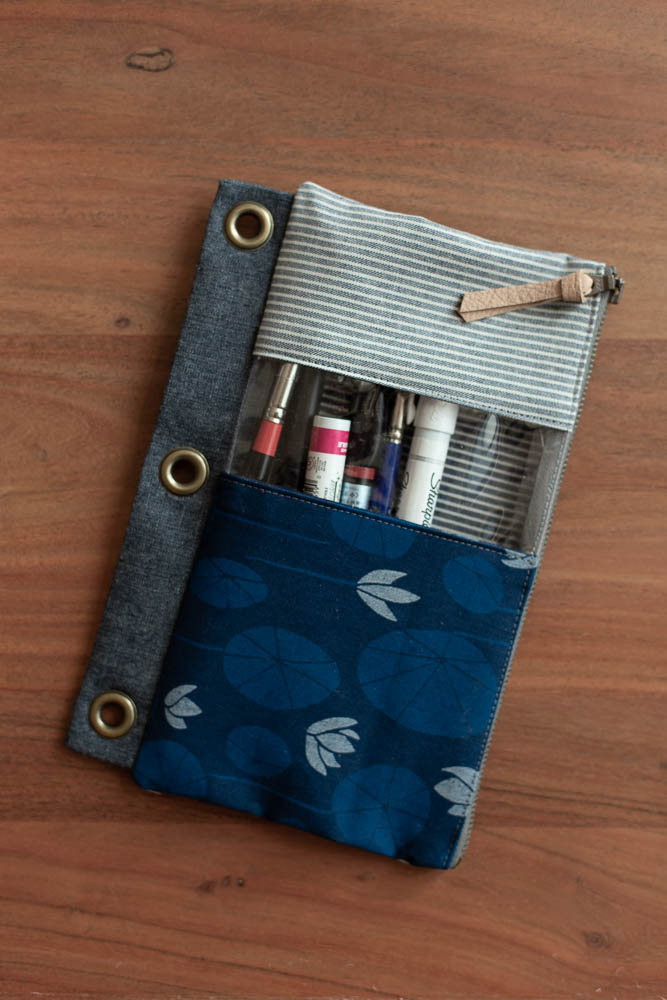
- From the vinyl cut one piece 6.5″ tall by 3″ wide.
- cut (1) 3.5″ tall by 11″ wide Grommet Tab (fuse the interfacing to the wrong side)
{Just a note: sewing through the vinyl might not be your thing! If you don’t feel up to it, skip the vinyl, and cut that piece from fabric. It’ll still turn out super cool.}
{All seam allowances 1/2″ unless otherwise noted.}
Make Front Exterior of Pouch:
Place the Pouch Front Left pieces right sides together with vinyl in between the fabrics, matching/aligning the 6.5″ sides. 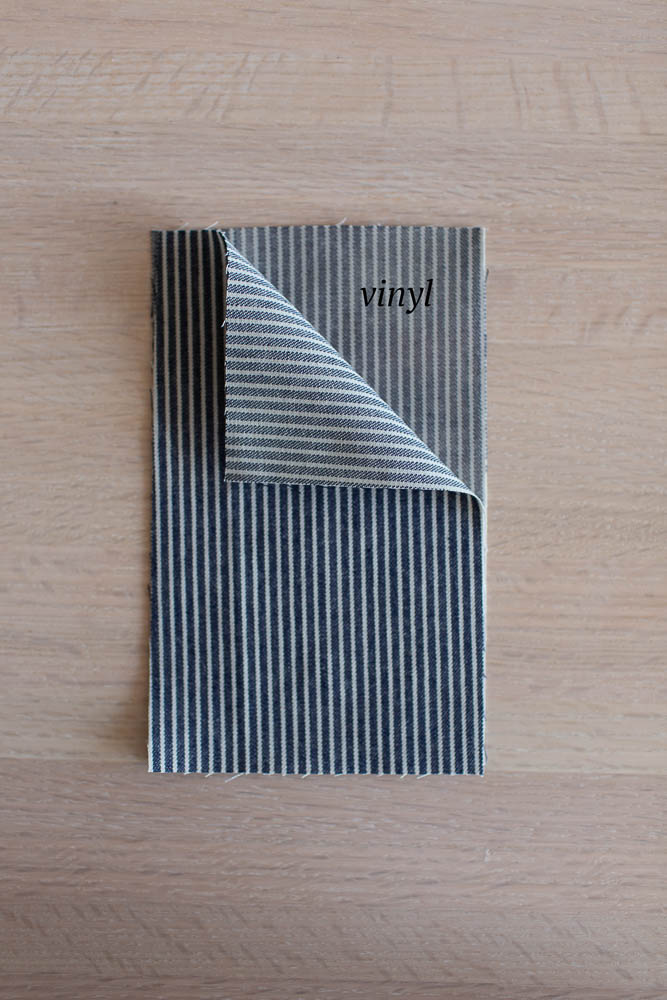 Sew using a 1/2″ seam allowance.
 Press fabrics away from vinyl being sure not to touch the hot iron to the vinyl.
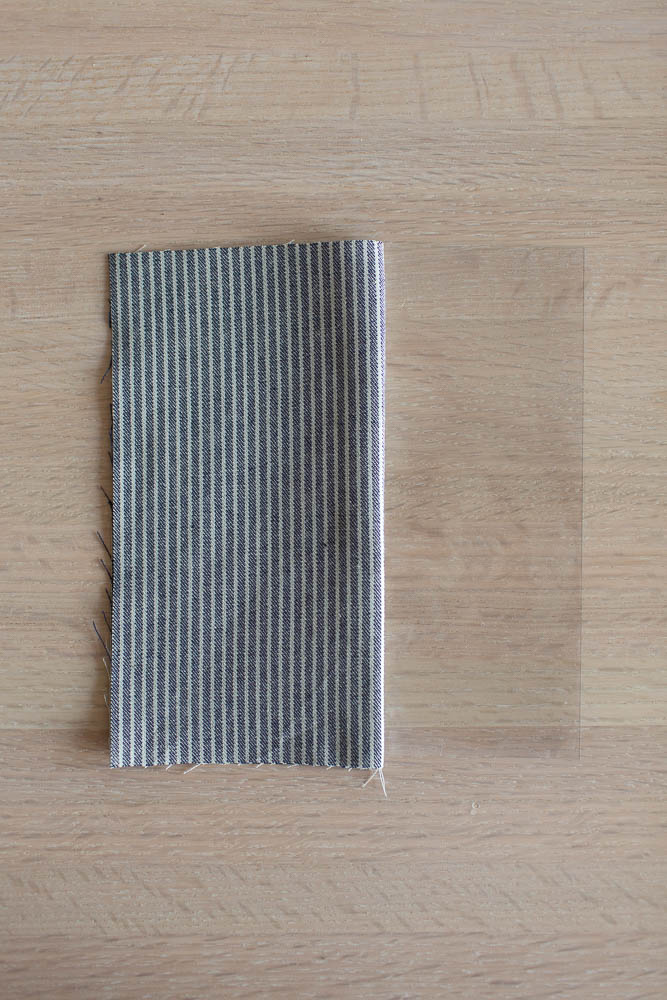
Place the Pouch Front Right fabrics, right sides together with the vinyl in between the fabrics, matching the 6.5″ sides of the opposite side of the vinyl.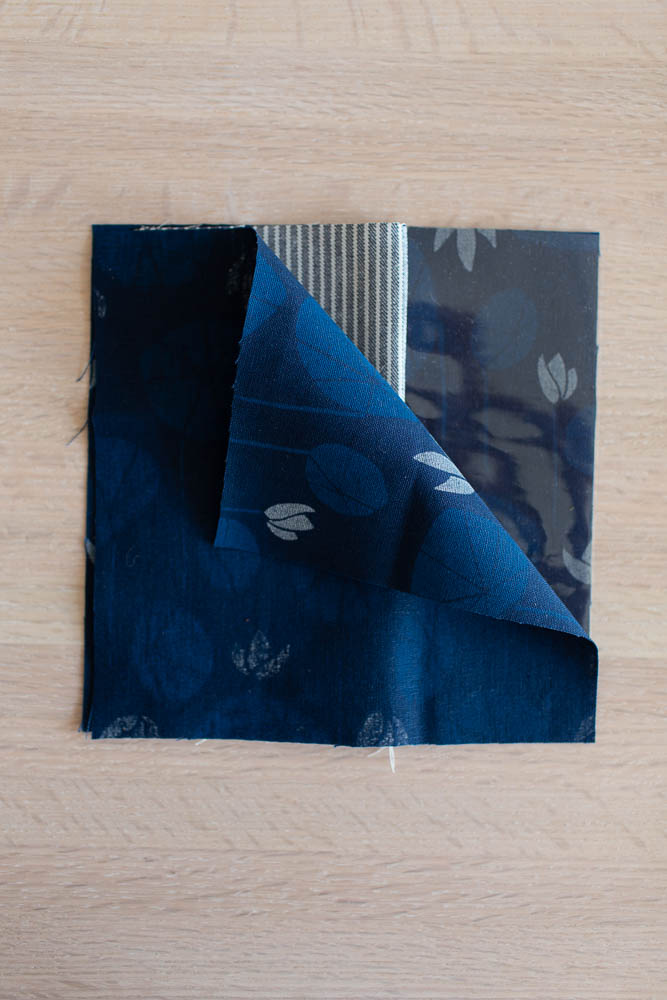
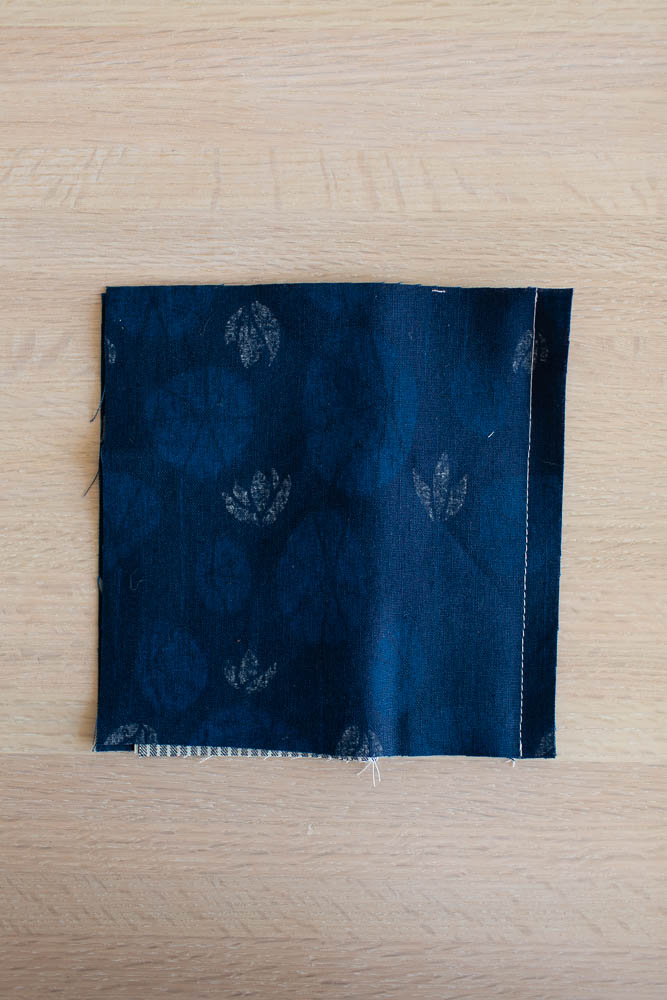
Sew and press fabrics away from vinyl. Your front pouch will measure 6.5″ tall by 11.5″ wide.
Topstitch on either side of the vinyl (on the fabric through both layers).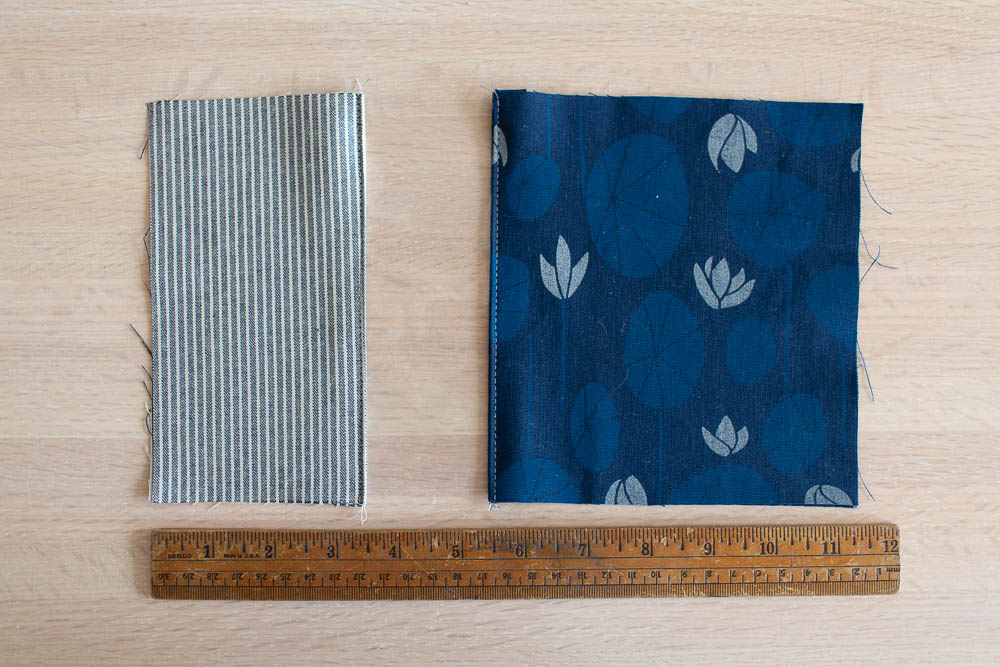
(Optional) Baste fabric layers together along perimeter.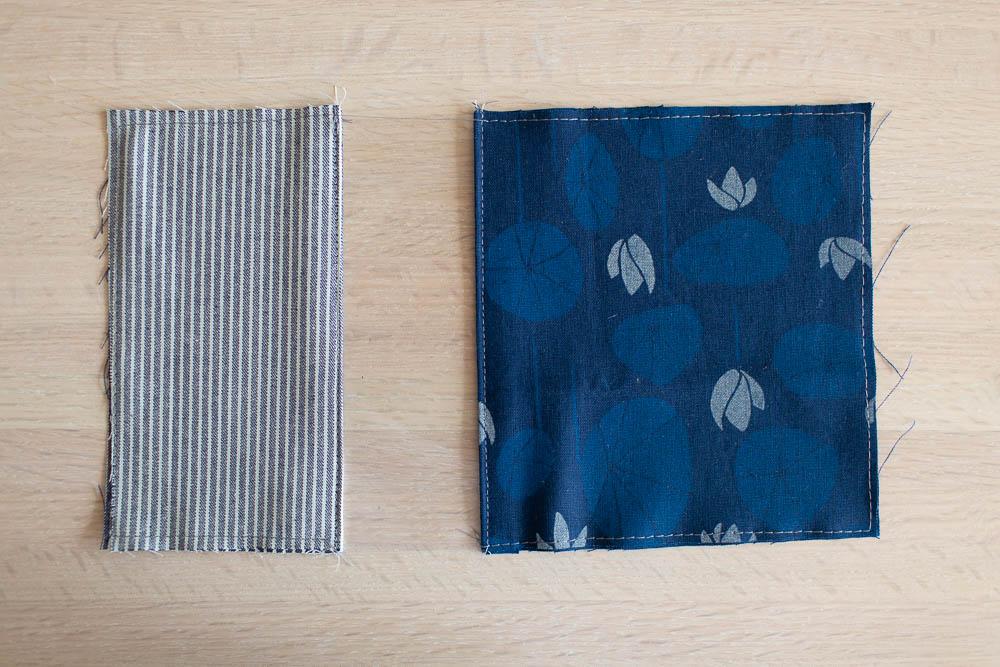
Assemble the Grommet Tab:
Fold the Grommet Tab in half the long way, right sides together.
Sew using a 5/8″ seam allowance on both of the short edges. Clip corners. Turn right side out and press.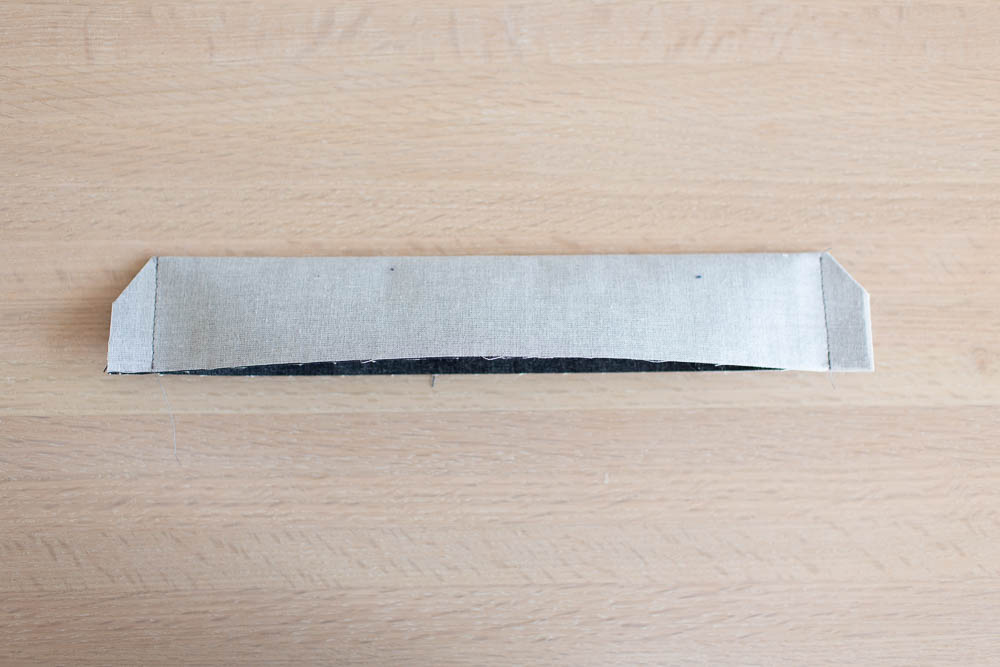
(optional) Topstitch along both short edges and the sewn long edge (the open edge of the grommet tab will be enclosed once you sew the pouch together). Set aside.
Assemble Pouch:
Because this is an unlined pouch, we’ll assemble it just a bit differently than a lined pouch. This next step is where a Teflon foot would come in handy, otherwise you can make do with a piece of scotch tape placed on the bottom side of your sewing machine’s foot. The tape will help the zipper foot slide across the vinyl section of the pouch front.
Fold one front pouch 11.5″ edge to the wrong side by 1/2″ and press. The vinyl won’t fold as well, but finger press it well (and a hair dryer on a low setting will help make it more pliable), do the best you can especially if it’s your first time using vinyl. Do the same for the back pouch fabric, folding one 11.5″ edge to the wrong side by 1/2″.
Center raw edge of Grommet Tab along (unfolded) 11.5″ edge of the back pouch piece, right sides together and baste (stitch length of 4-5mm) in place using a 1/4″ seam allowance.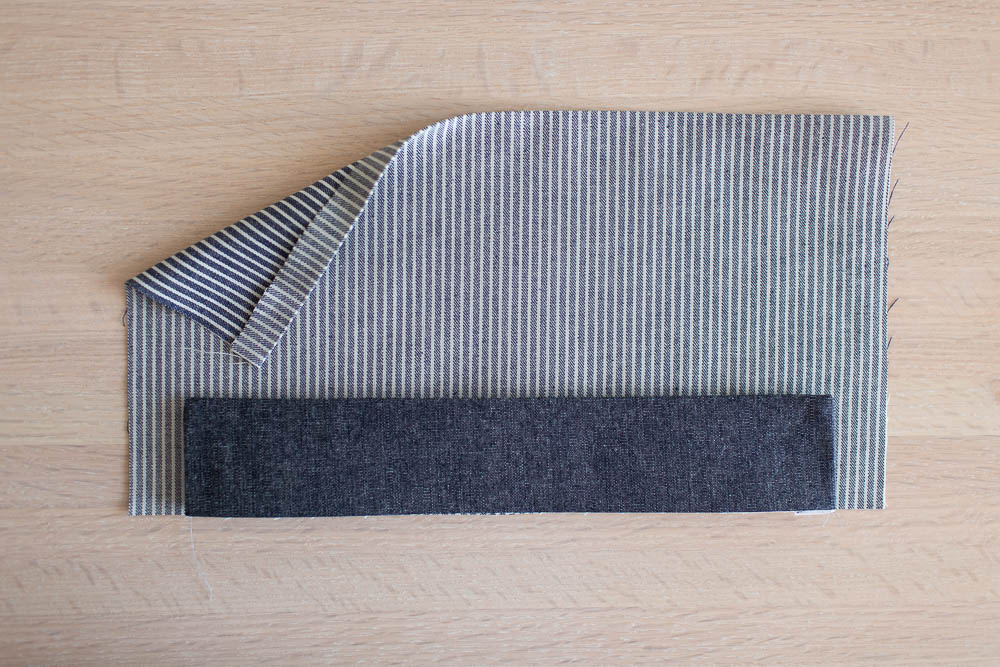
With the zipper right side facing up (zipper pull at the left) place the pouch assembled front’s folded edge in place along the zipper teeth (approx. 1/8″ away from the zipper teeth) and pin in place. Topstitch in place close to the fold (1/8″ away from fold).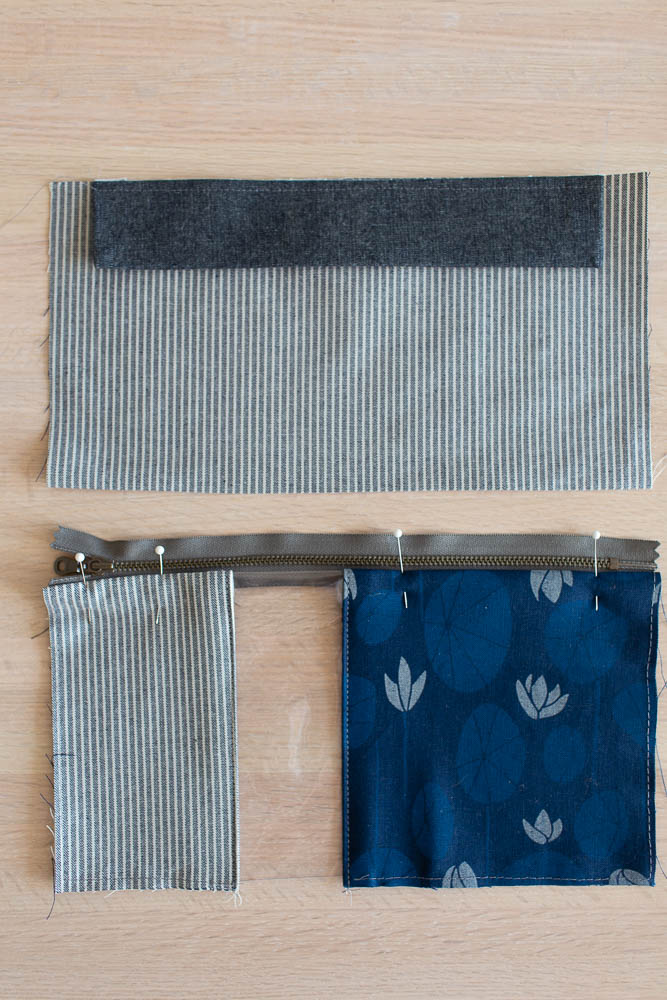
Pin the back exterior’s folded edge in place along the zipper teeth on opposite edge. Topstitch in place close to the fold.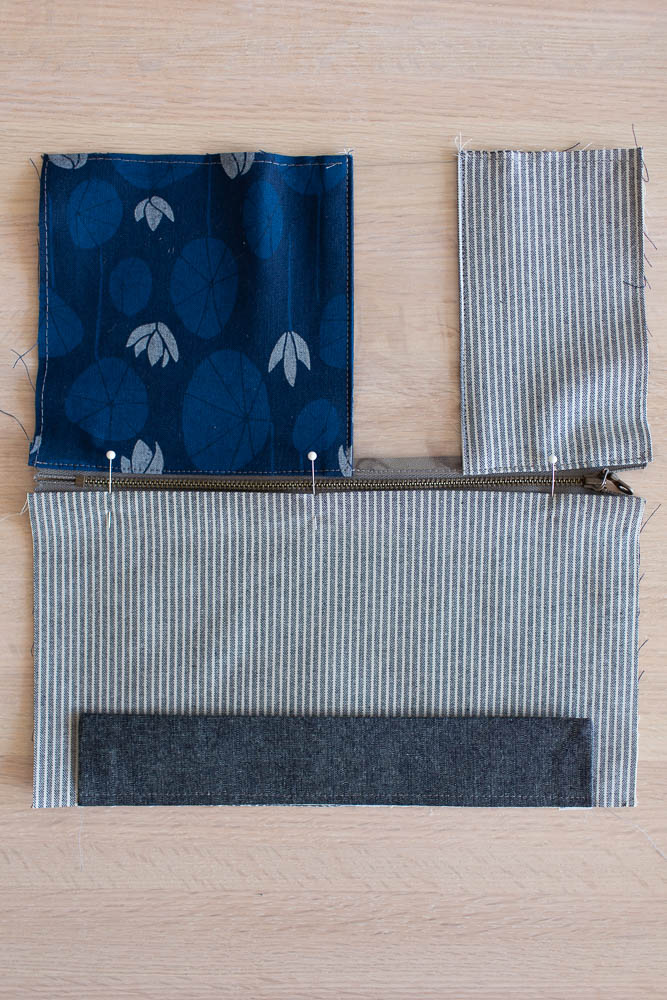
Now take the pouch and fold it so the RIGHT sides are together, be sure to keep the grommet tab tucked in between the front/back layers.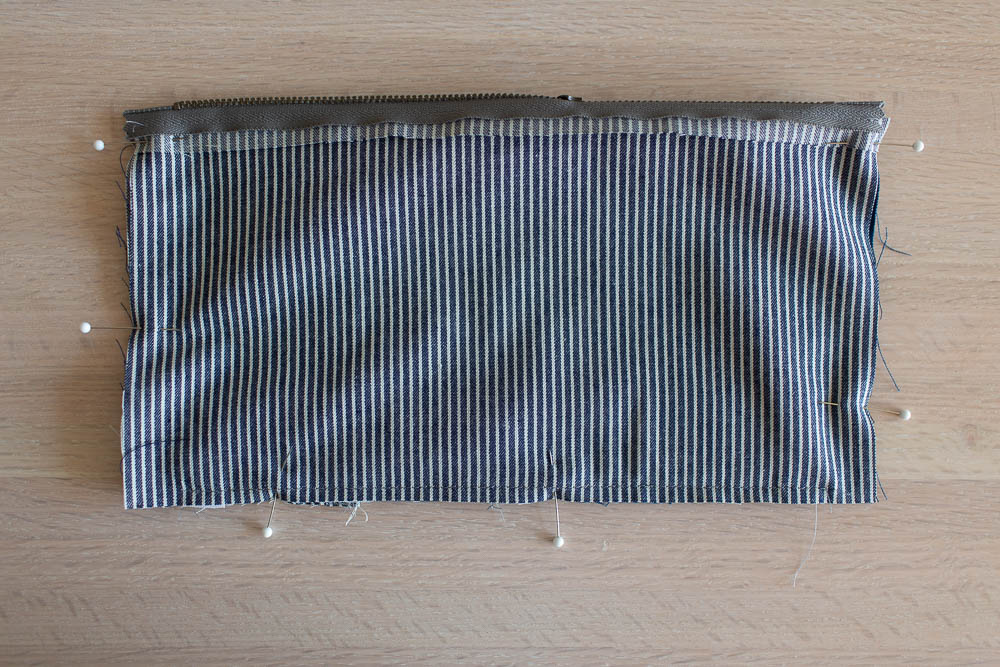
Pin along both sides and bottom edge. Make sure the zipper is open about half way. Sew along both sides and bottom edge.
Finishing Seams:
You could just leave the pouch as is at this point, zig-zag, or serge the edges. As another option, you could use binding to cover up the raw edges.
I left my seams as is and then clipped the corners with my pinking shears.
Turn right side out and press! (Again, be careful around the vinyl!)
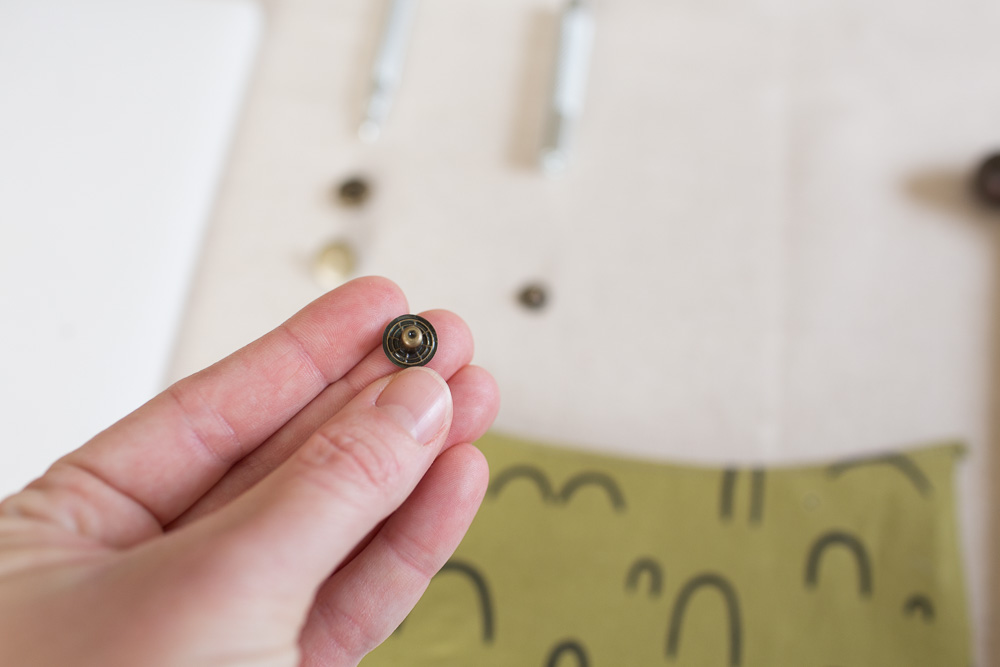
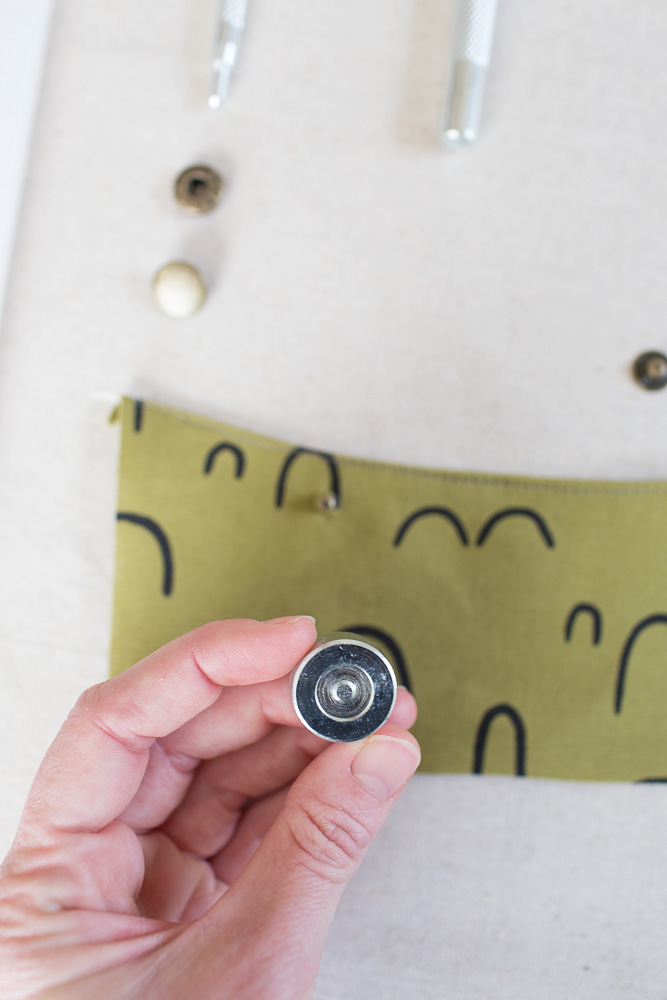
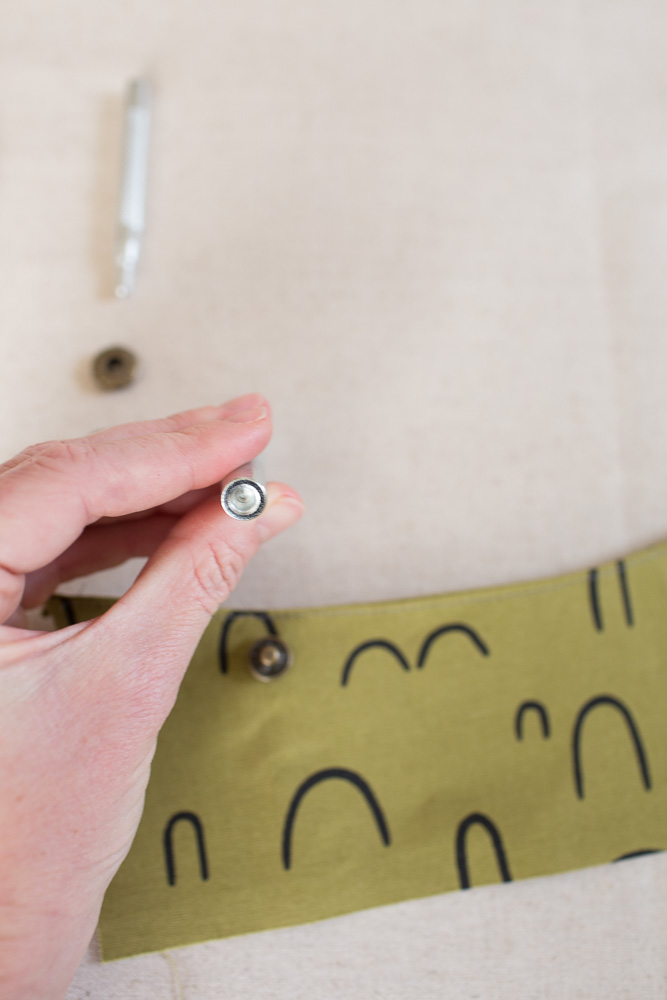
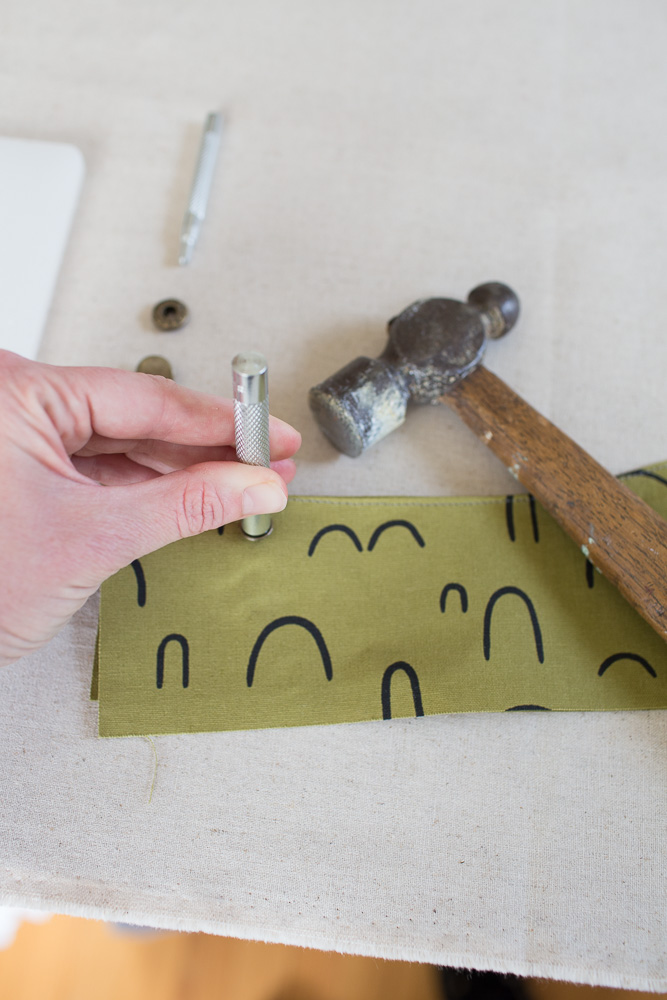
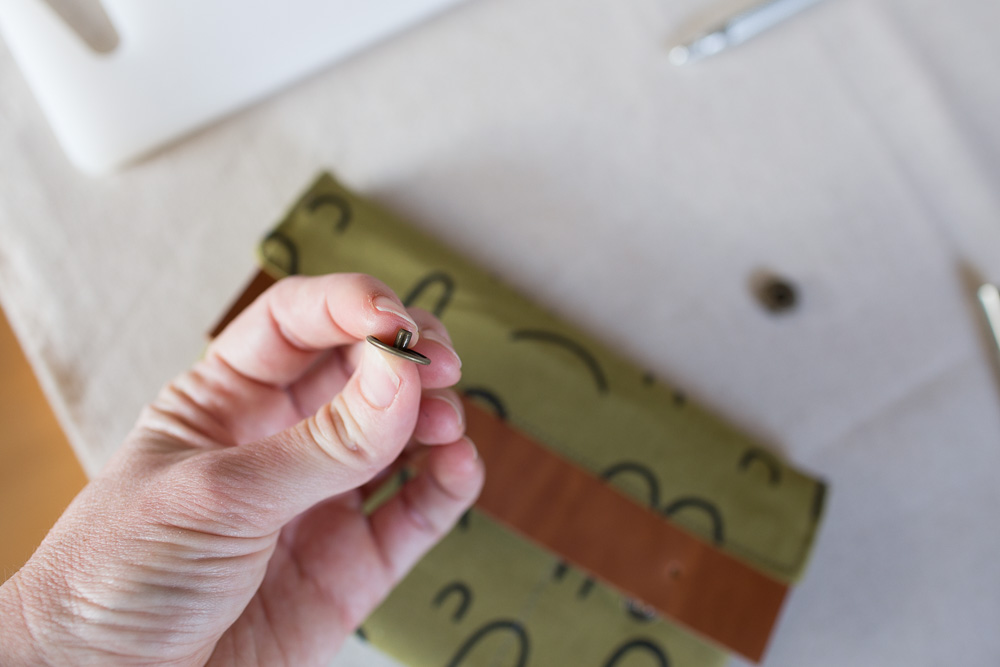
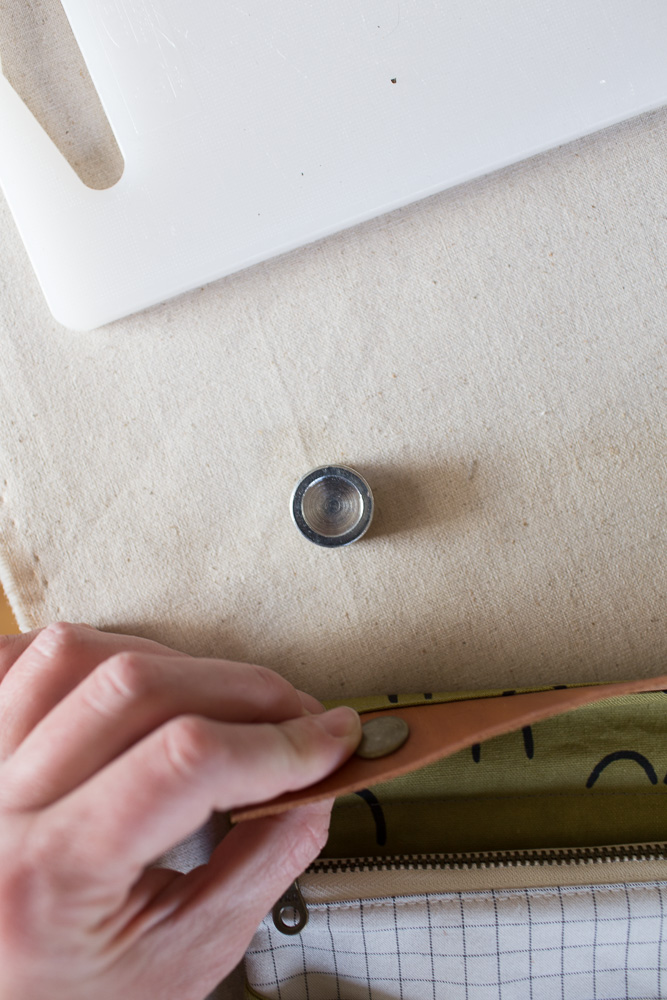
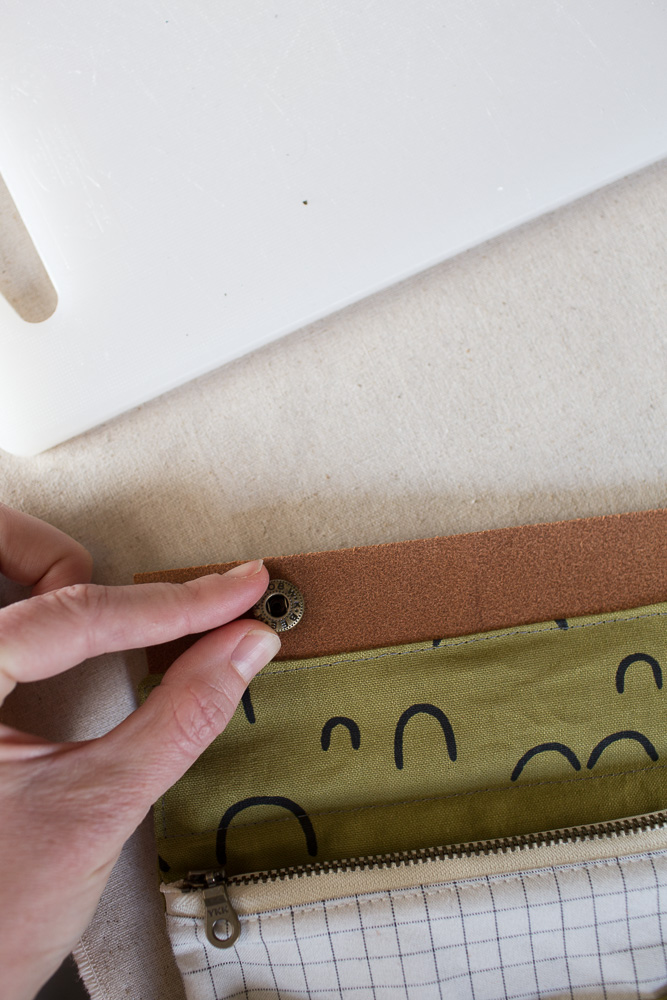
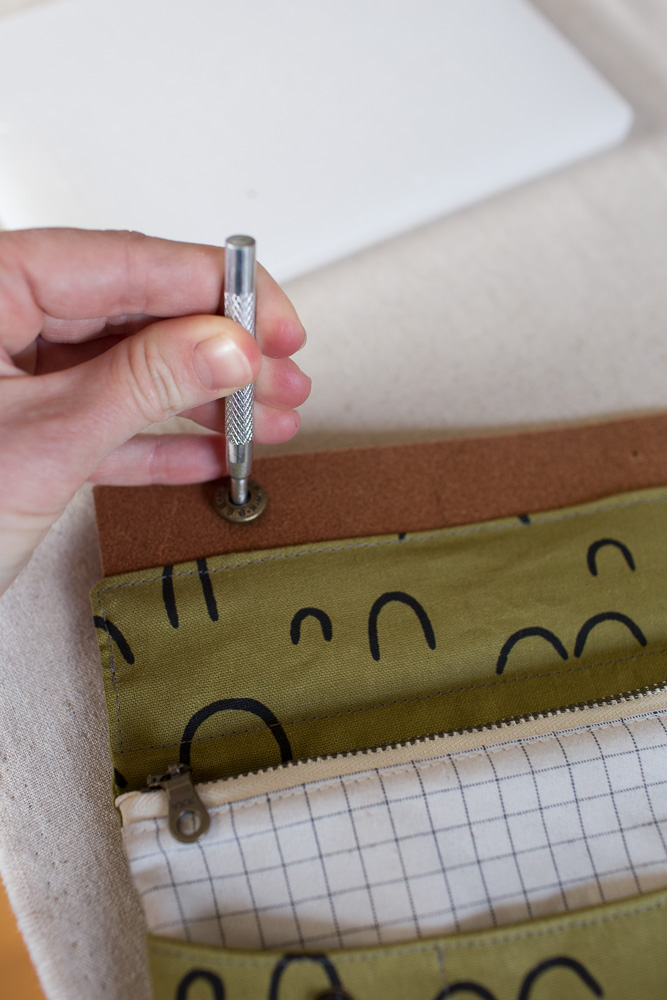
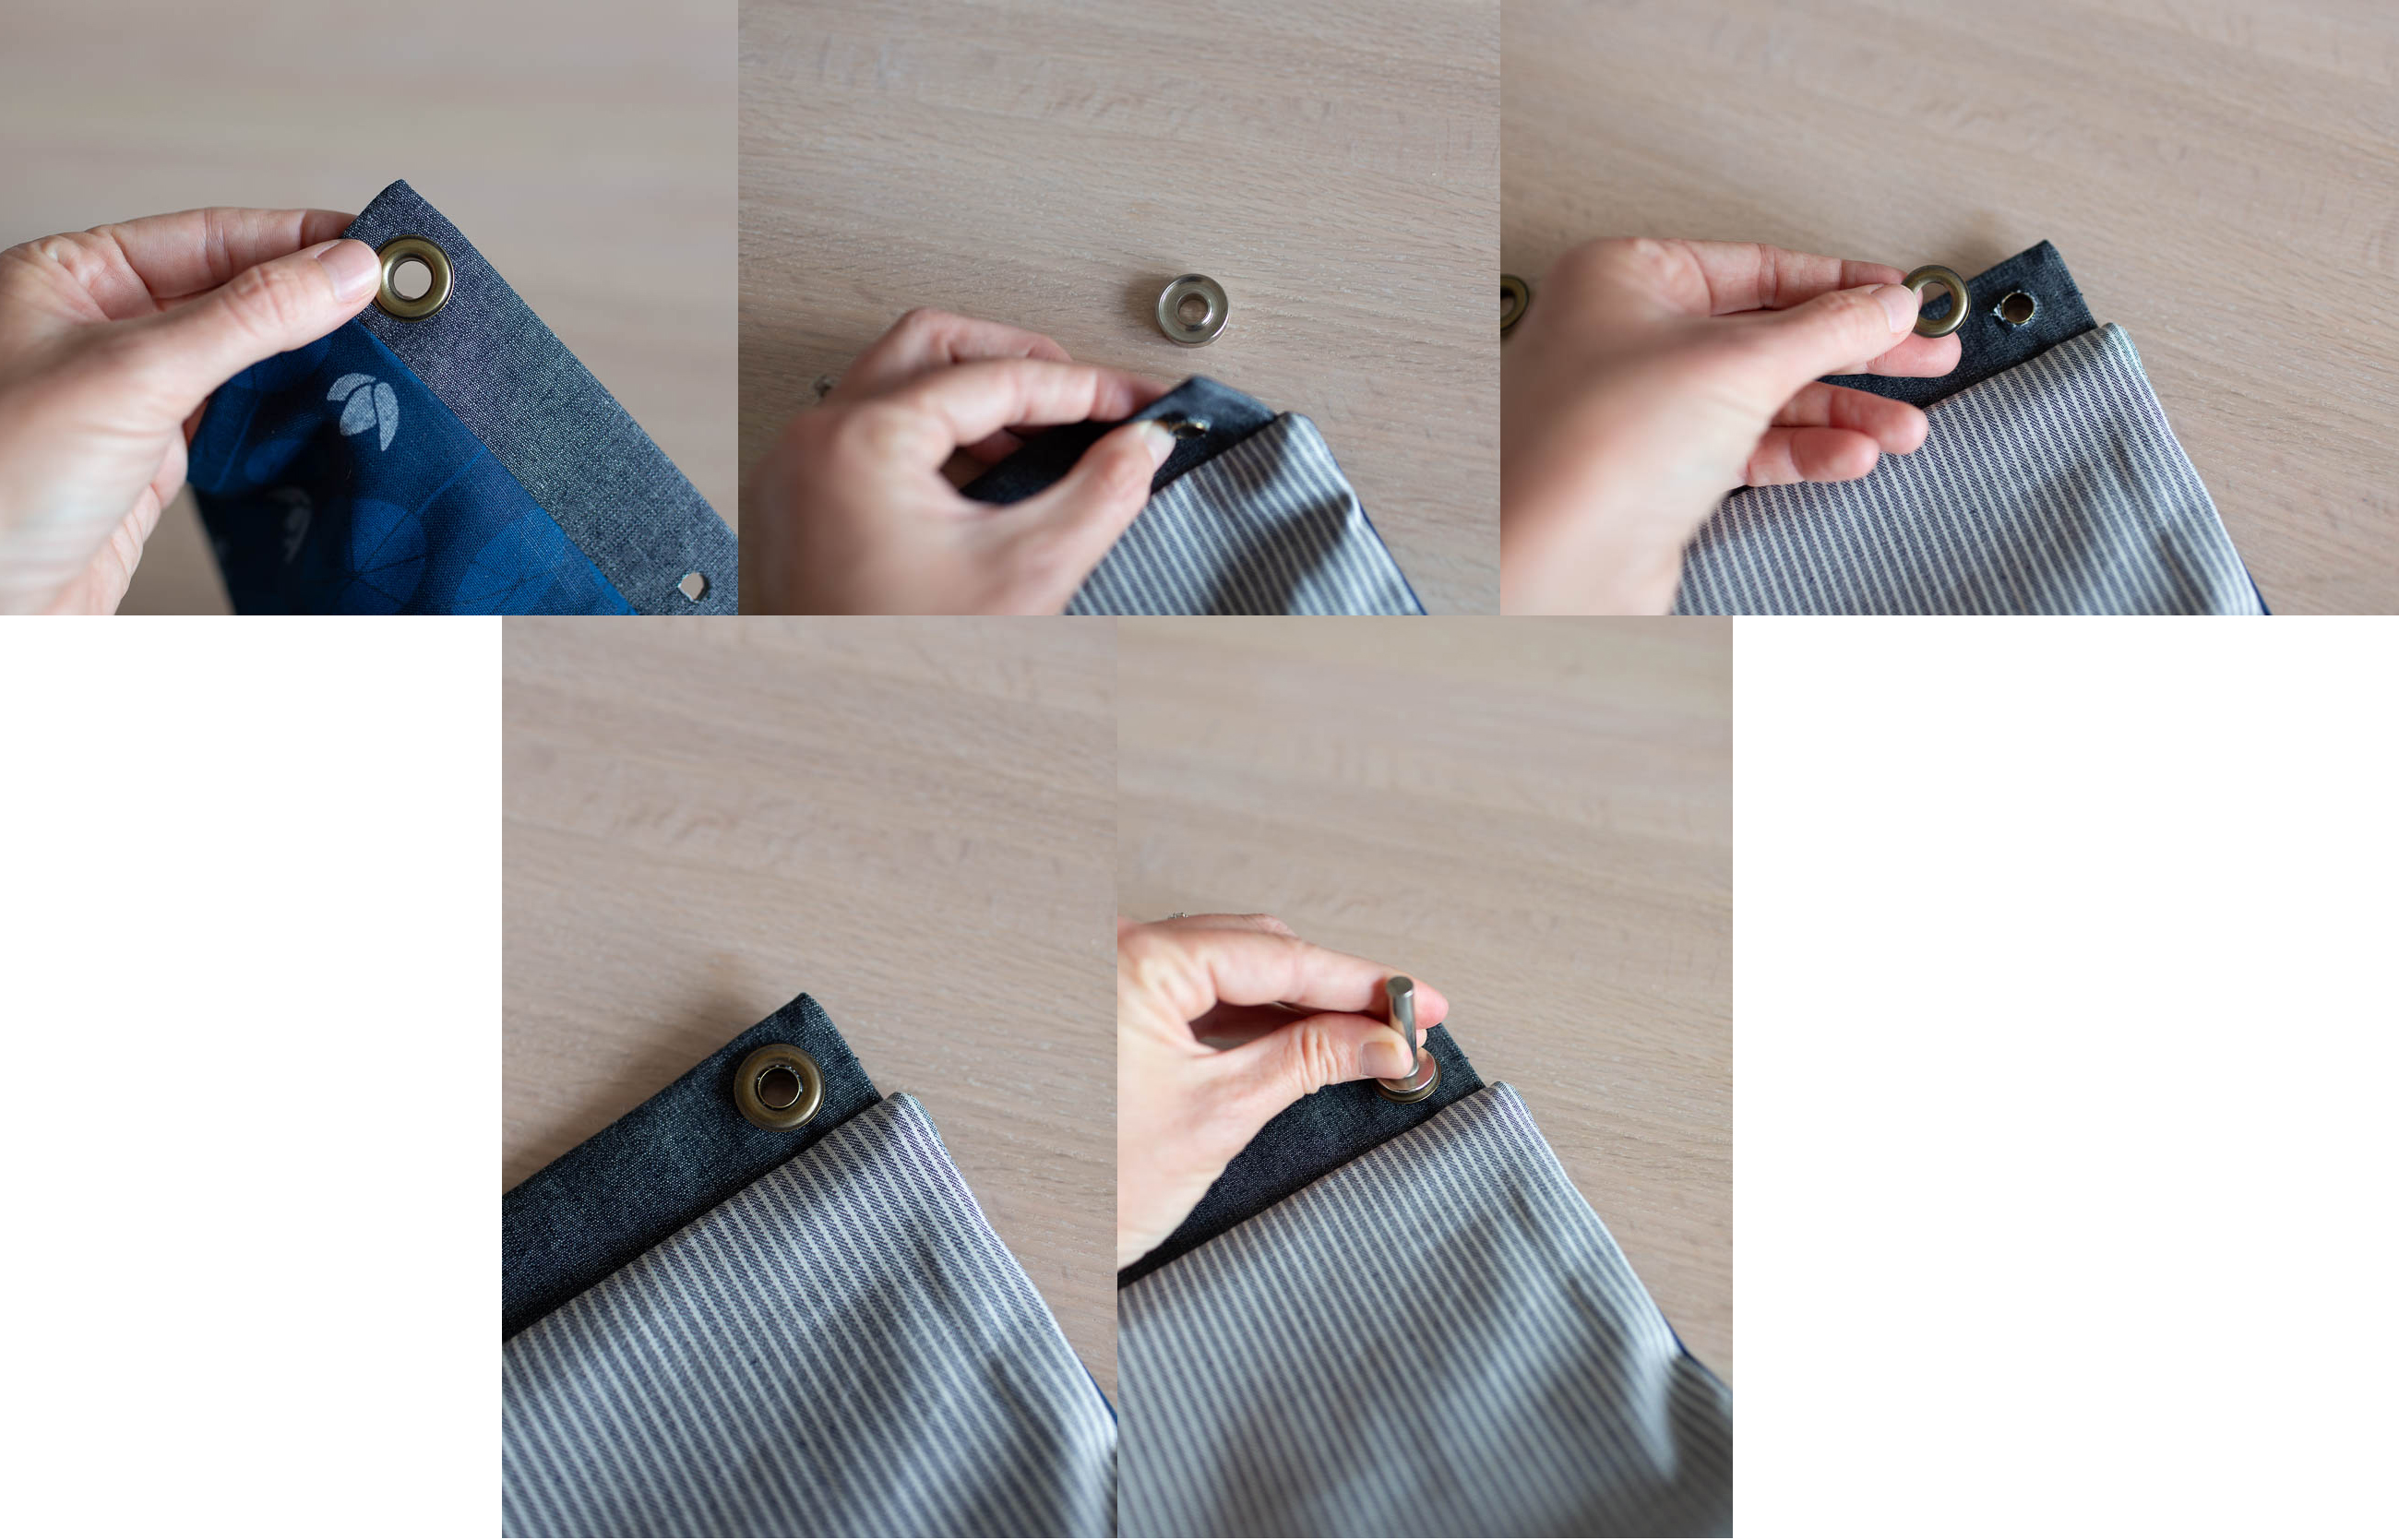
Insert Grommets:
Using a water soluble pen, make a dot on the grommet tab in the center of the tab, measuring .5″, 4.75″, and 9″ from one grommet tab edge. I’d recommend having the binder you’ll be using with the pouch to make sure everything aligns before you install the grommets. It’ll be much easier to make adjustments now rather than have a non-functioning pencil pouch just because the grommets don’t align with the binder rings.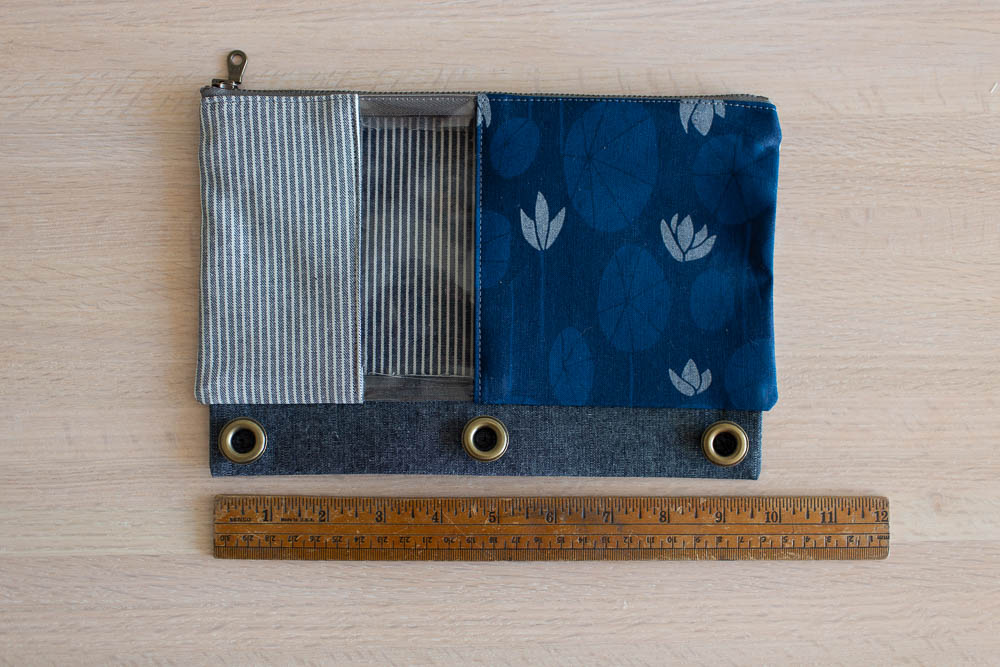
Install the grommets using the directions on the packaging. Here are a few photos, too. I use the grommet to trace the inner circle (centered on my dot marking) and then with a sharp scissors I cut the circle out. 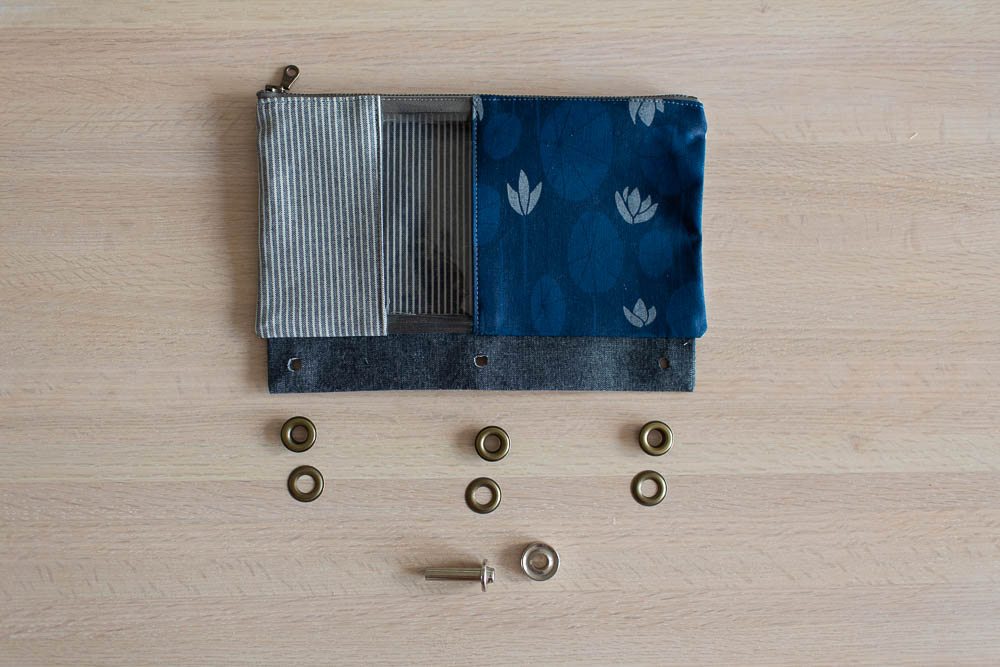
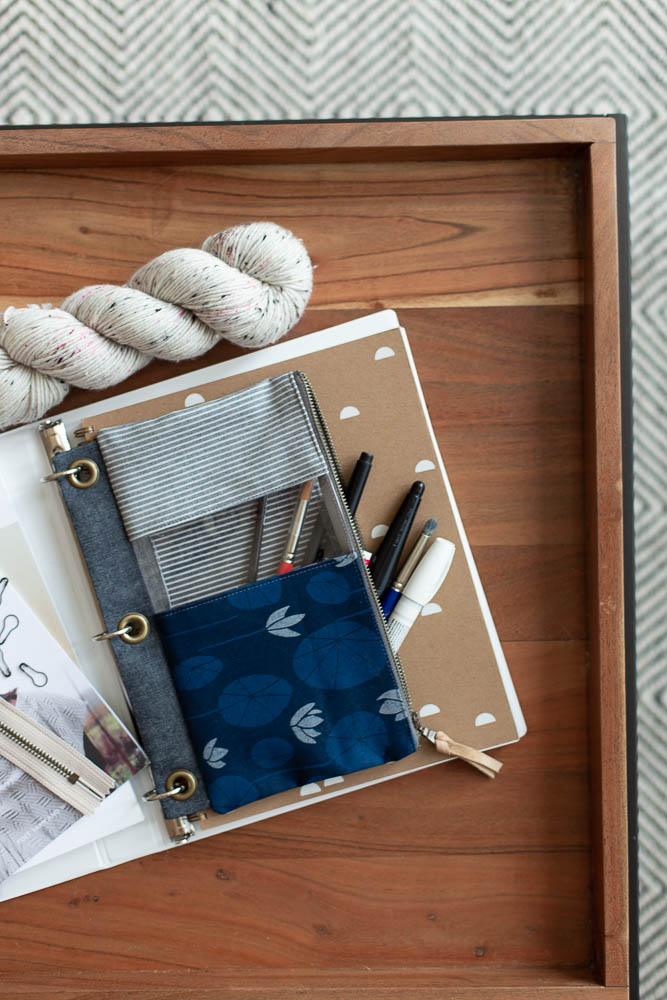
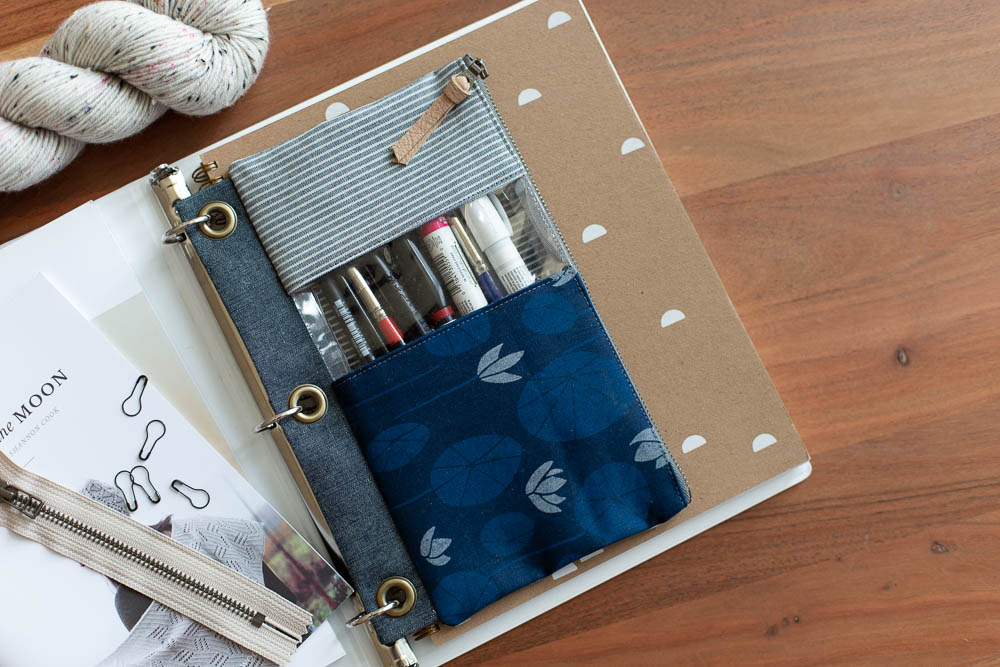
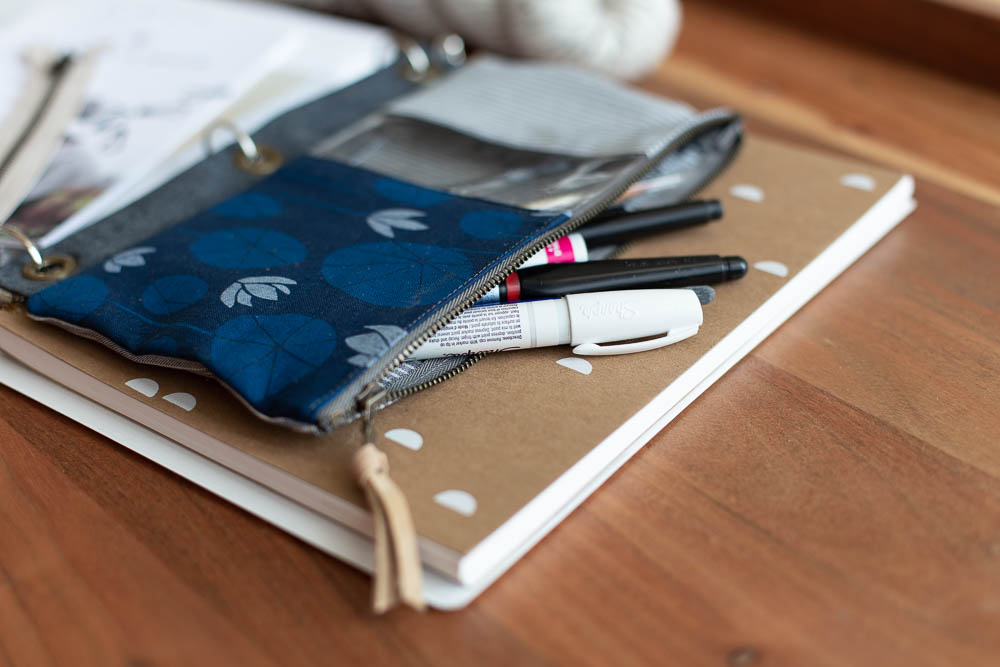
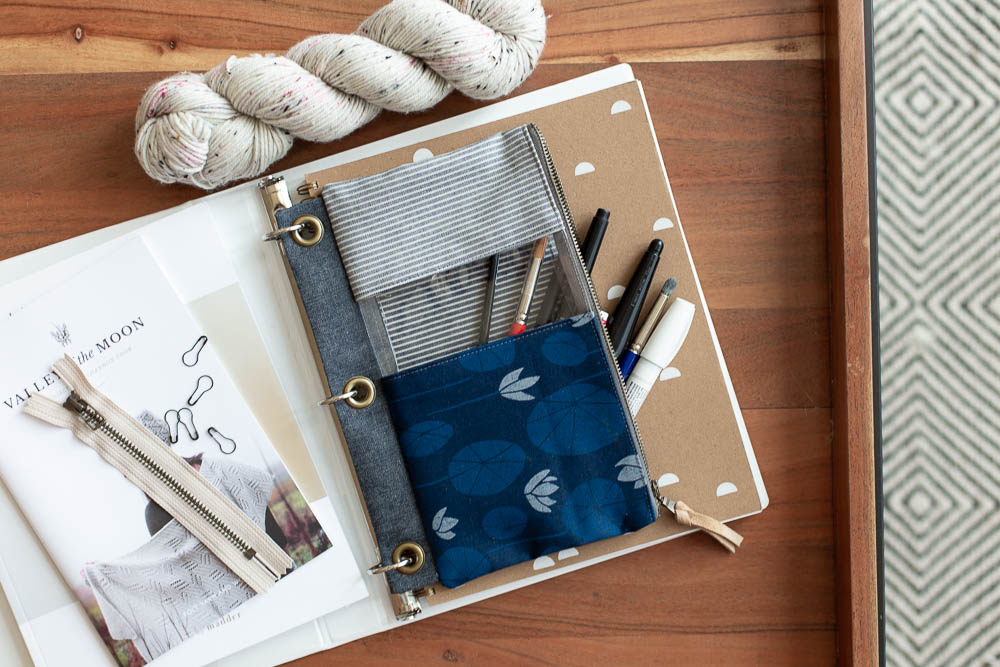
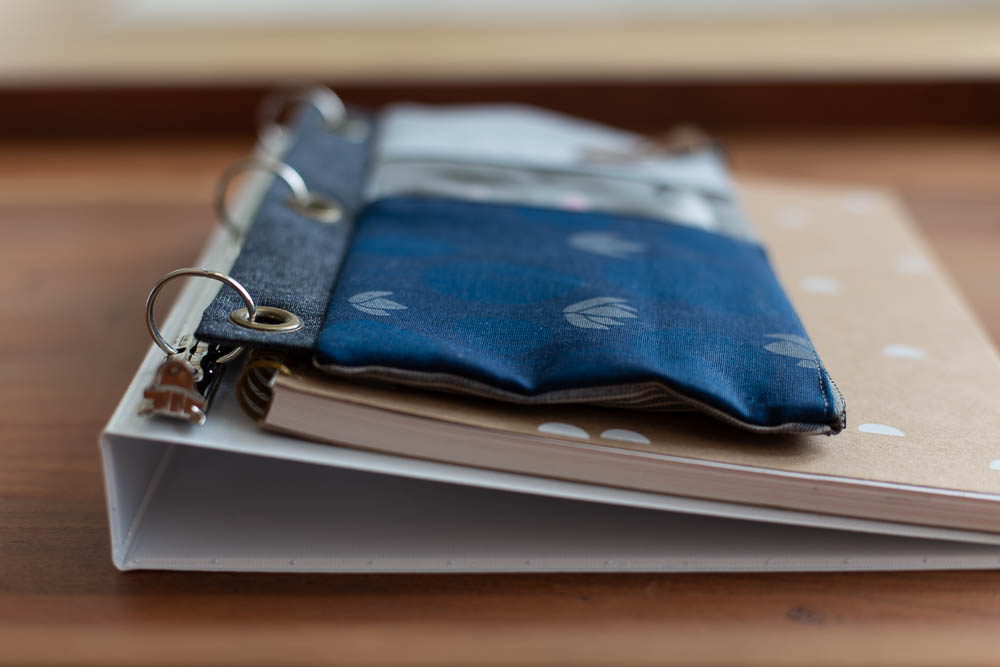
Fill with some pencils and pens or markers, snap it into your binder and you’re all set! Water lily fabric is from my Driftless fabric collection.