Looking for a downloadable option with extra add-ons and options? Find the
full pattern here.
A huge thanks to
Dana and
Disney for doing such a great job of rounding up all sorts of wonderful mother’s day projects!
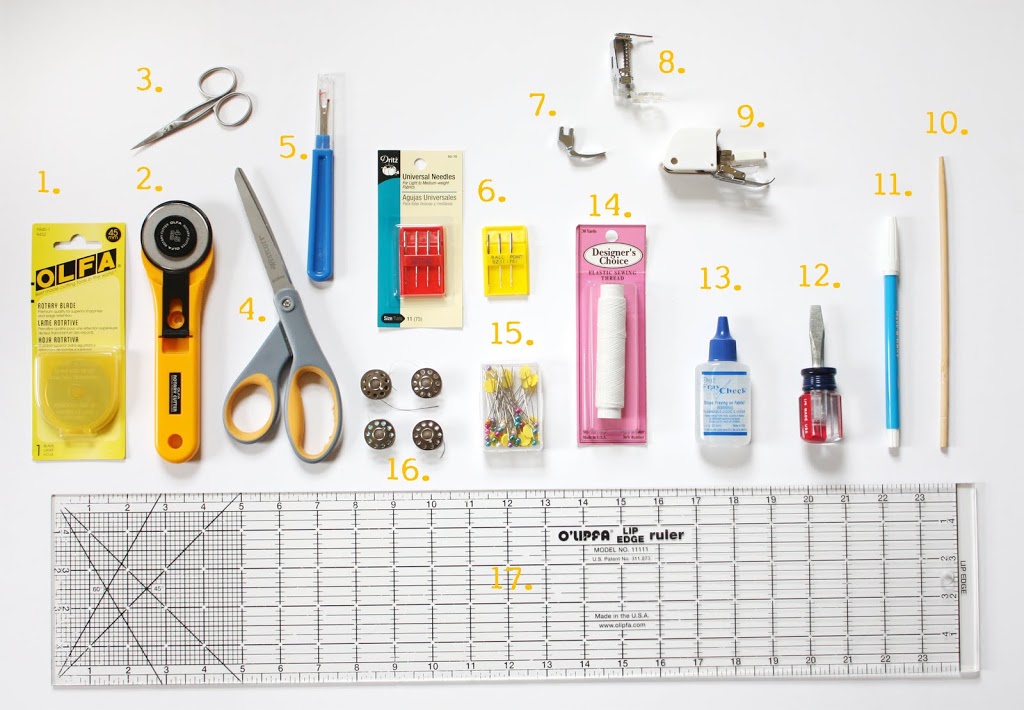
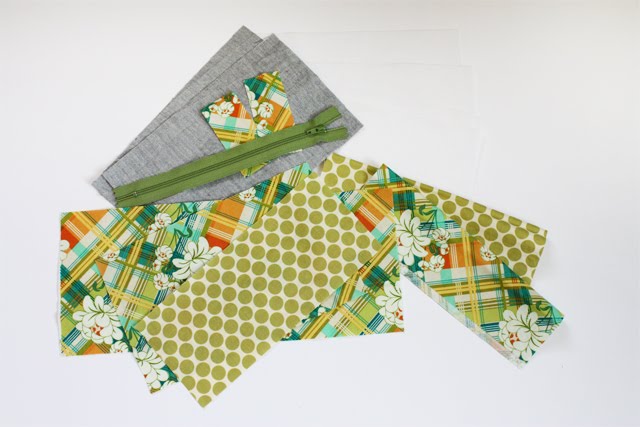
Materials needed:
- 1/4 yard each of three coordinating fabrics (you’ll definitely have scraps leftover)
- 7″ zipper (you can always purchase a longer zipper and shorten it, just follow the directions on the package
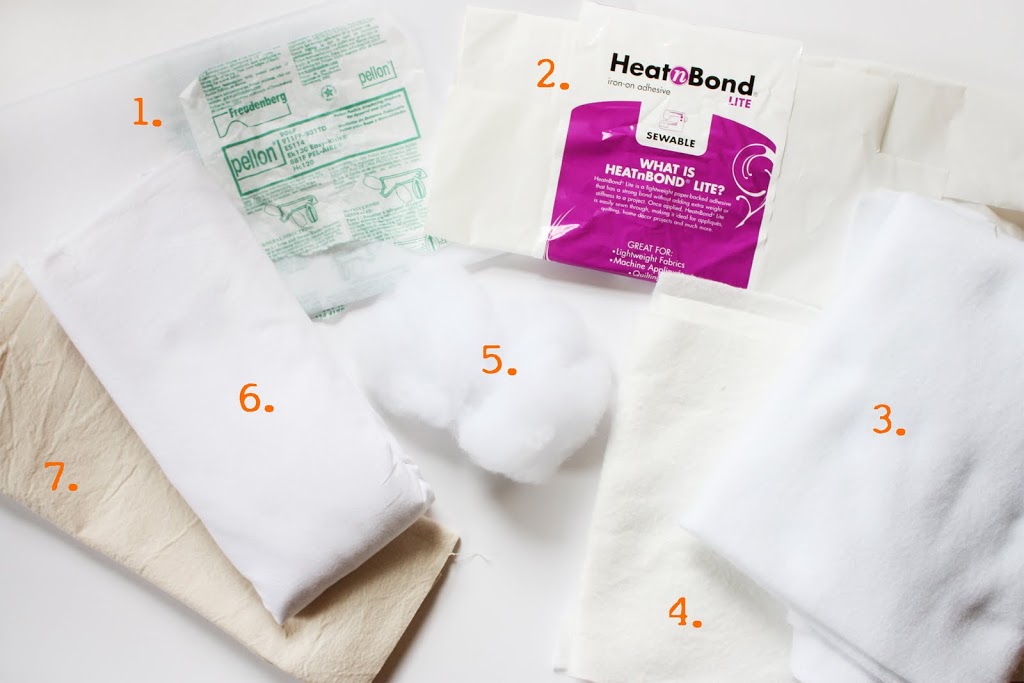
- scraps of medium weight fusible interfacing
Cutting the pieces:
Main Exterior: cut (1) 5.5″ tall x 9″ wide, and (1) 5.5″ tall x 13″ wide (this will be the gathered front)
Front Band: cut (1) piece 4″ tall x 9″ wide.
Lining: cut (2) pieces 5.5″ tall x 9″ wide
Zipper End Covers: cut (2) 1.5″ tall x 2.5″ wide
Medium weight fusible interfacing for exterior pieces of clutch: cut (2) 5.5″ tall x 9″ wide
Optional:
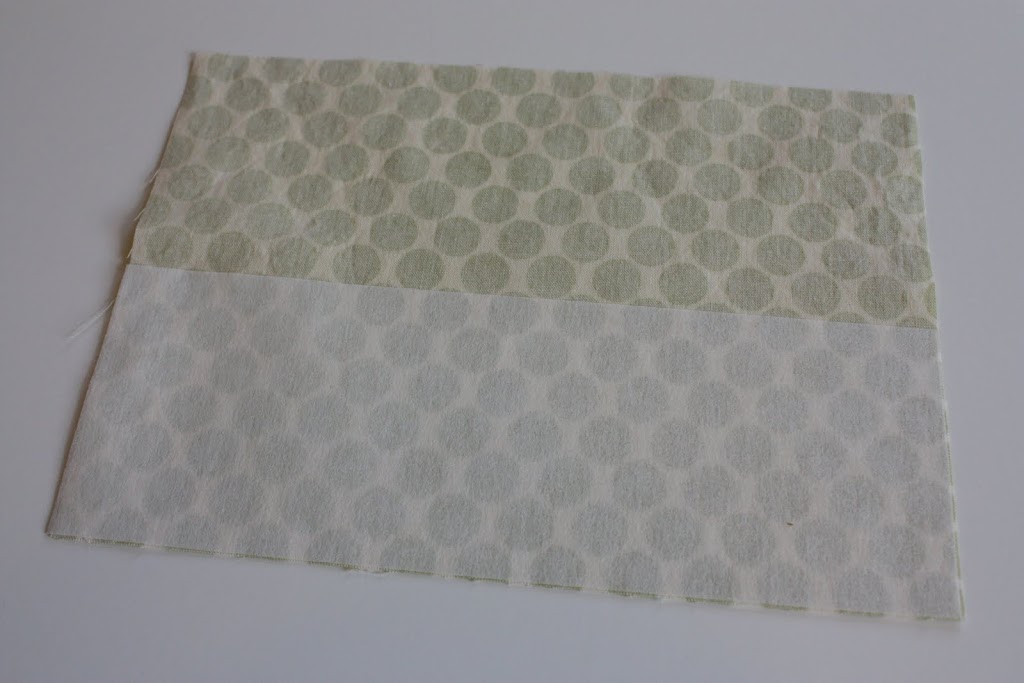
Divider Pocket: cut (1) piece 8″ tall x 9″ wide (apply interfacing to half, you’ll need at 4″ x 9″ piece)
Card Holders: cut (1) piece 7″ tall x 9″ wide (apply interfacing to half, you’ll need at 3.5″ x 9″ piece)
The most time consuming part for me is always picking out my fabrics and cutting them, the rest goes together pretty easy, so let’s go!
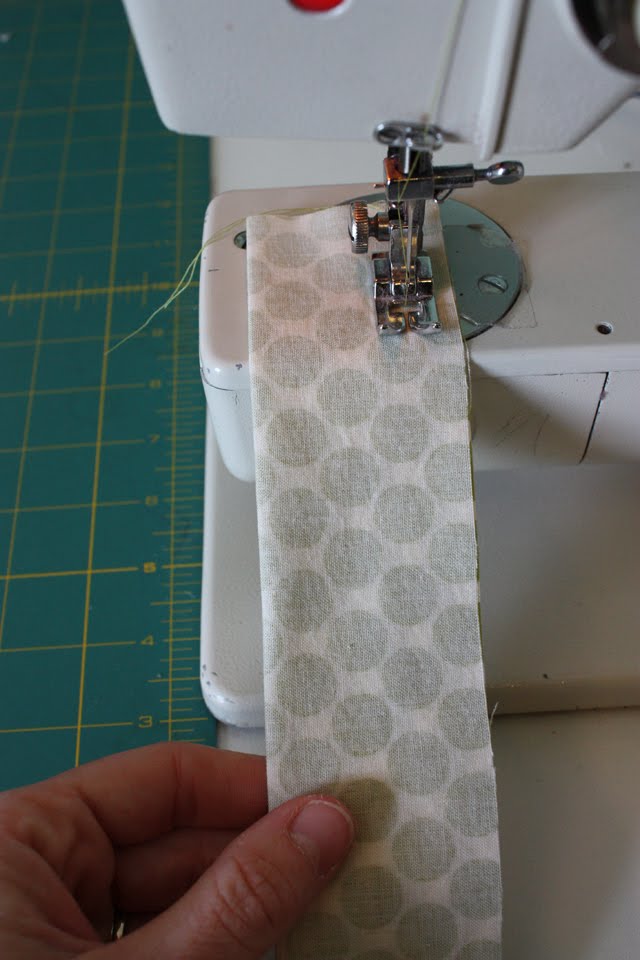
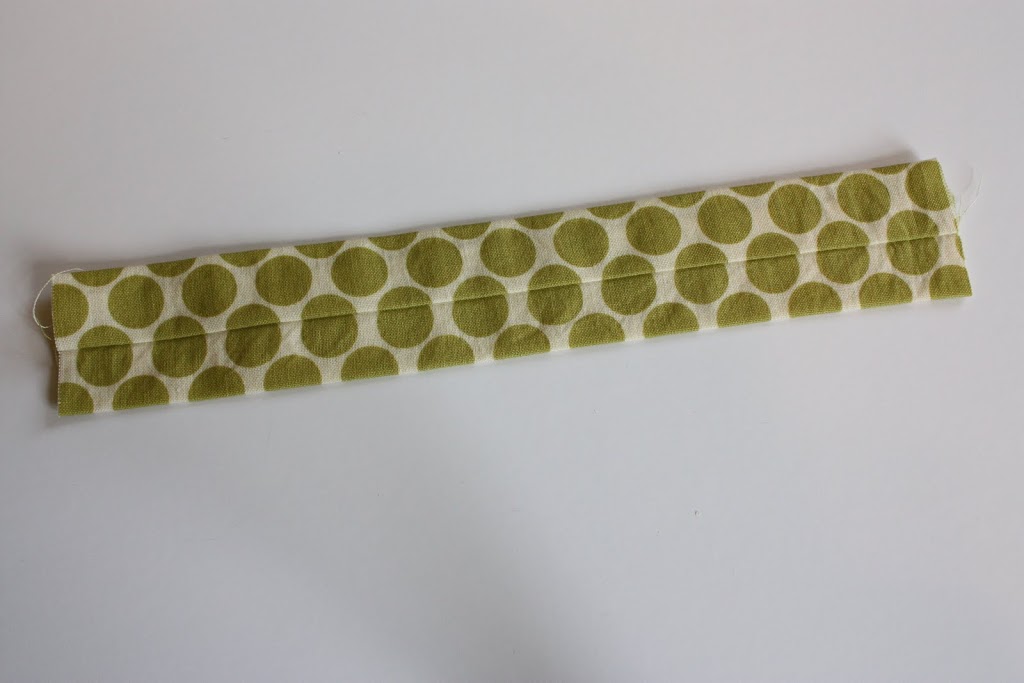
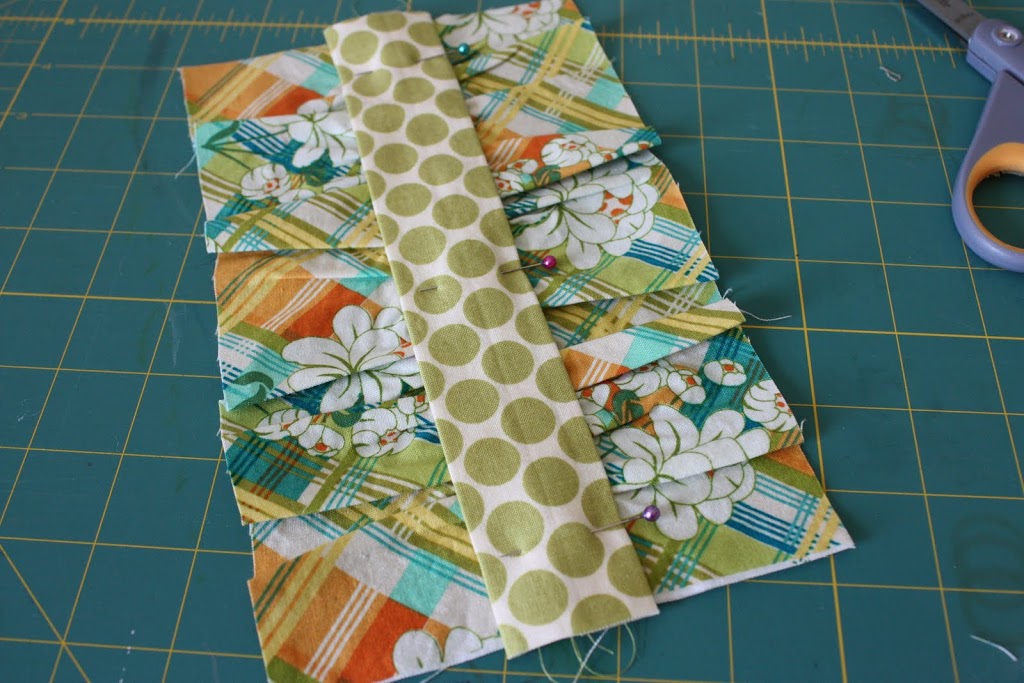
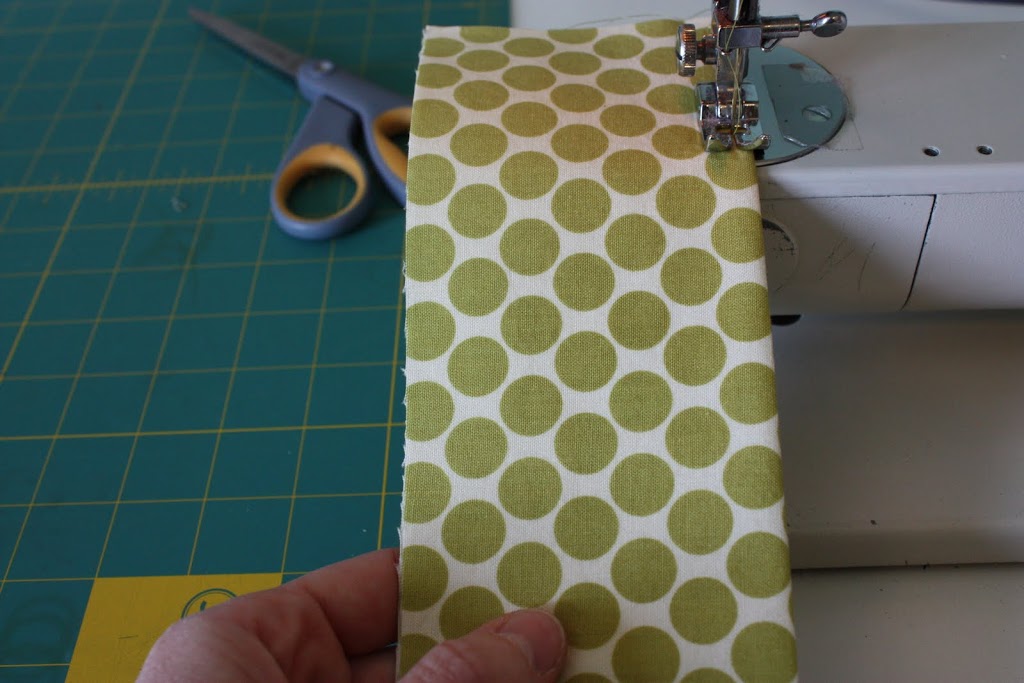
Take the front band piece and fold it in half the long way (right sides together) and sew together using a 1/2″ seam allowance.
Turn tube right side out and press with seam in the middle. Set aside.
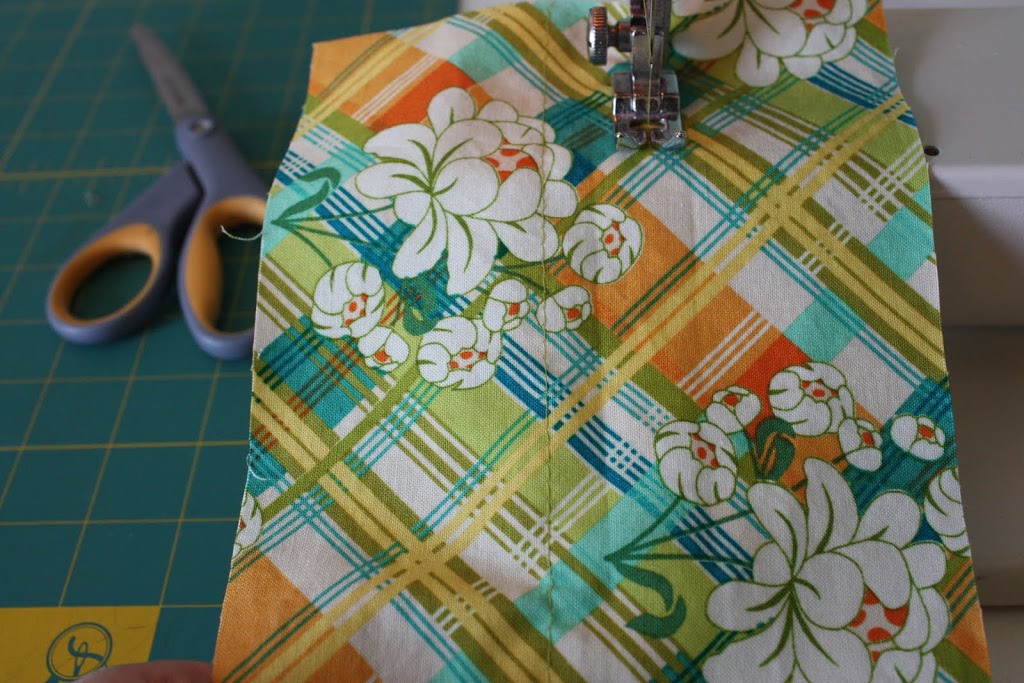
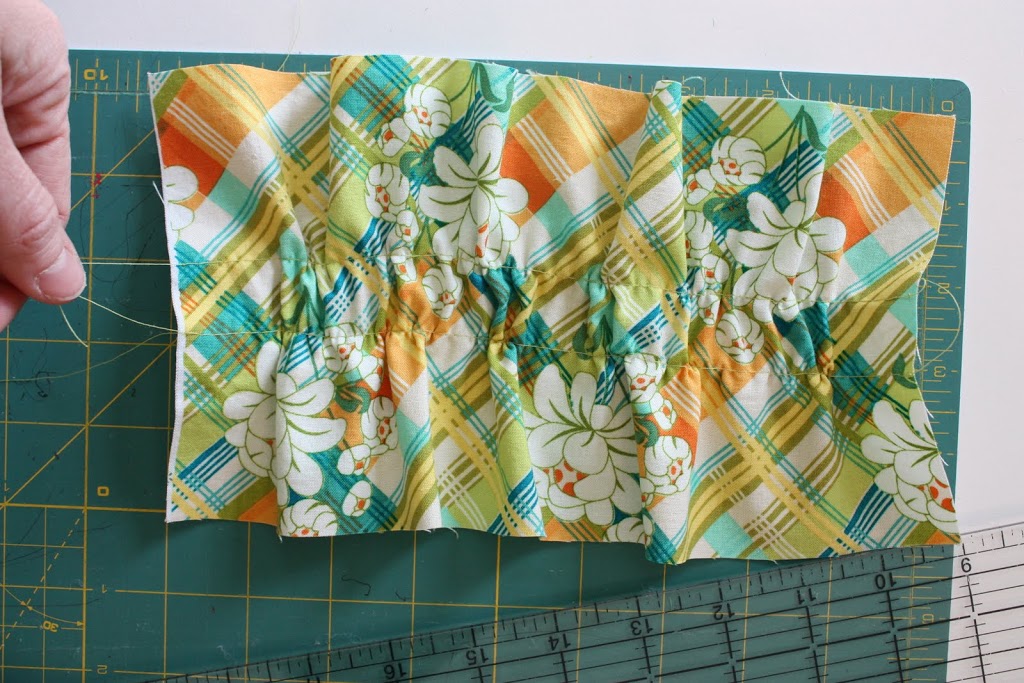
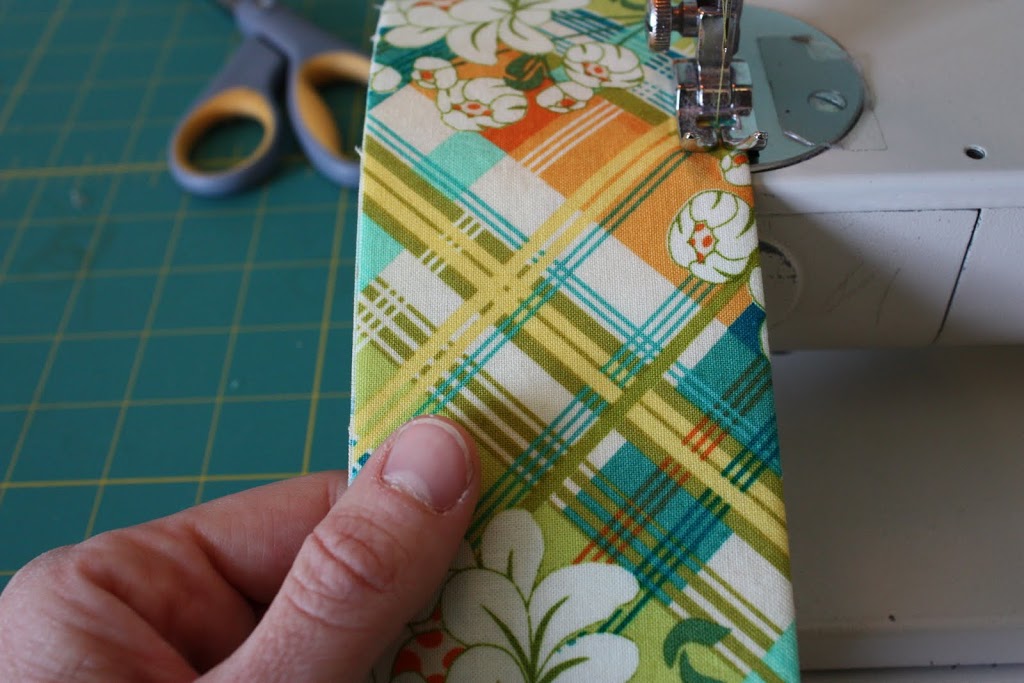
Grab the 13″ wide main exterior piece. Sew two lines of gathering stitches down the middle, about 1″ apart.
Pull the top threads to gather, pull until the length is 9″ long. Press the gathers in place.
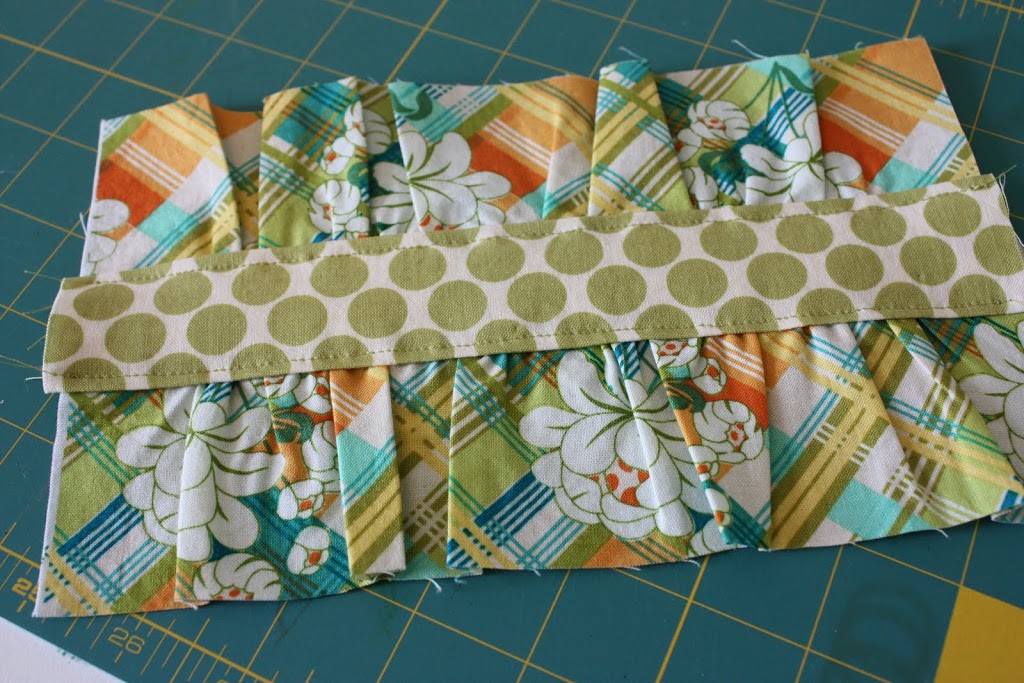
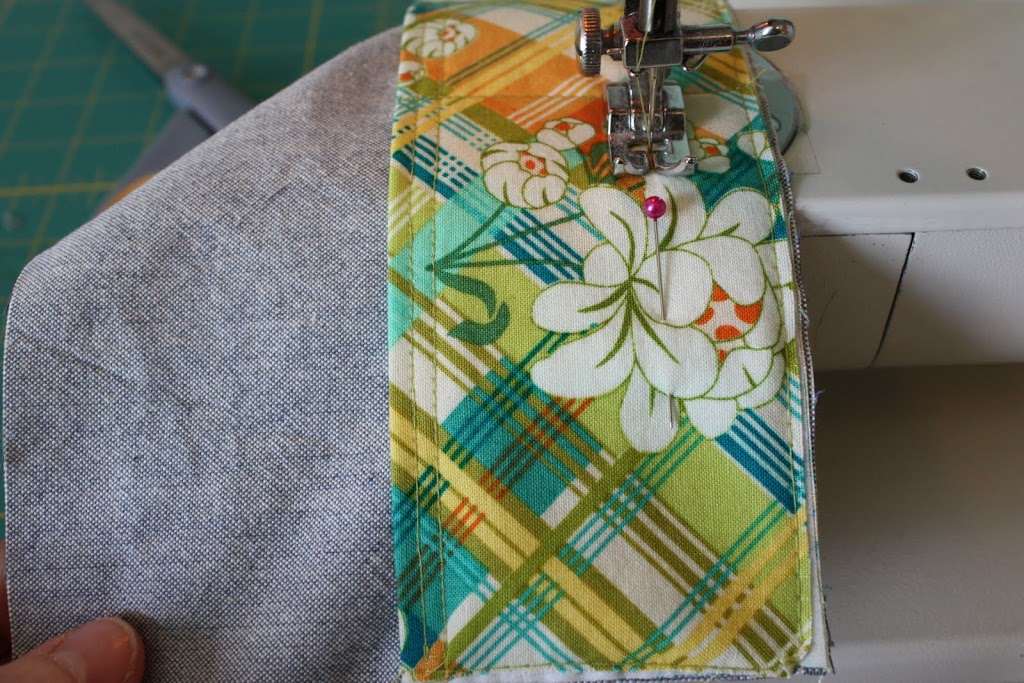
Take the front band and pin it in the middle of the exterior piece you just finished.
Top stitch along each side of the band. Take the 5.5″ tall by 9″ interfacing piece and iron it to the WRONG side of the gathered piece. This makes all the gathering and stitching stay in place nicely. Set aside.
Make the divider pocket:
Fuse interfacing to half of the piece.
Fold fabric in half with WRONG sides together, press. Topstitch along folded edge and then add another line of topstitching about 1/4″ below the first line of topstitching. Set aside.
Make the card holders:
Fuse interfacing to half of the piece. Fold fabric in half with WRONG sides together, press.
Topstitch along folded edge and then add another line of topstitching about 1/8″ below the first line of topstitching.
Take one piece of the lining fabric and line up the card holder with raw edges together, one on top of the other baste along side and bottom edged of card holder (the plaid fabric).
Grab your credit card or driver’s license and mark with a pin how far you want your card to stick up from the slot. Sew a line across the lining/card holder piece where you marked with the pin. Sew one line of stitching down the center of the card holder.
Take your card again and mark with a pin where the edge of your card is (you can leave a little wiggle room, but it’s nice to keep it pretty snug to hold your cards in place). Sew a line for the side of the card, repeat for other side. Now you should have two card holders! Set aside.
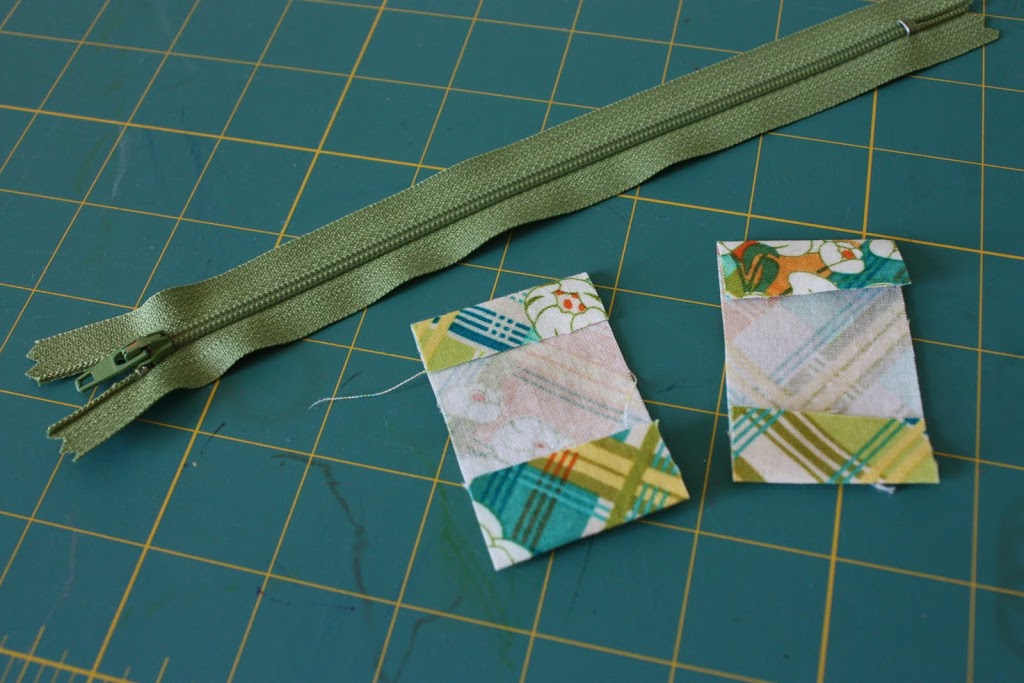
Making the end tabs for the zipper:
Fold the piece of fabric in half width wise, turn down each raw edge to the center crease and press (the pic above doesn’t show it pressed in far enough). Repeat for other end tab.
Take your zipper and sandwich the end tab around the zipper, just avoiding little metal end stops on both ends.
Topstitch a line straight across the zipper end tab with a very small seam allowance being careful not to hit the metal end stops! Repeat for other end. Trim the fabric tabs to the width of the zipper.
IMPORTANT! The length of the zipper with the tabs on should measure 8.5″ end to end.
Baste the card holders to one piece of lining and the divider pocket to the other piece of lining, aligning the raw edges at the bottom.
Almost done!
Assembling the clutch:
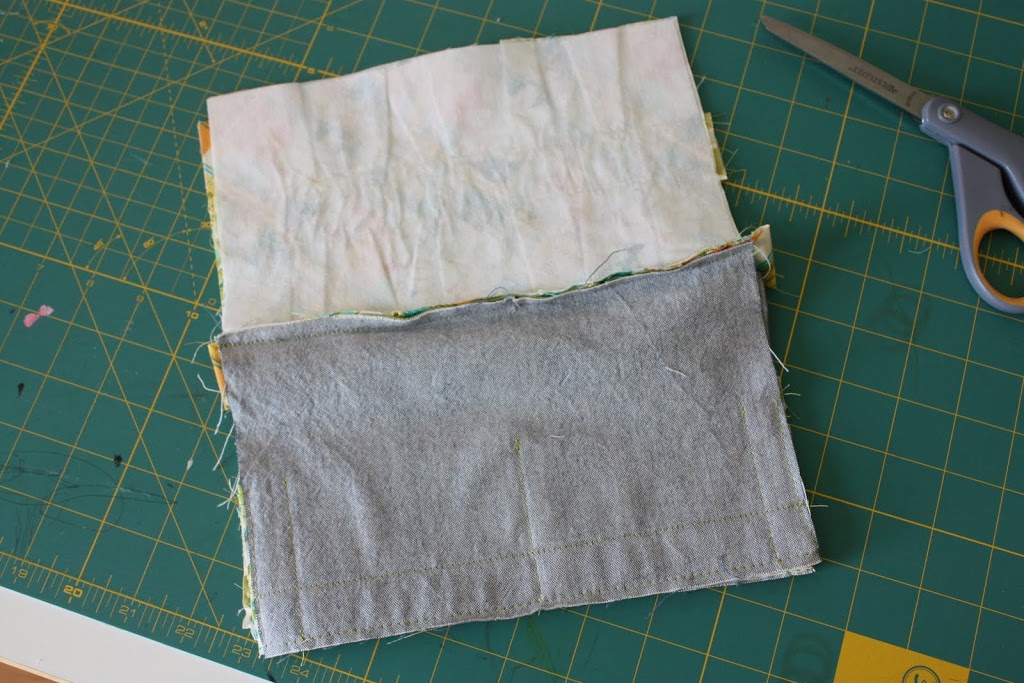
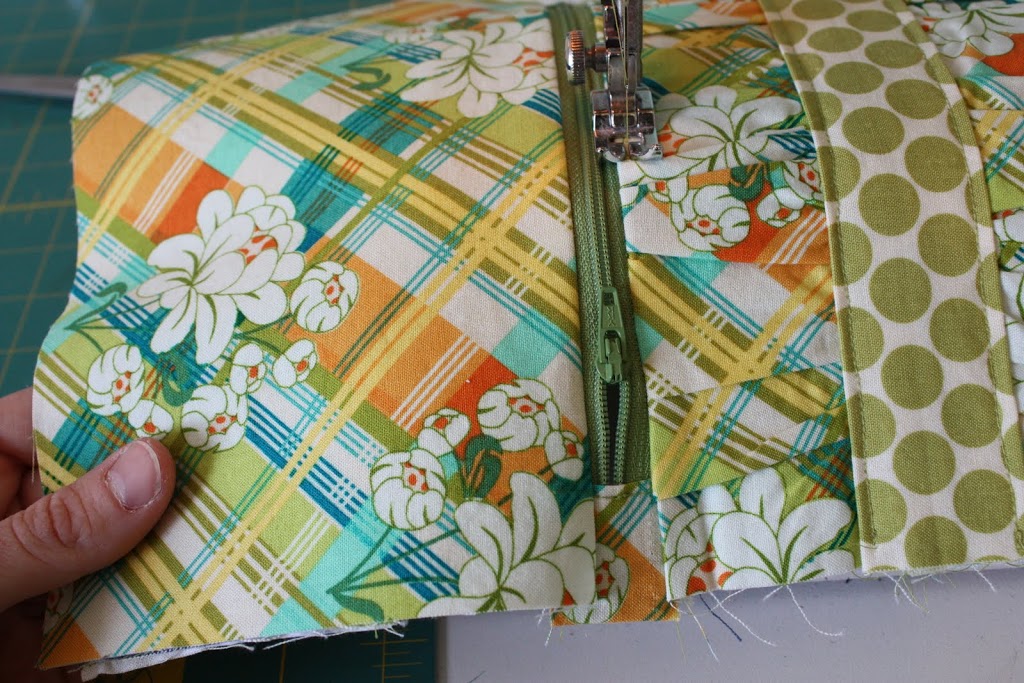
Place your gathered exterior piece RIGHT side up (whoops!, had it wrong in the pic, don’t worry, just get out your seam ripper and start again). Put the zipper teeth side down with the pull tab to the LEFT. Then put the lining piece WRONG side up. Pin in place.
Using your zipper foot sew along the edge of this zipper sandwich. Flip pieces so the WRONG sides are together.
***Please note that in a few of these shots the zipper with end tabs sewn on is longer than the clutch exteriors and linings, it was the first one I made and have since made adjustments to the measurements, all updates are included here in the tutorial.
Grab the other exterior piece, place RIGHT side up. Put the zipper teeth side down with the pull tab on the RIGHT this time. Place the remaining lining piece WRONG side up on top of the zipper. Pin in place, sew. Flip pieces so the WRONG side are facing each other. Press!
Put your regular sewing foot back on and sew a line of topstitching on either side of the zipper.
Now open your zipper about halfway, don’t forget this! If you forget to do this, don’t worry, you can still wiggle the zipper open if you carefully pull at it through the fabric.
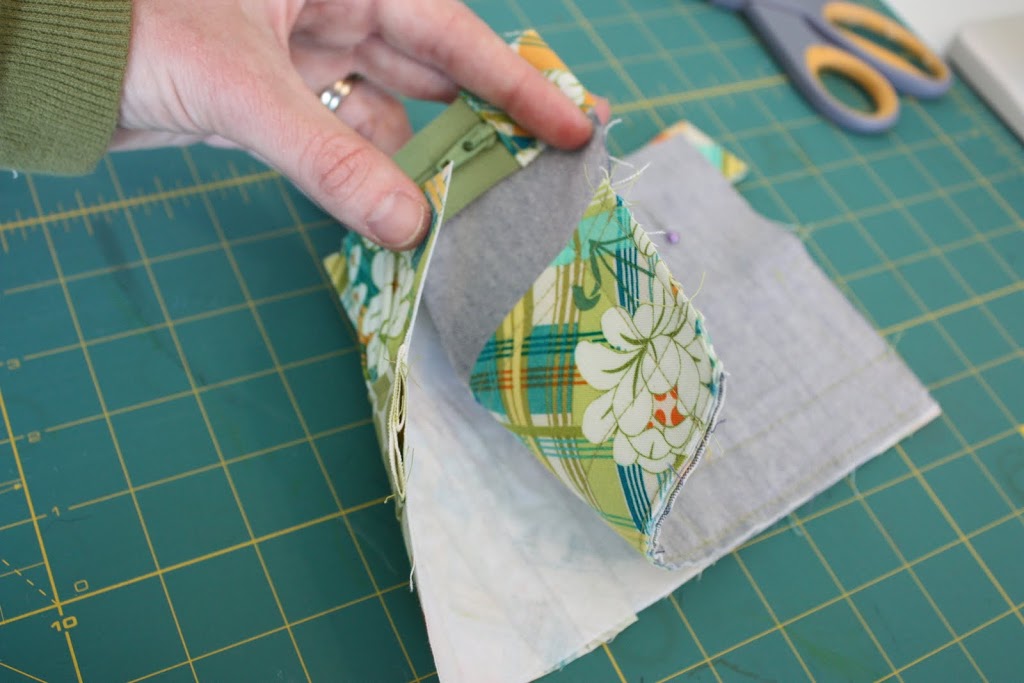
Place the exterior pieces RIGHT sides together and the lining pieces RIGHT sides together.
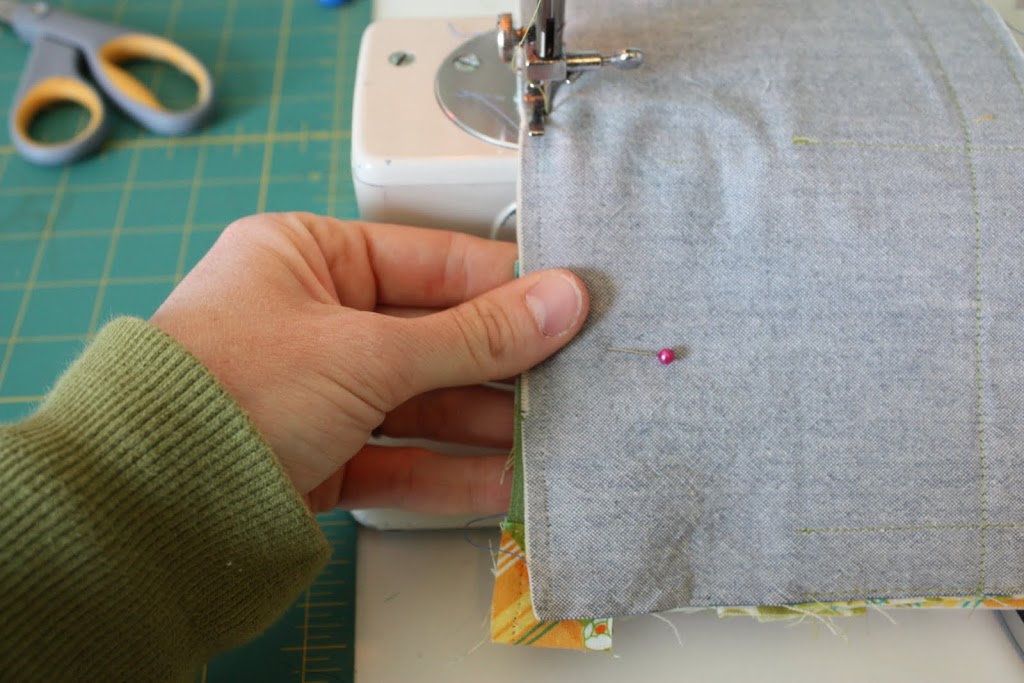
Sew all around the edge using a 1/4″ seam allowance, leaving a 3-4″ opening in the lining for turning.
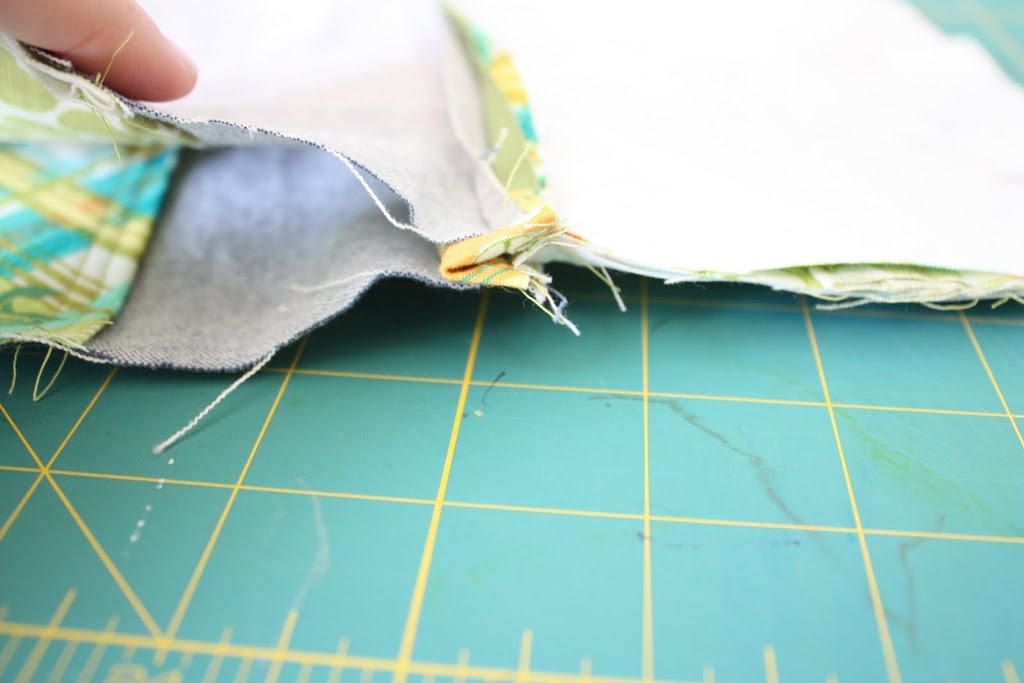
Make sure you try to sew right next to the zipper end tabs and not actually throught them, click here for a visual. Clip corners. It also helps to sew with a slightly larger seam allowance when you sew around the lining pieces.
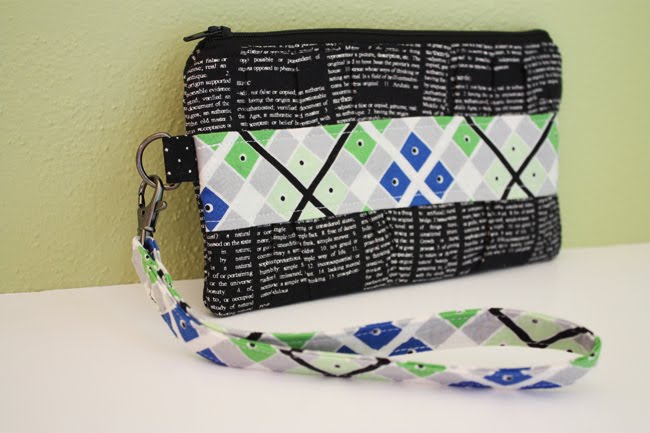
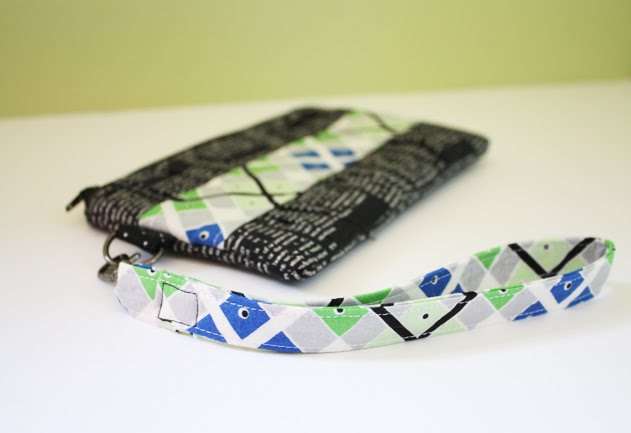
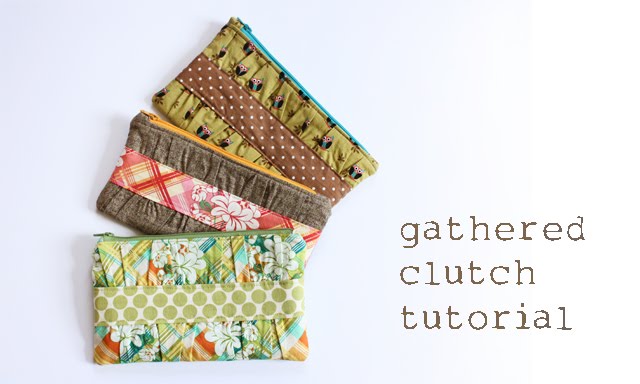
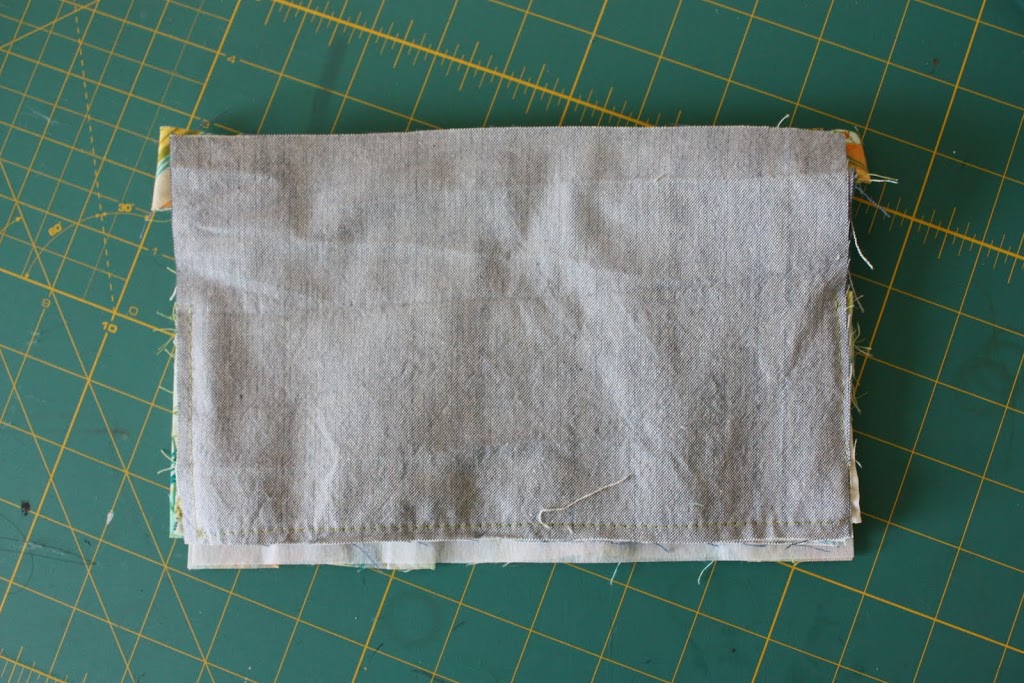
Turn the clutch right side out. Push corners out. Tuck in raw edges of opening left in the lining and sew the opening in the lining closed using a small seam allowance (or by hand). Tuck the lining into the clutch. Press again and your DONE!!! Phew. It does seam like a lengthy process, but it really does sew up pretty quickly. For the biggest time saver, just skip the divider pocket and card holders! Or add a handle! The one below I just put in a mini pocket!
If you don’t add the divider or card pockets, I would recommend adding a layer of fusible fleece or even canvas as interfacing, it will make the clutch more sturdy.
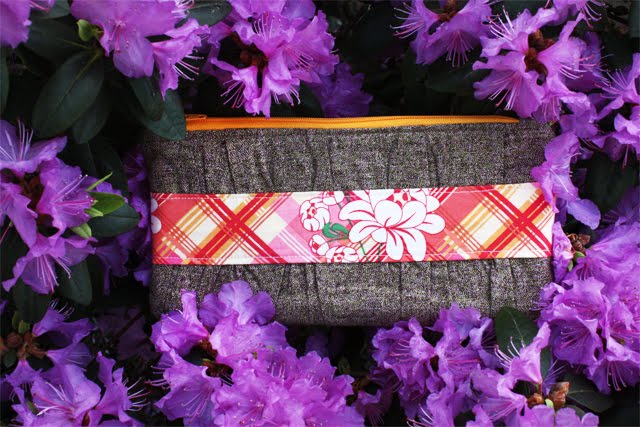
Have fun with it and give that mom in your life a big hug!
Have a great Mother’s Day!
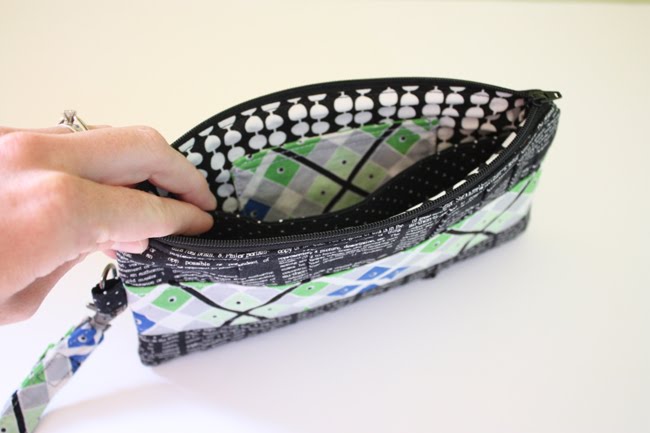
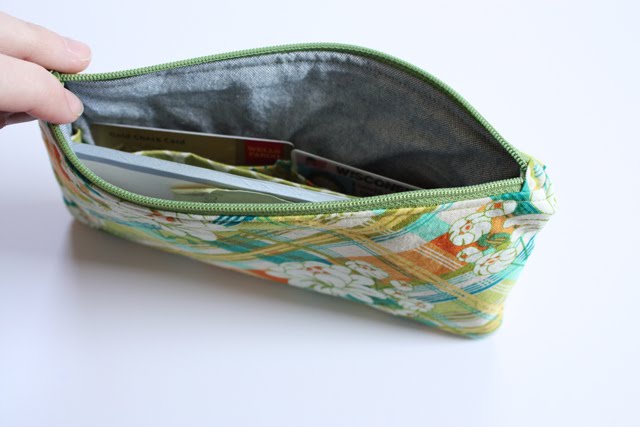
Interior shots
interior card holders (2 – side by side)
interior pocket divider (it’s the green polka dot fabric)