Techniques

How to Install Rivets

1

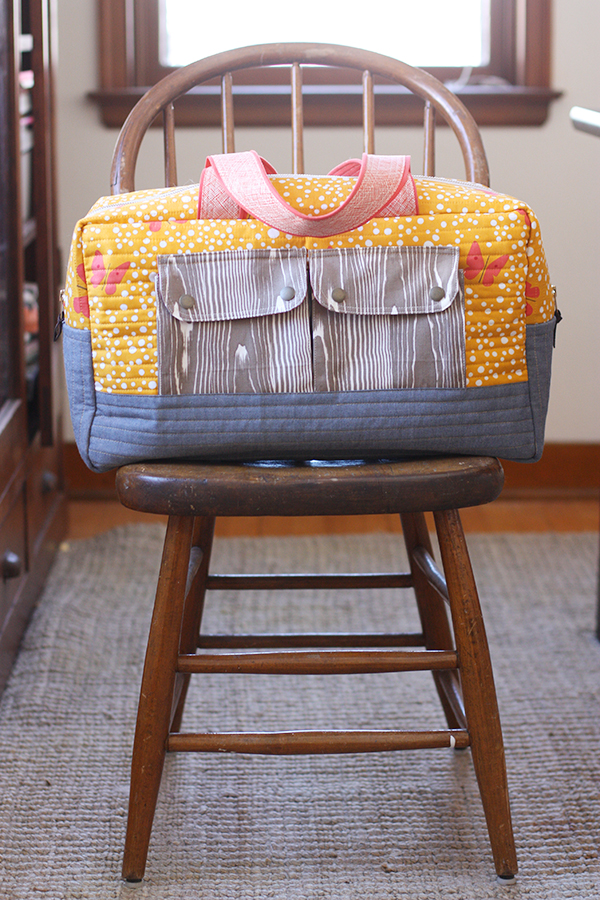
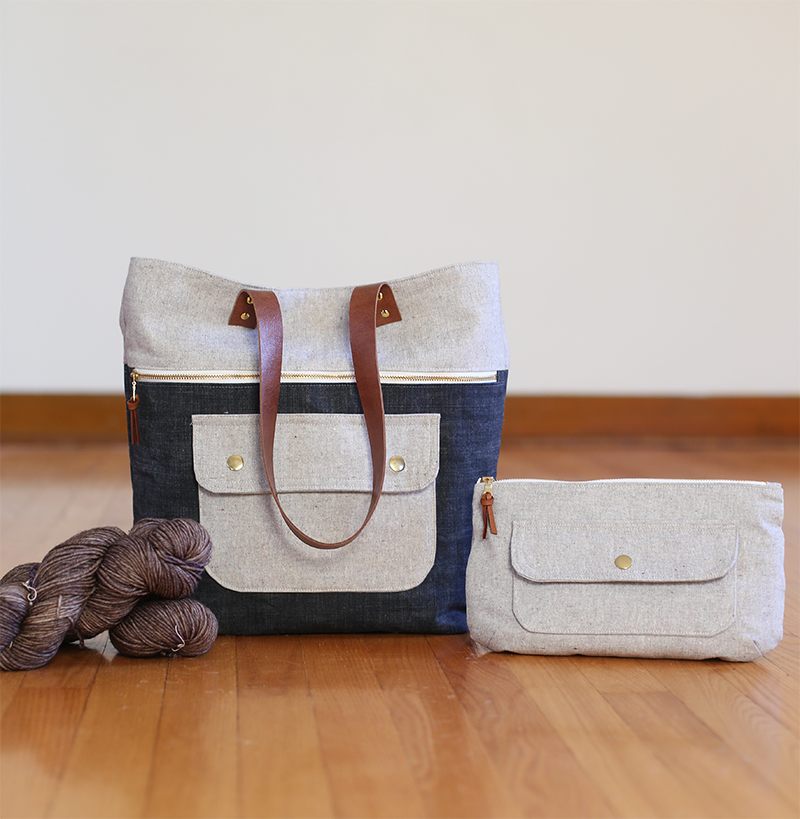
Hi there! Remember the Caravan Tote + Pouch pattern? Well, today I’m sharing my tips and instructions on how to install handles using rivets. As part of Sew Mama Sew‘s Super Online Sewing Match II, the Caravan Tote is the project for the third round of the competition. I’m so excited to see how the talented contestants interpret this pattern. It’s always fun to see everyone’s creative twist on a project, that’s what I love most about sewing!

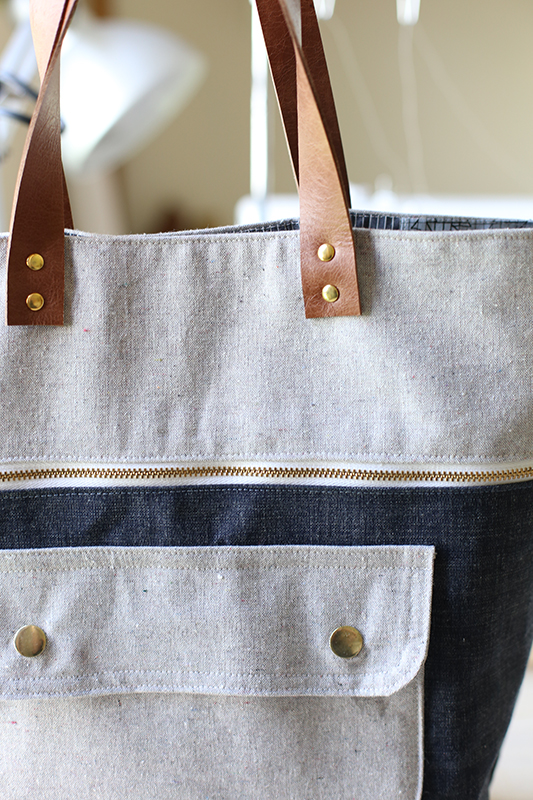
Using rivets in bag making can take your projects to a whole new level, and they look awesome with the Caravan Tote.

p.s. you can totally do this!

11

rivetbag2

Hardware is one of my most favorite parts of bag making. It adds a beautiful detail with professional looking results. I think hardware can be very intimidating to learn at first, but with a little bit of information and how-to, anyone can do it. Many times installing hardware is one of the last steps when making a bag, especially when it comes to attaching handles with rivets. You’ve working really hard to make an awesome bag, and then it’s rivet and handle time! I’ve been there and I know it feels scary. Hopefully with this tutorial and my tips, you’ll be setting rivets in no time flat – and with confidence!

1

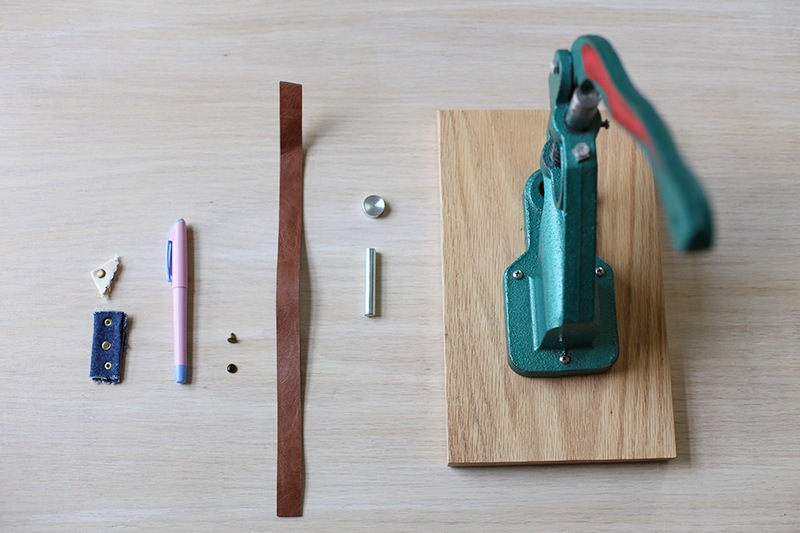
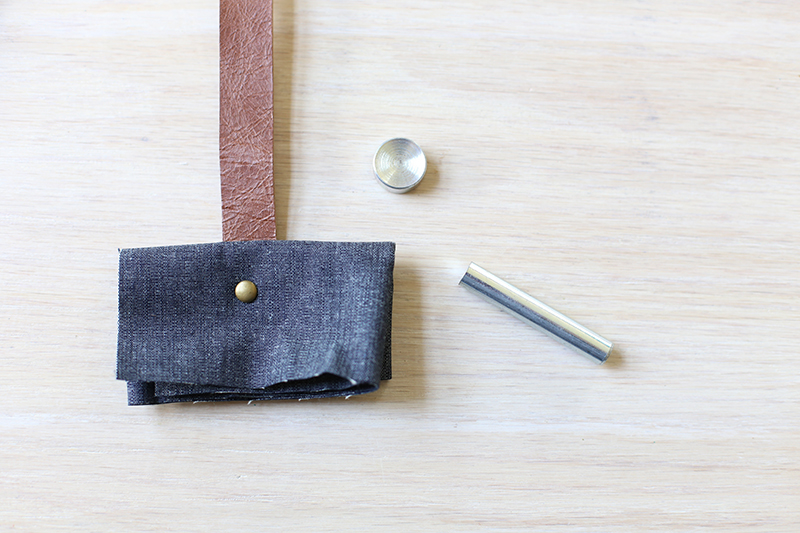
[test rivets and materials, water-soluble pen, double cap rivet, finished strap, rivet setting tool or rivet press]

Materials:

  • rivets (I typically use double cap rivets with an 8-9mm cap size and 6-8mm post length)
  • awl/leather punch/rivet press
  • rivet setting tool or rivet press that fits the size rivets you are installing
  • soft hammer/mallot
  • finished handles (fabric or leather)
  • a bag to attach them to!

2

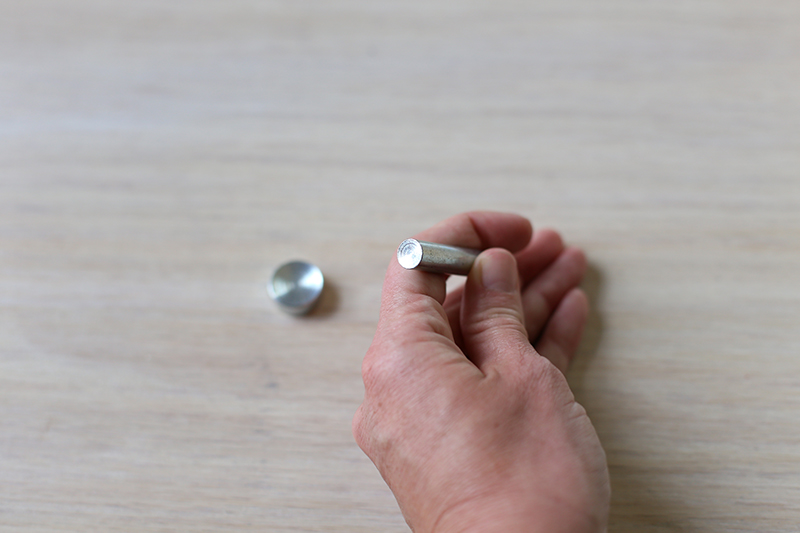
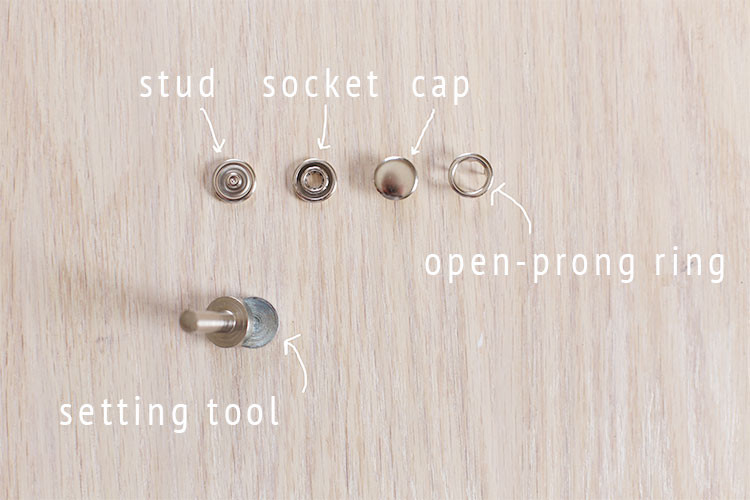
[Rivet setting tool, anvil and strike post]

3

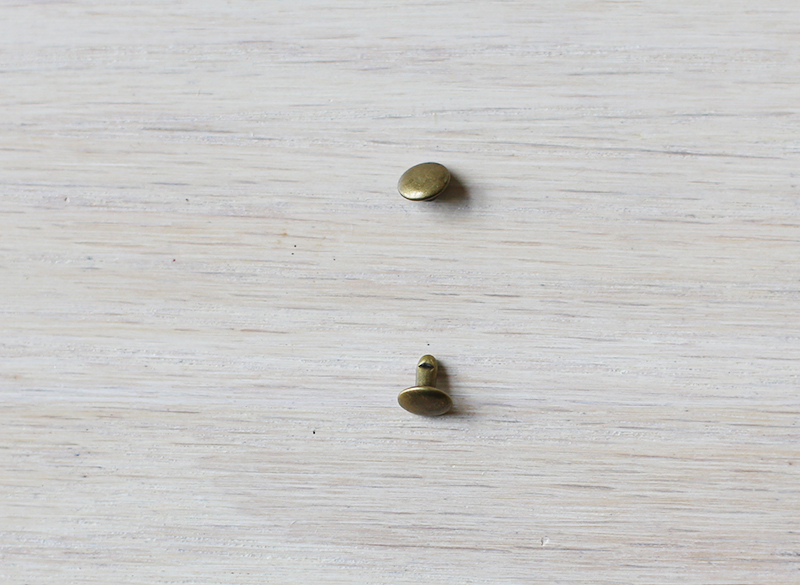
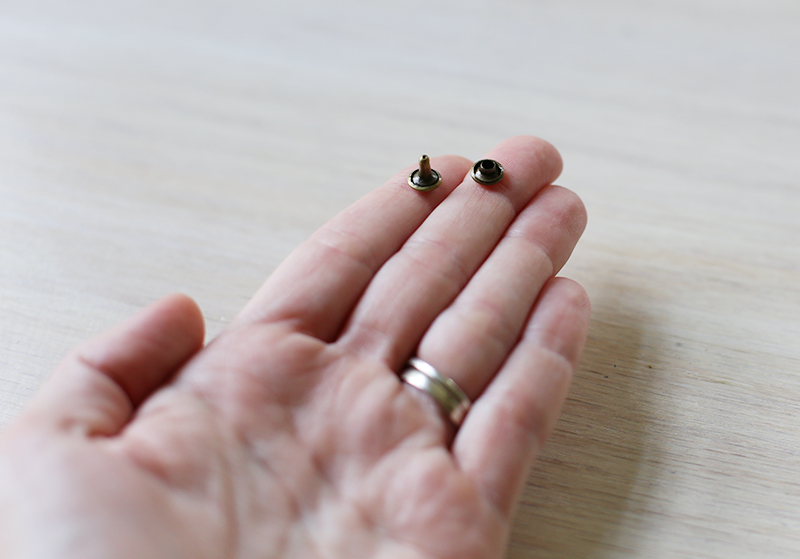
[rivet cap on top, rivet with post]

4

Tips to get started:

  • Rivet size. There are many types and sizes of rivets! Probably more than you’ve ever thought possible. Buying the right size and type for your project is cruicial in having success with your finished product. For most bags I recommend an 8mm or 9mm double cap rivet with a post length of 6-8 mm. Don’t forget about finding the correct post length! It helps determine how many layers your rivet will actually hold together. Having too long of a post length, your rivet won’t sit snugly on your handles, but having a post length that is too short will leave you with a rivet that won’t be long enough! Take time when you’re shopping. If the item description doesn’t list the information you need, contact the shop owner.
  • Practice. No one ever has set out to do something they’ve never done before and been amazing at it the first time they try! Don’t expect yourself to know everything the first time. Everything is a learning process and a few practice tries will get you warmed up and ready for setting your first rivets on a real project. I usually set aside a couple small snippets of the same amount of layers/fabrics that I use for my finished project. It’s great to practice a few times with scraps to get a good feel for how everything goes together and to get acquainted with the tools.

Install rivet:

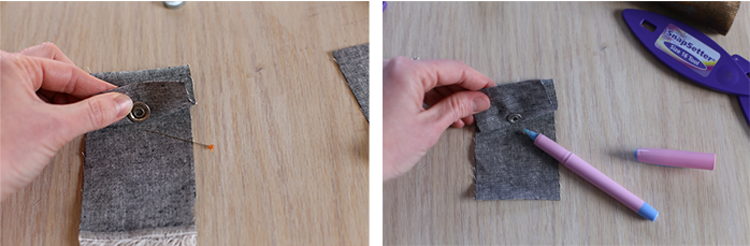
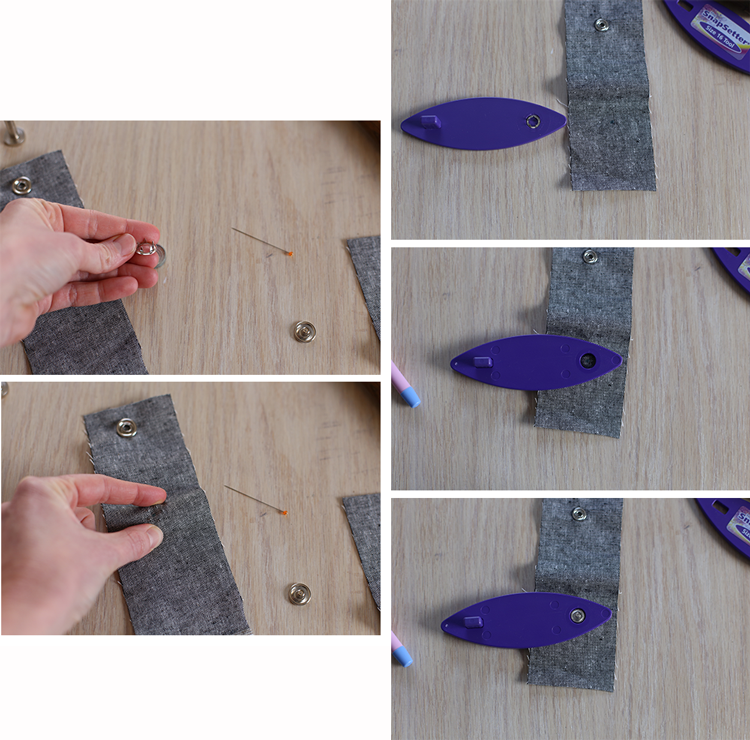
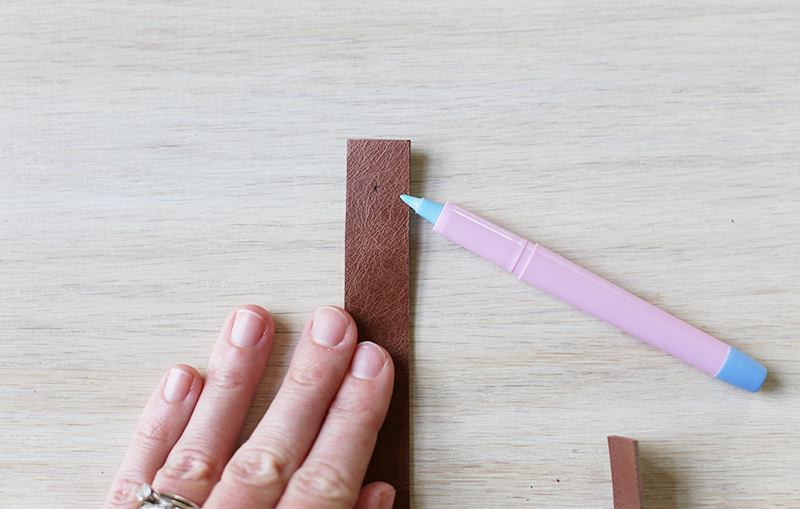
  1. Mark rivet placement. I like to use a water-soluble pen for marking placement. I find it works for the particular leather handles that I use, but do a test marking with your materials that you’re using. I usually use the cap part of the rivet to get a good look at how things will work. I recommend setting two rivets per handle end. The bag pattern you’re using should suggest the distance between the straps, or align them to how you see fit.5
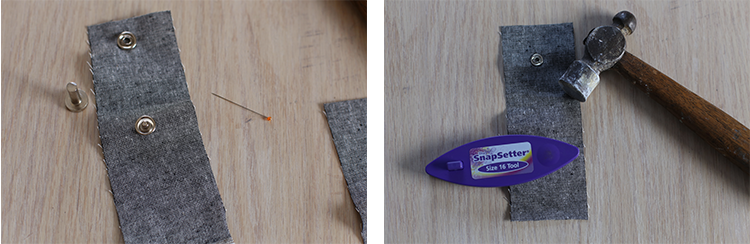
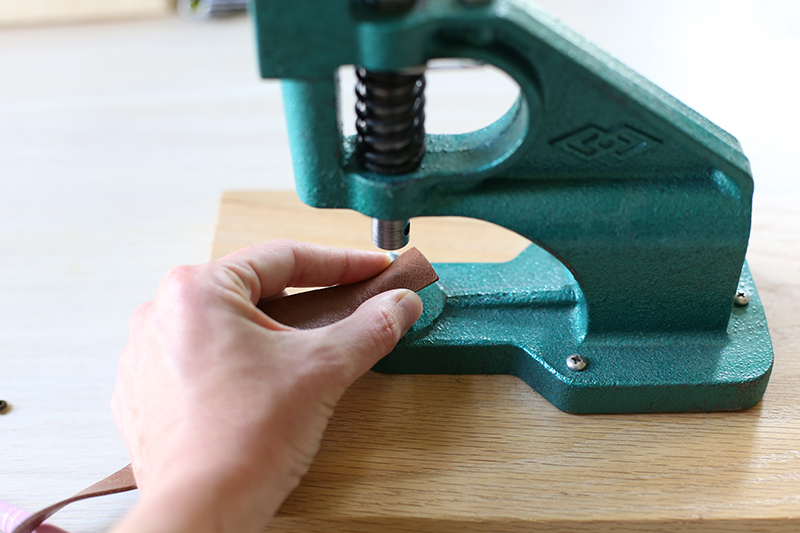
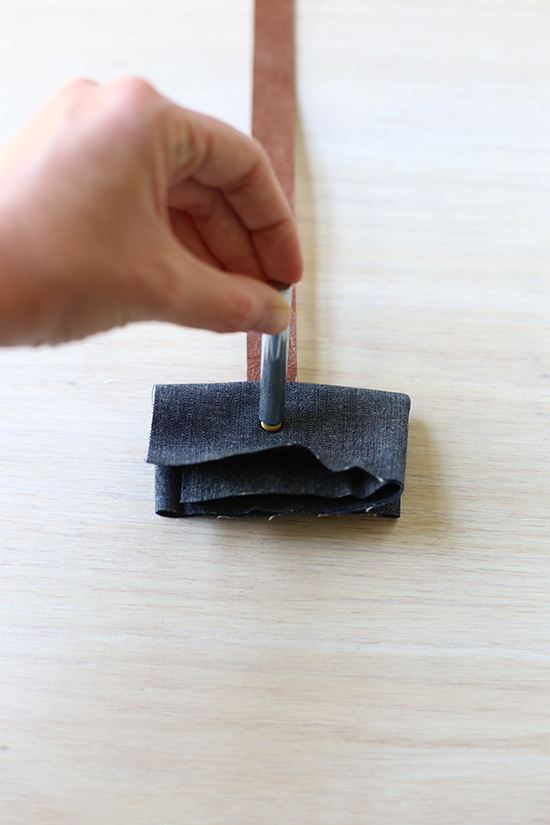
  2. Punch holes. Use and awl, leather punch, or rivet press, punch the hole in both the leather and bag using the markings you previously marked.6
    7
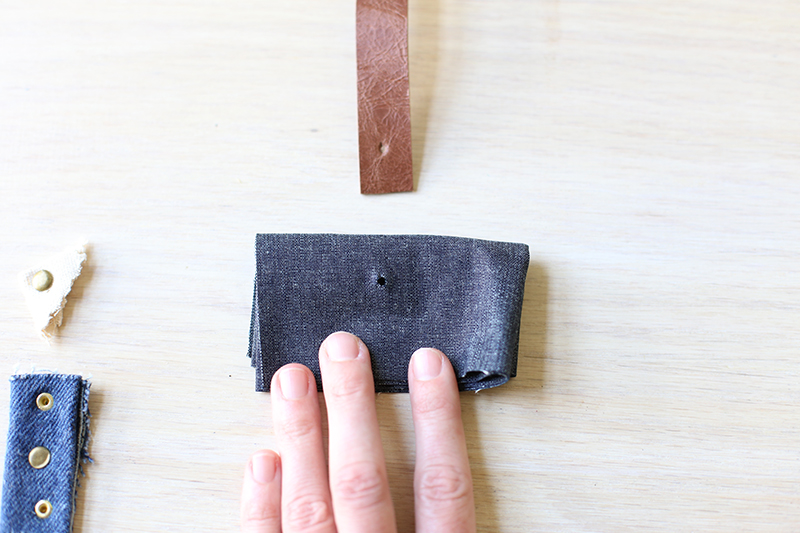
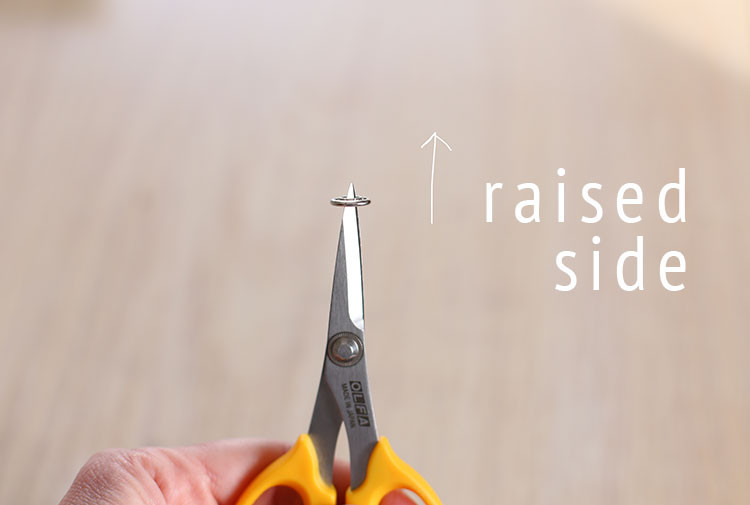
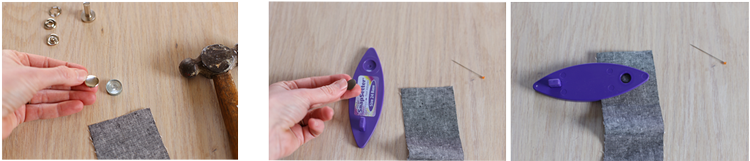
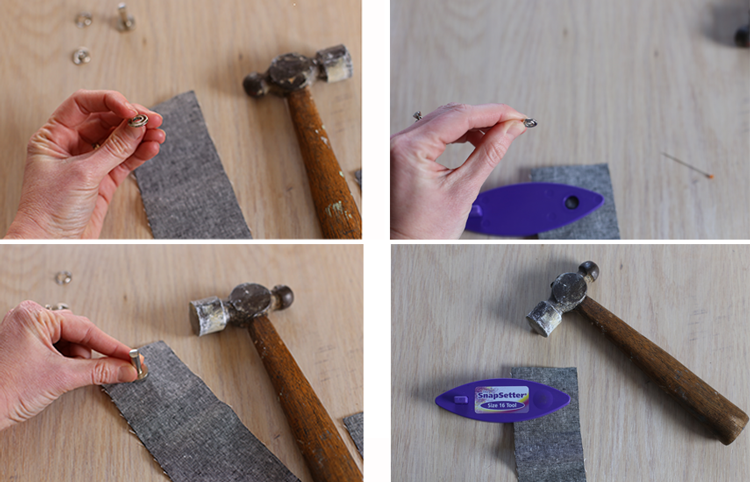
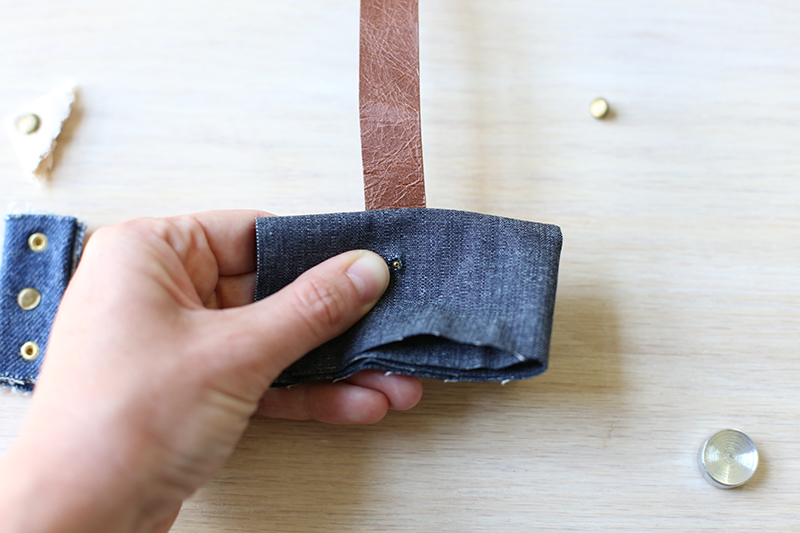
  3. Align holes and push the rivet post through layers from exterior of bag to the interior. You can probably do it the opposite way as well, working from the inside of the bag, so do what works best for you after doing a few practice runs. Snap rivet cap in place on rivet post. Some rivet brands click into place, others may not.8
    9
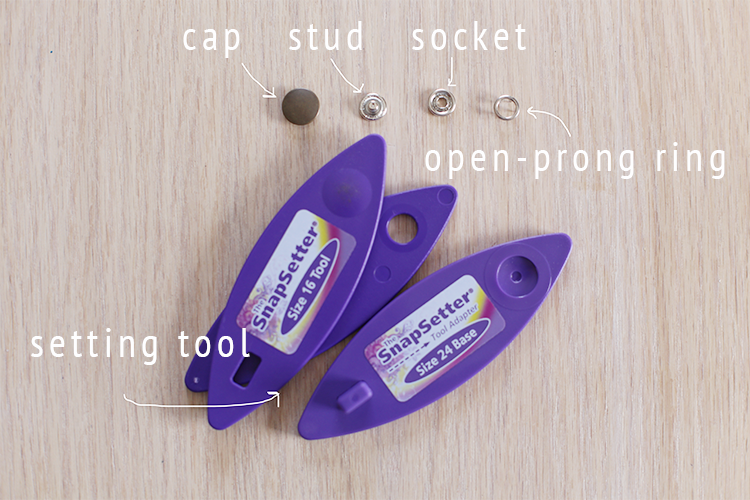
  4. Set rivet. Using the setting tools, or rivet press attach the rivet. Most likely if you’re new to using rivets a setting tool is the most affordable option. It comes with a strike post and anvil. The anvil is set on a solid surface, next aligning the attached rivet over anvil, then the strike post is the tool is set over the cap. With a soft hammer or mallot, strike the post with a few solid taps. A rivet press is a really amazing tool. Most also are able to be used for setting grommets or even snaps. They are fairly costly, so I do suggest trying the hand setting tools first.10

That’s all! Pretty painless, right?! I think the more you practice, the more confident you’ll feel. I can’t wait to see all the awesome ways you’ll be incorporating rivets into your handmade projects!11

In the past few years, I have spent hours and hours researching and sourcing hardware and straps. My patterns and book both include these resource links, plus more. It’s a search that I’ve been passionate about and have tried to learn as much as I can – and am still learning. I have personally used these shops and can verify that they sell high quality products.

Rivet supply sources (I typically use an 8mm head with a 6mm post or 8mm post length:
Minkus Margo on etsy
Buckleguy.com
Gold Star Tool
Emmaline Bags

Leather Punch – Tandy Leather

Handles:
Leather Handles (in my shop!)

Techniques

anatomy of a zipper

zippers

You love sewing with and using zippers, right? Well, if you’re new here, let it be known that I love zippers. Sometimes zippers can seem like some crazy contraption that’s out to get you, but if you know your way around a zipper, you’ll feel much more confident working with them. I’ll be covering a few common types of zippers and what the parts of the zipper are named.

Material:
Plastic coil – plastic coil zippers are quite easy to find at big box craft supply stores. They’re often referred to as an all-purpose zipper. I think they’re the easiest to use and get great results. Plastic coil zippers are easy to shorten. You can sew a few stitches (by hand or machine) over the zipper teeth where you need the length to be and then simply trim the zipper with a scissors 1/2″ past the stitches.

material

Metal – metal zippers have metal teeth and end stops. They come in many different finishes (nickel, brass, antique brass to name a few) and zipper tapes of varying colors. I love the look of a metal zipper. They are more difficult to shorten, but it can be done – with a little elbow grease and a needle nose pliers.

Zipper tape: 
Zipper tape is the ‘fabric’ that runs along the sides of the zipper teeth. Zipper tape lengths and widths vary my manufacturer and by zipper type. For example, the width of a purse zipper is approximately 1/2″ wider than that of a standard plastic coil zipper. Usually the wider the zipper teeth, the wider the zipper tape. Zipper tapes come in a variety of colors to coordinate with your project! Most commonly, zipper tape is polyester, but you can also find cotton and a few other specialty materials.

Separating or non-separating?
separatin

Separating zippers do just that, they separate when fully opened. Think of a jacket, that is a separating zipper. Non-separating zippers stay connected at one end when fully opened. Some non-separating zippers stay closed on both ends (such as a coverall zipper). It’s important to pay attention to what type of zipper a pattern calls for. If you try to use a separating zipper in place of a non-separating zipper, you could run into trouble. For example, separating zippers do not have extra zipper tape at the open end of the zipper, and if you would try to use one in place of a non-separating zipper you wouldn’t have enough zipper tape to properly install the zipper, thus leaving a gap or even making the zipper much more difficult to use. Non-separating zippers are also sometimes called closed bottom zippers.

separating

Zipper Pull(s):headtohead
There are many ways a zipper can open. Most zippers are a one-way zipper. There are also head-to-head zippers, coverall zippers, and two-way separating. When purchasing a zipper pay close attention to what type of zipper the pattern calls for.

End stops:endstops
The end stops are very important. Not only do they help you measure your zipper (see below for how to determine the length of a zipper), but they tell the zipper when to stop opening. The end stops of a zipper are usually metal on both plastic and metal zippers. You can buy replacement end stops and install them yourself, this comes in really handy when shortening a metal zipper. The end stops are located at both ends of a zipper, the pull-side (referred to as the top stop) as well as the end of the zipper (referred to as the bottom stop).

Invisible:invisible
An invisible zipper is a great choice for, you guessed it, installing a zipper where you don’t want it to show on your finished project. Garments and pillows are both common projects that utilize invisible zippers often. You can install and invisible zipper using a regular zipper foot, but I find it’s well worth it to have a specialty invisible zipper foot. For my Janome, the invisible zipper foot only cost a few dollars and it really saves time. There are special channels that guide the invisible zipper coils and keep the needle in the perfect position. When the zipper is correctly installed, you can’t see the zipper – thus it’s invisible, like magic!

Measuring a zipper:
Teeth/Coil Size – It’s true, zippers are also measured not only by length, but also the width of their teeth/coil. For example a #3 size zipper’s teeth/coil is smaller than a #5 zipper, a #3 zipper teeth/coil is 3mm wide whereas a #5 zipper is 5mm wide. Most metal zippers I use in my projects are a #4.5. A #5 is fairly wide and is most likely designed for a project where you need a heavy-duty zipper. If you’re shopping online and the listing doesn’t tell you what teeth/coil size a particular zipper is, contact the shop owner.

labeled coil zippers

Length – To determine the length of a zipper you measure from the top stop to the bottom stop. On a separating zipper, measure from the top (pull-side) stop to the end of the zipper tape (where the zipper would separate). That is the length! Easy, right?!

length

While this isn’t an exhaustive list of zipper types and features, I have tried to cover most of the common parts and types of zippers. Hopefully this information will help you next time your project calls for a zipper!

I’d like to thank Jennie from Zipit for helping me verify the information within this post and giving me permission to use a couple of her photos (teeth/coil size photos).

zippers2


Techniques

Snap Tutorial

snaptutorial

Lately I’ve gone a bit crazy with my love of metal snaps. I love all sorts of hardware and snaps are an awesome way to add a professional finish to lots of projects. I first designed the Cargo Duffle pattern and loved how the snaps looked and functioned. My Snappy Manicure Wallet pattern also uses snaps! Plus I have a few more projects coming up that also use snaps. Yay! I know that sometimes hardware can be intimidating, so I hope this tutorial will make things a bit less scary.

catnapcargo

manicure6

koiduffle

You’ll need the required size of snaps for your project and a snap setting tool and a hammer (a pin and water-soluble pen come in handy, too). I’ve had the opportunity to try several different snaps and snap setting tools and I’m excited to share with you my favorites.

First, I should talk about the snaps themselves. They’re commonly referred to as ‘heavy duty snaps’ or ‘pronged snaps’. Each snap is made up of 4 parts: cap, socket, stud, and open prong. Some manufacturers may have slightly different names for the parts, but of the brands I’ve used they’re basically the same pieces. Most are available with a capped top, but you can get open-ring style as well. They come in many different finishes, colors, and metals. And of course sizes, anywhere from size 14 to 24. You’ll have to choose which size you need based on your project, but I keep size 16 (for wallets and smaller projects, even shirts) and size 24 (for pocket flaps and more). Manufacturers usually recommend using snaps on heavier fabrics or/in addition to interfacing. Basically, you’ll want a sturdy spot to attach the snap.

snapsourcesetter

My first choice of snaps are by Snap Source. I’ve used these since 2009 and have both size setting tools and they’re still going strong. Snap Source has many choices for colors and metal finishes, I really like the ability to choose whatever color/finish will work best for me. I think they’re really user-friendly and reasonably priced. I order directly from their site and usually have my snaps within a few business days (they’re based in Michigan). I believe some quilt shops carry them and possibly some other shops online (please leave a comment below if you know or currently stock these)? The snaps come with photo as well as illustrated instructions which are both really great. I think the trickiest part is figuring out which part of the socket piece faces up (both brands I use have a socket piece in which one side is raised).  I’ll share some pictures here and hopefully you’ll find your first install to be a breeze! Below you can see (hopefully!) the inner ring of the socket is slightly raised. That raised end will face the cap of the snap.

raised-side

dritz-parts

I also really like using Dritz Heavy Duty Snaps. I can buy them at my local Hancock fabrics, which comes in really handy when I have a coupon and need some quick. Mine use a 2-part setting tool and they’re just as easy to install as the Snap Source snaps. They only come in 4 metal finishes: brass, antique brass, black and silver (and a few other colors such as navy and white), but I find that works for the majority of my projects.

I have also used the Dritz snap pliers and I can’t recommend them unfortunately, the few pliers I’ve tried haven’t held the cap part of the snap in place very well, making install pretty difficult. Possibly they’ve changed/updated them since I’ve used them last?

I should also point out that it’s probably not a great idea to try and use snaps/setters from different manufacturers. Stick with one brand and use it’s designated setting tool.

Setting a Snap (Dritz on left, Snap Source on right)

I typically* first set the cap half of the snap first. It’s the most visible and I try to be precise and measure where I want to place the snap.

  • Make a mark with a water-soluble pen then place the cap (prongs down) centered on the mark.

snap1

  • Push the prongs through the fabrics and then lay the cap into the bottom part of the snap setter.
  • The socket part gets added next with the raised part facing the cap (so raised side down in this case). With the Snap Source setter there’s a middle alignment piece that you place down on top that helps align the socket.

snap2

  • Then place the strike plate on top and hammer into place. A few solid hits usually work for me.

To get the snap to line up, I use a pin and water-soluble pen to mark the placement after I set the cap half of the snap. You can set the Stud half of the snap first, but I prefer the other way, do what works best for you and your particular project.

  • Once the Cap half of the snap is set, I fold the flap (or whatever you’re attaching) into place in it’s closed position. I slightly lift the flap and poke a pin into where the center of the snap hits on the fabric. I then lift the flap out of the way and make a mark where the pin is with my water-soluble pen.

snap3

  • With the prong ring under my marked spot, I gently push the prong through from the back. It’s easy to tell if you’re off on your alignment. Just feel for the prongs and adjust as necessary.
  • Once you’re set, push the prongs through and place the bottom of the snap setter in place underneath.
  • Then place middle alignment piece (Snap Source), stud, and setter tool.

snap4

  • Hammer into place just as you did when setting the cap.

snap5

*There are always exceptions to installation. For instance, with my Snappy Manicure wallet, you wouldn’t want the back part of the stud-half of the snap to show on the interior of the wallet, so the order of install is a bit different – the stud half of the snap is set first (which is explained in those instructions). Try and plan ahead in your particular project and you should do just great.

And what happens if I set the snap and I realize afterward that it’s crooked? Or if I don’t get it to set correctly?

No problem. I’ve been there, more than just a few times. I’ve found that with a little patience I’ve been able to remove mis-set or mis-aligned snaps with a flat head screw driver. Just be sure to be gentle when prying the parts apart next to the fabric and you should have no issues. Some brands of snaps actually puncture a hole when setting the snap, so I would be extra cautious when setting those. Do a few practice runs so you feel comfortable before attaching them to your finished project.

Happy snap setting! If you have any questions please leave them in the comments and I’ll do my best to answer them below. And of course feel free to add in any tips or tricks you’ve learned!

I haven’t been contacted by any of these companies to review their products (I’m not that cool, haha), I simply want to share some helpful tips and tricks I’ve learned along the way.