Bags, Wallets, and Zips

Tiny Treasures Basket & Tray Free Pattern

Tiny Treasures Basket & Tray Free Pattern - Noodlehead

Tiny Treasures Basket & Tray Free Pattern - Noodlehead

Yayyyyy! I’m sharing this fun (and free!) basket and tray pattern that I made up using Carolyn Friedlander’s new fabric collection for Robert Kaufman Fabrics – Euclid. It’s printed on gorgeous essex linen and I think it might be my favorite collection of hers yet.

Tiny Treasures Basket & Tray Free Pattern - Noodlehead

Tiny Treasures Basket & Tray Free Pattern - Noodlehead

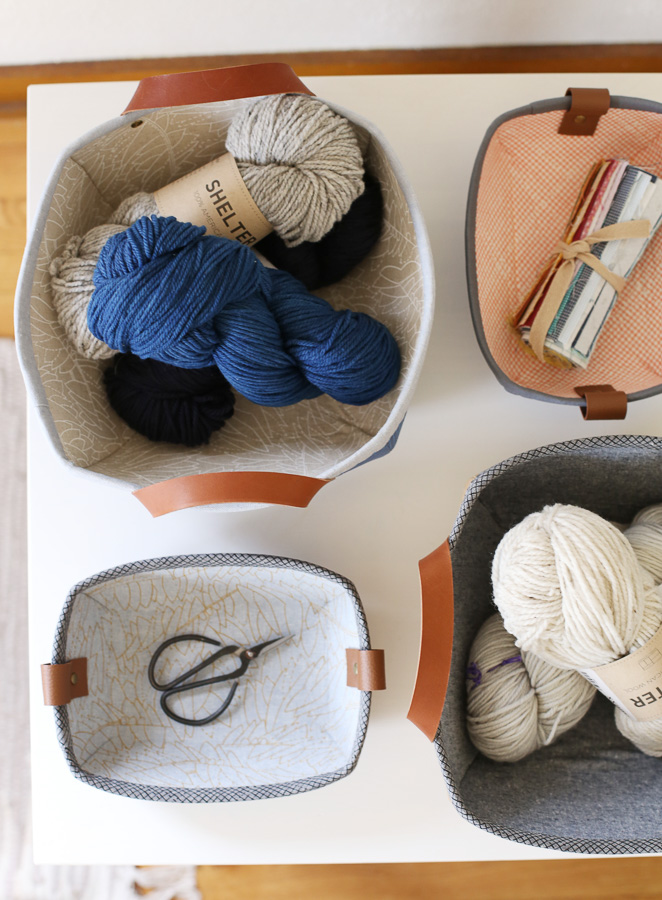
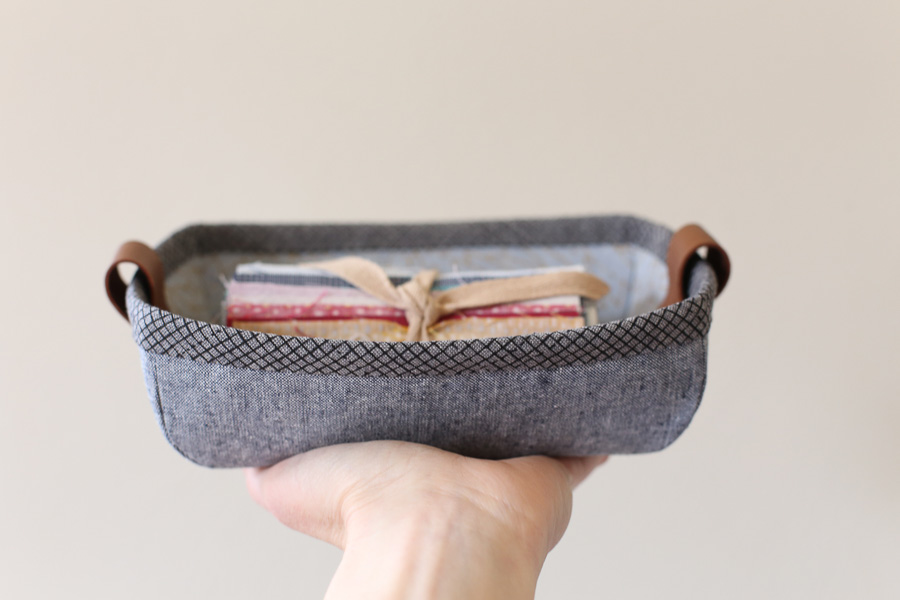
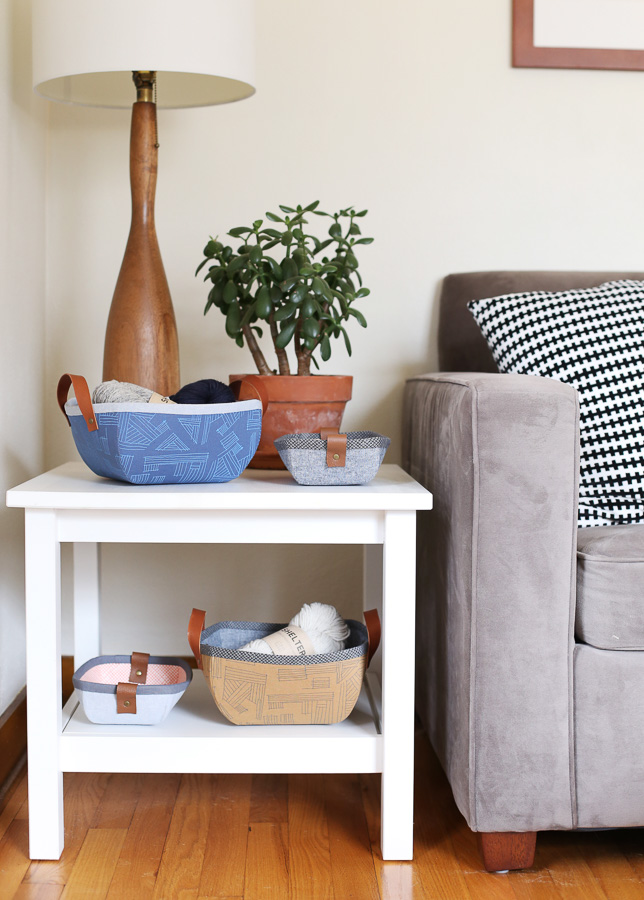
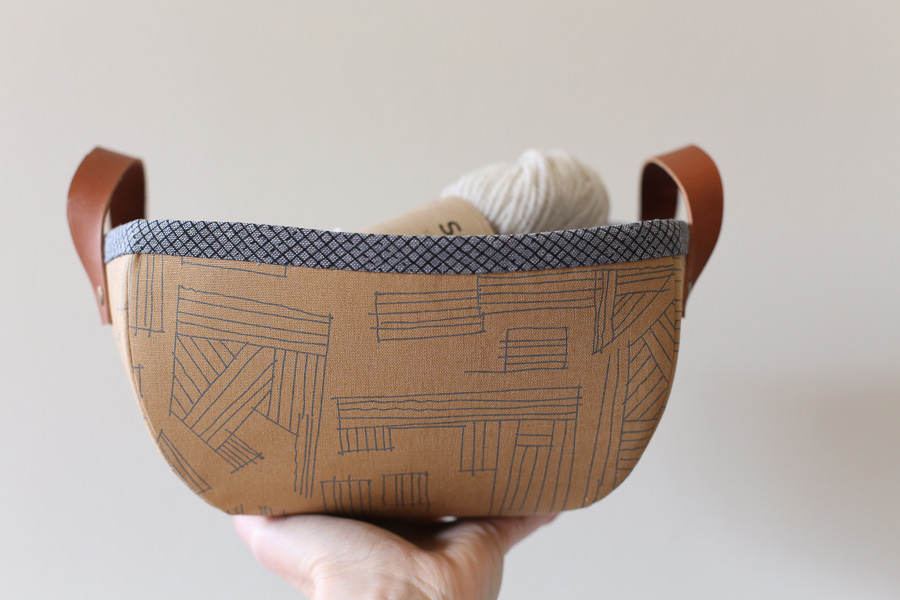
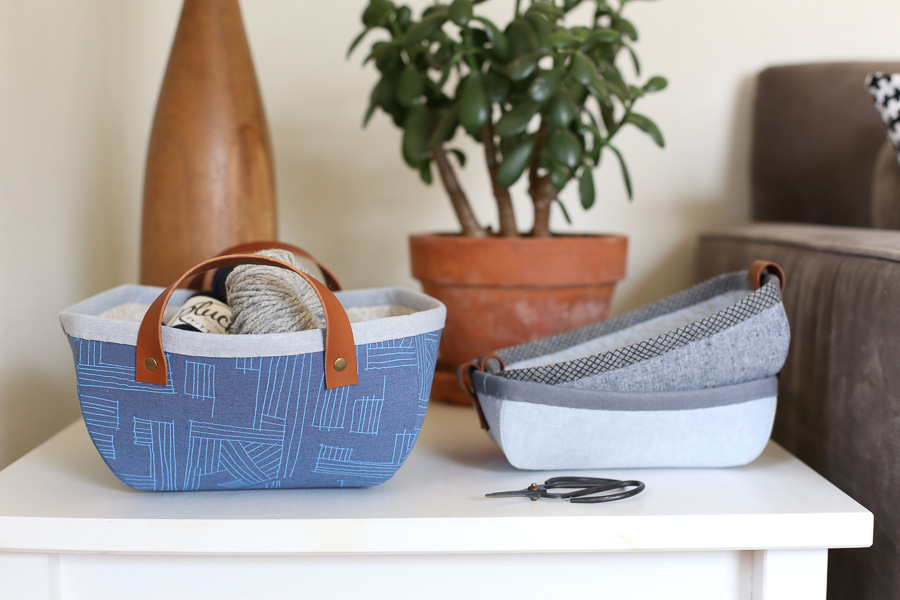
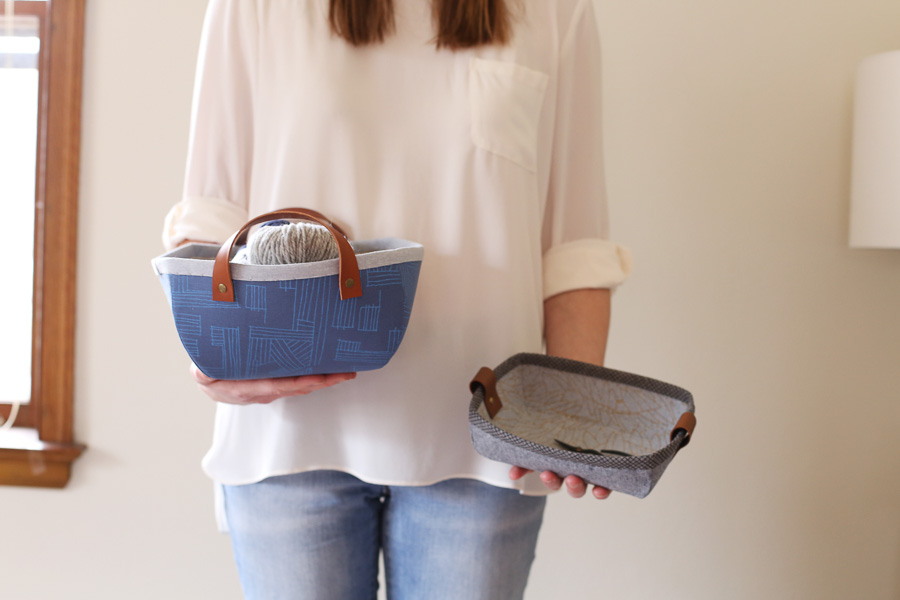
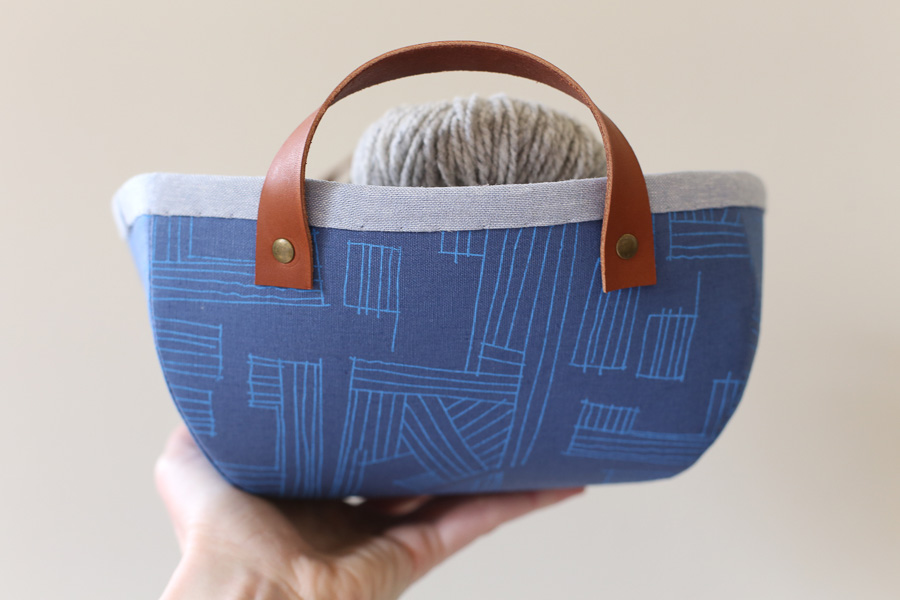
I was dreaming up what project to make using Euclid and a basket kept coming to mind. The Euclid designs are perfect for home dec items, have you seen these gorgeous napkins? I definitely need some of those in my life. I think the basket and tray are so useful and you can never have too many places to hold all your favorite things, right?! Plus, this set is perfect for pairing up and displaying on your coffee table, dresser, or even in your sewing space. They’re so great for collecting and displaying small treasures. I especially like to think that the basket is perfect for yarn whereas the tray fits a small scissors, thread, and notions so nicely.

Tiny Treasures Basket & Tray Free Pattern - Noodlehead

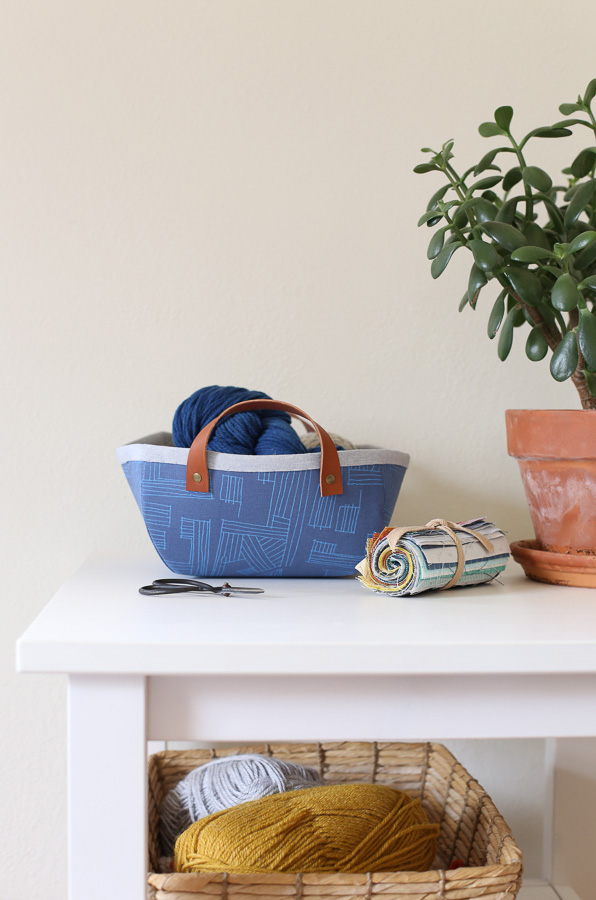
They’re a fun almost origami-like shape and the leather handles and rivets look so amazing. You could definitely sew fabric handles or get creative using thick wool felt and hand stitch them on. Either way, I hope you’ll use this free pattern and have some fun with it! I can’t wait to see what you make.

Tiny Treasures Basket & Tray Free Pattern - Noodlehead


Pattern: Tiny Treasures Basket & Tray Pattern
Fabric: Euclid by Carolyn Friedlander (coming to shops in August!)


Tiny Treasures Basket & Tray Free Pattern - Noodlehead

Let me know in the comments if you’d be interested in being able to purchase sets of leather for the basket or tray from my shop. Handles for the basket are now in my shop!

Tiny Treasures Basket & Tray Free Pattern - Noodlehead

Have a great weekend!

Bags, Wallets, and Zips, tutorial

Carkai Gatherer Crossbody Bag

Carkai Gatherer Crossbody Bag by Anna Graham for Robert Kaufman

Carkai Gatherer Crossbody Bag by Anna Graham for Robert Kaufman

I have a new free pattern to share with you! And just in time for Christmas because this one is quick and satisfying to make! I had the opportunity to design this bag for Carolyn‘s new collection Carkai (which is shipping to stores any day now) for Robert Kaufman. I can’t ever say no to working with Carolyn‘s designs, they’re pretty much my favorite thing ever – every time. I am always blown away by her color combinations! Needless to say her designs inspire me.

Carkai Gatherer Crossbody Bag by Anna Graham for Robert Kaufman

Carkai Gatherer Crossbody Bag by Anna Graham for Robert Kaufman

Carkai Gatherer Crossbody Bag by Anna Graham for Robert Kaufman

So this is the Gatherer Crossbody Bag, I had such a fun time sketching out ideas! Admittedly sometimes getting from sketch to a design I actually want to make can be so difficult as well as time consuming. But this one definitely wasn’t the case. From sketching to starting work on my prototype went really smoothly. I feel really lucky when that happens. And I couldn’t stop at just one bag, three is always more fun. Playing with the different combinations is my favorite. Especially on a new project that hasn’t been released yet. Secretly I want to keep the pattern all to myself at that point, and run off with the samples. hehe!

Carkai Gatherer Crossbody Bag by Anna Graham for Robert Kaufman

This is a small-ish bag (Dimensions: 10″ wide x 9″ tall x 2 1/2″ deep) to be worn across the body. The flap closure is a fun opportunity to try out some leather or non-fraying faux leather or suede. I think you’ll find the button stud closure (or sub in this Loxx fastener, super easy to use!) to be really elegant as well as quick and easy to install. The piping adds a nice pop an definition to the flap and front pocket. Stop by my piping tutorial for making your own and you’ll probably never want the store-made stuff again.

Carkai Gatherer Crossbody Bag by Anna Graham for Robert Kaufman

Carkai Gatherer Crossbody Bag by Anna Graham for Robert Kaufman

The straps finish in a sort of raw state which I think compliments Carkai nicely. They simply gets knotted around each side loop, although you can also use swivel/lobster clasps if you like using hardware. My goal was to keep the bag simple and one that didn’t require a lot of ‘extras’ that can sometimes be difficult to track down.

I hope you’ll try one and maybe gift one to a friend, too!

Click here to download the FREE Gatherer Crossbody Bag
(the link is on the Robert Kaufman site on the right hand side)

Carkai Gatherer Crossbody Bag by Anna Graham for Robert Kaufman

Bags, Wallets, and Zips

ten-square quilt mini tutorial

babyquilt

Hope you had a great weekend! It’s definitely starting to feel like fall here and I couldn’t be more excited for all the fall activities.

I thought I’d share a quick how-to on making the baby quilt I made a few weeks ago. You can find the original post here. I do want to point out that there are probably many ways to make this quilt. I don’t believe one way is more correct than another, so if you’ve found something that works better for you, go for it. I wanted to make the best use of this 10-square (some manufacturers call this a layer cake, either way, it’s a grouping of 10″ squares) with minimal leftovers and without a lot of planning. Again, this 10-square is by Jennifer Sampou and it’s her Shimmer Coordinates 10-Square.What that means for me is that I made the quilt in a somewhat unconventional way in order to have the most variety among the blocks. Using what I believe to be a more a traditional method, you would have duplicate blocks, but with the small number of full squares in the 10-square, I knew I’d have to do some mixing and matching.

quilt

Start by making half square triangles (HSTs). Place two full squares right sides together. Using a ruler and pencil, mark a line diagonally across the top square.favorite baby quilt by Anna Graham

Sew 1/4″ on both sides of the line. Cut on marked line.10packtutorial-02

Without picking up block, cut on the diagonal in the other direction. Press seams open. I didn’t plan out how many I made, instead I made 5-6 at a time (chain piecing) until I ran out of full squares to match them up with later on.

10packtutorial-03

Now you’ll have units that look like this:

10packtutorial-04

Place right sides together with a full square, being sure to grab two different HSTs (this is the key to getting the most variety). Align the cut HST to the outer edges of the full square. There will be about a 1″ gap between the two HSTs. Carefully pin the HSTs to the full square along the cut edge. Please note that where you are sewing the HSTs to the full square will be on the bias. Carefully pin and take your time to avoid stretching. Trim into two blocks using the HSTs raw edge as a guide for a 1/4″ seam allowance. Press seam open.10packtutorial-05

Keep going until you can’t make any more blocks. I had 3 blocks and maybe 4 HSTs leftover from my 10-pack after I finished my layout. Trim blocks to 9″ square aligning diagonal seam lines to ruler markings.10packtutorial-06

Lay out blocks in 6 rows of 6. Sew the blocks into rows. Press seams open. Sew rows together pressing seams open.

That’s it, your quilt top is finished! Hope this helps a bit for anyone who was curious. Let me know if you have questions, or if I’ve left anything out!

It’s a pretty quick quilt top! Finishes at approximately 51″ square.

folded