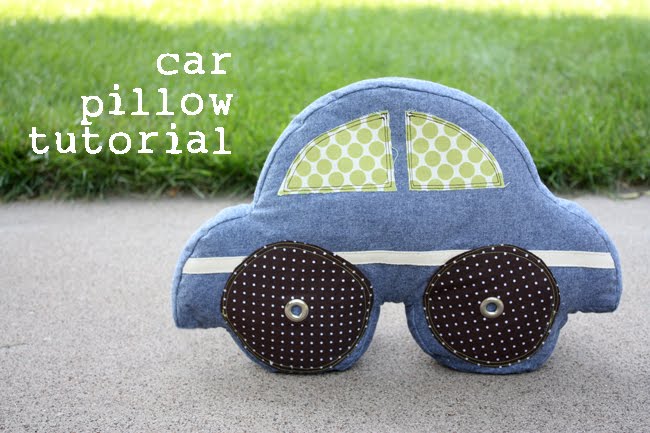
Gotta car lover on your hands? Here’s a fun little project for you to try out!
I had to make something a little fun for my soon to be nephew, so besides
all that necessary
stuff, I wanted to make him a little car pillow for his nursery. After all, his father is a car lover and
autocross specialist, so hopefully he’ll get a kick out of it, too, even though it’s not a Porsche.
Materials needed:
- 1/2 yard focus fabric
- 1 yard lightweight fusible interfacing
- scraps for windows/wheels
- 1/2 yard twill tape
- 7/16″ grommets (two)
- poly fiber fill
- heat n bond
- thread, etc.
- car template pattern piece (I set it up to print on an 11×17 paper, but you can select ’tile all pages’ if you’re printing on a regular home printer – just butt pieces together, tape, and cut out shape. The dotted lines are your cutting lines for the main car shape, but if that gets cut off in your printer’s margins just make a line 1/4″ around the solid car shape to give you room for a seam allowance.)
Cut and prepare fabrics:
Cut two car shapes from your main fabric. Cut one long strip of fabric 2 1/4″ wide by 50″ (piece together if necessary, or why not try and do some patchwork with your scraps?!).
Fuse interfacing to the two car shaped pieces and the long strip.
Decorate pillow front:
Take one of the car shapes. Pin on the twill tape and sew in place, stitching on either side of the tape. Apply heat n bond to the scraps for the windows/wheels and cut to shape using the pattern pieces as your guide.
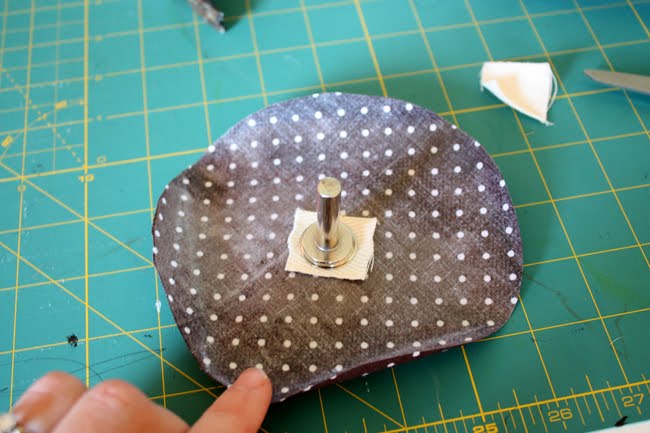
Install the grommets in the center of each wheel piece. I used a piece of larger twill tape as reinforcement, but you could also use a layer of interfacing or batting to keep it stable. There are instructions on each grommet kit, so definitely check those out. What I do is trace the inner circle of the grommet (with a water soluble pen) and cut a hole in the fabric as well as your twill tape bits or whatever reinforcement material you’re using. Put the piece of the grommet that has the stem on it through the hole on the RIGHT side of the fabric. Slip the remaining ‘ring’ piece of the grommet over the stem of the other grommet piece and hammer into place using the tool kit that comes with the grommets.
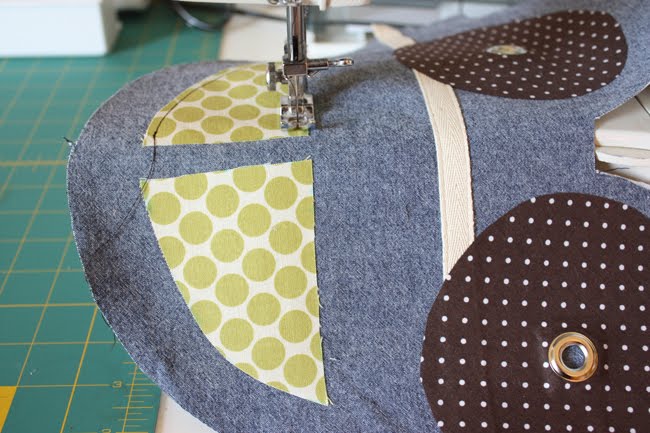
Fuse the windows/wheels into place using manufacturer’s instructions while using the pattern as a positioning guide. Sew two lines of stitching around each piece in a contrasting color. Here it might also be fun to add in the child’s name just above the twill tape for that extra personal touch.
Sew the pillow together:
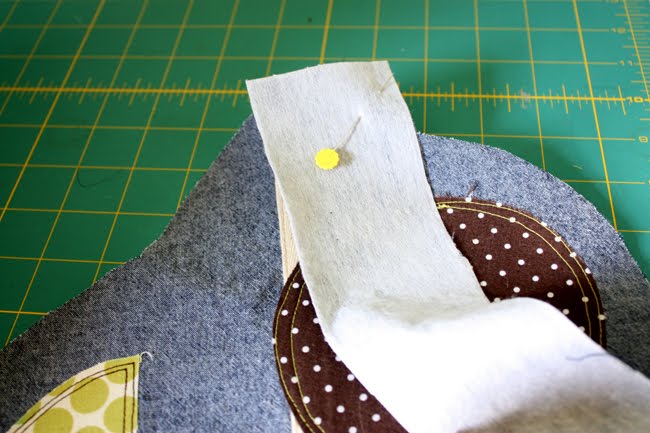
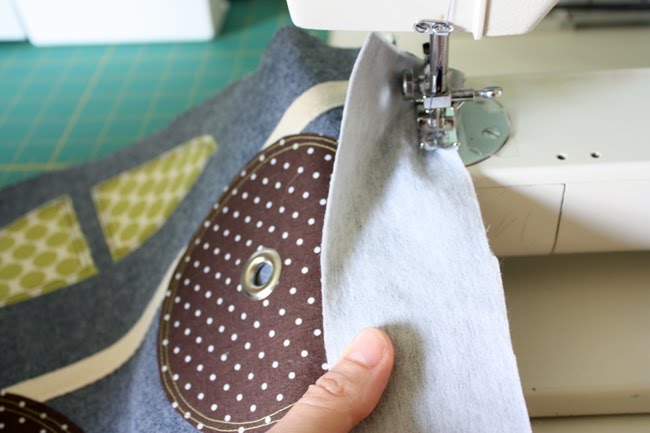
Take the one car shape piece and long strip piece and put them RIGHT sides together at the front of the car (I just found it easier to keep track of what I was doing if I put it at the front). Starting about a 1/4″ in from the edge, stitch all along the perimeter of the car using a 1/4″ seam allowance.
Being sure to stop and lift the presser foot with the needle down and pivot the material so that they align. Take your time here, just go slow and make sure the raw edges align. Now you should have this:
Repeat for other side of car, leaving a small opening in the front of the car for stuffing.
It is a small hole, but I find the less time and effort I have to put into hand sewing an opening closed – the better.
Finish!
Turn right side out. Stuff the pillow. Tuck the unfinished ends of fabric into the pillow and hand stitch the opening shut. And tada, a fun car pillow for your favorite car enthusiast!