
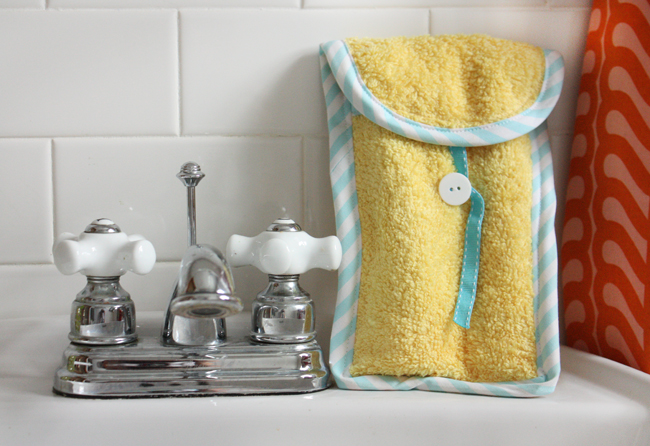
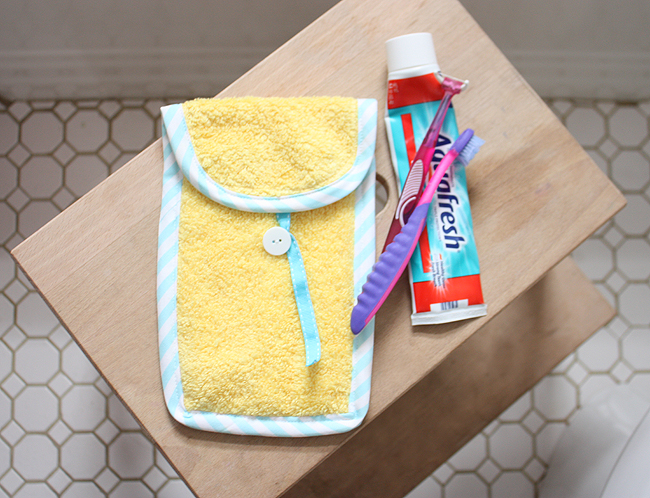
Hi there! Today I’m joining in the fun for Sewing Summit’s Travel Handmade series. I’m really excited about getting to travel on my own, it’s been a while! I hate to admit it, but usually for day trips and over-nighters I put my things in a plastic shopping bag. So sad. This little toothbrush/toothpaste case will be perfect though. No more messy, wet or slimy tooth brushing equipment floating around my bag anymore! It’s quick, easy, and cute!
Materials needed:
- bathroom hand towel, new or up-cycled (it would be so cute with a vintage printed towel!) you’ll have enough for at least 2 cases or more!
- 1/2″ double fold bias tape, store bought or handmade (I made mine by cutting bias strips 2.25″ wide), a yard will be more than plenty
- small scrap of fabric for button reinforcement
- button
- small length of ribbon
- walking foot is recommended!
Cut the pieces, you’ll need one case back and one pocket front as indicated: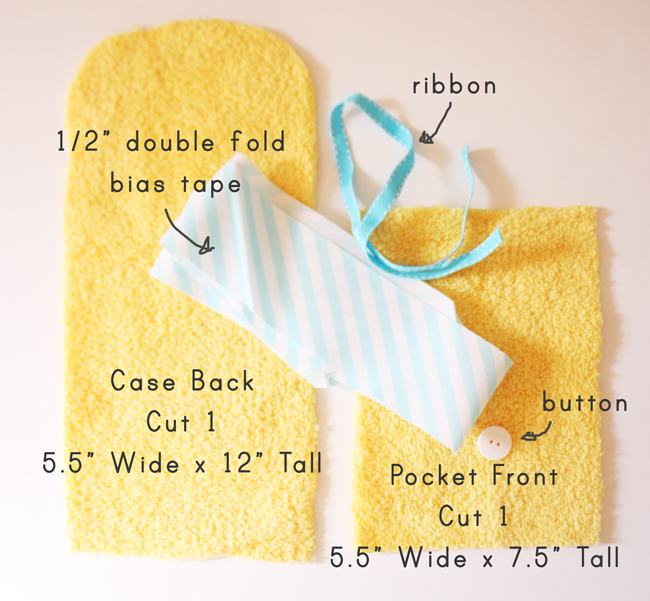
Round the top two corners of the case back.
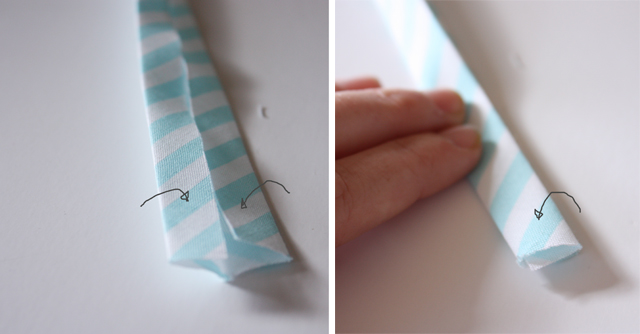
Make bias tape (unless using store bought).
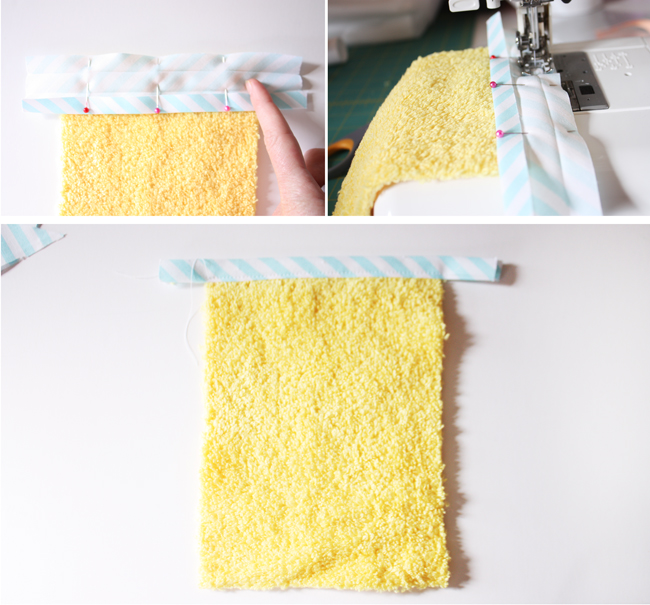
Apply bias tape to top edge of front pocket. Open up bias tape. Align raw edge of bias tape to raw edge of the front pocket. Pin in place. Sew along the first fold. Flip bias tape around the back of the pocket covering the raw edge. Stitch in place close to the inside fold. Trim edges as necessary.
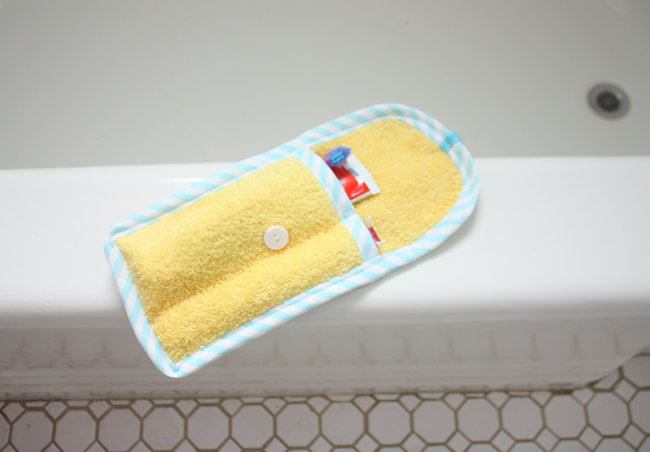
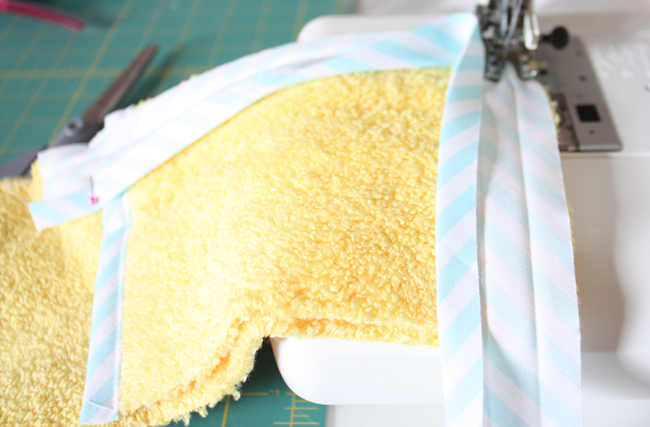
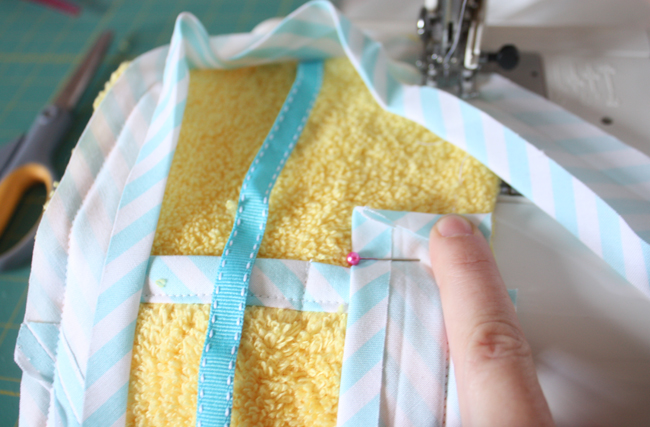
Lay front pocket on top of back case piece. Sew a dividing line down the front (through both layers) if you wish to make a divided pocket (great for stashing a flossing stick or your toothbrush. Place the length of ribbon at the top of the flap, sew in place.

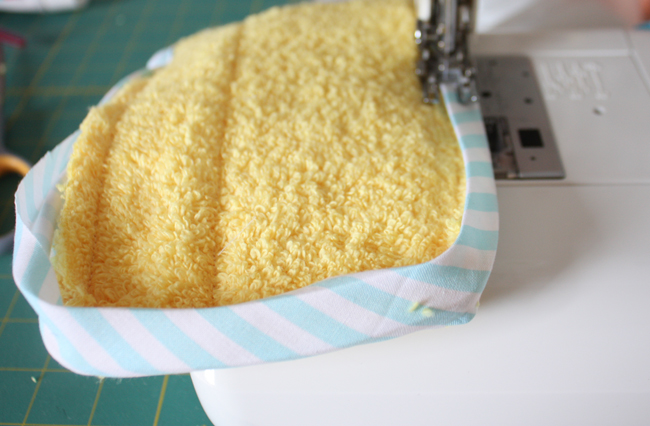
Open up bias tape. Fold short edge of bias tape to the wrong side. Pin in place. Sew along the first fold around entire case, overlapping when the bias tape ends meet up.
Fold bias tape over, wrapping the raw edge, mitering the corners. Stitch close to the inside fold of the bias tape around case.

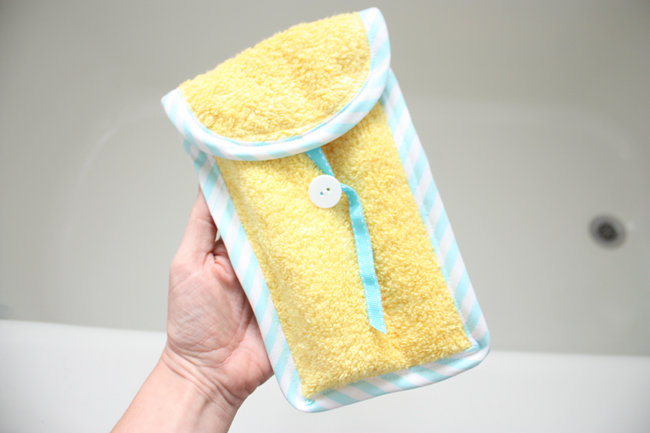
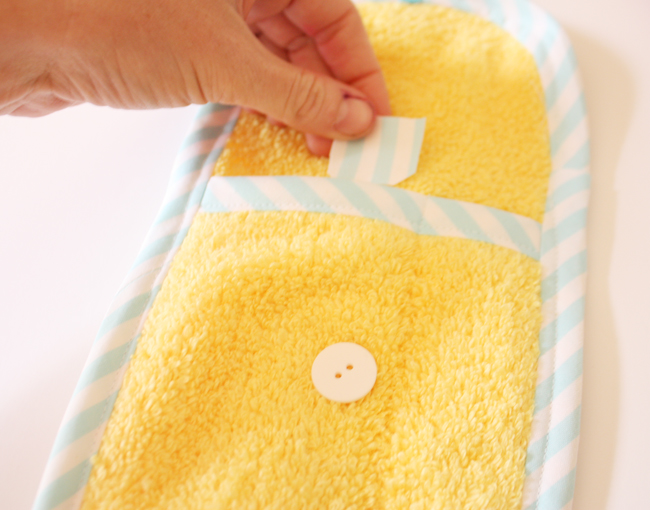
Take a small scrap of fabric and tuck it behind where you’ll be sewing the button. Hand sew button in place. And that’s it! To close the case, simply fold over the flap and wind the ribbon around the button.

ой, здорово как!!! Возьму на заметку.
This is adorable Anna, what a great idea I love it!!
ooh very cute! have so much fun!! Wish I was going!!!
🙂
Very cute!!! Look forward to meeting you!
Adorable. Love the colors together!
Thank you so much for this post. I want to let you know that I posted a link to your blog in Creative Busy Bee Craft Inspirations, under the Page 2 post on Sep. 25, 2012. Thanks again.
Thank you so much for this post. I want to let you know that I posted a link to your blog in Creative Busy Bee Craft Inspirations, under the Page 3 post on Sep. 25, 2012. Thanks again.
is a plastic ziploc baggie bad? HA! This is such a great idea Anna! Very cute 🙂
Ca-ute!!
Love this! Gotta do it for my kids, too.
Great! Thank you for sharing.
just darling!
sorry that comment above was me…my husband stole my computer last night 😉
Omagosh …. THAT’S funny….kinda cute to think A MAN was commenting!!!!
Really useful!! and seems easy to make!!!! I´ll try it!!!!
So smart! I see a few of these being made up for stocking stuffers! Thank you for sharing it with us!
What a cute and functional tutorial, thnks!
This is just perfect. I needed one of these too.
you are making me want to go even more now. 🙁 man i should have just done it again. oh well. next time. 🙂
love this! i knew there had to be a better option than the ziploc bag i always use 🙂
now this is a really nice idea!
Genius.
SO clever! Love the new blog look too!
Such a great idea, I wonder if I have time to whip one of them up…
What a great travel accessory. I travel quite often and will definitely be making one of these. I am registered for your finishing details class at Sewing Summit. I can’t wait to meet you.
So, so cute!!!
Very cute and washable, which is definatly a bonus when it comes to toothbrushes. Thanks so much for the idea and the tutorial.
What a great idea! 🙂
Oh you’re such a smart cookie! I hate the slimy toothbrush plastic bags. Pinning this one for later… 🙂
I agree iI do not like the slimmy plastic bags on my trips. Love your tutorial. Thanks for sharing….Judith,Texas
very cute anna. my kids would love one! i better get to work.
This is great, love it 🙂
This will make great stocking stuffers! Thank you for sharing.
That is seriously adorable. Must pin now!
What a great way to tote a toothbrush. I hate when mine gets the rest of the toiletries wet. This solves that problem.
Brilliant! I usually throw all our toothbruses & toothpaste into a zip lock baggie…it gets pretty gross pretty quick.
SO cute and practical! It would make my trip more fun if I had this in my purse!
I love how practical it is. I hate having to put my toothbrush and toothpaste in plastic bags when I travel. I’d rather carry this cute handmade bag.
Such a cute idea!
We are having overnight guests soon and I want to make them each one of these as a little holiday gift! Thanks for the inspiration!
Oh My! I found this just in time! Thank you so much! =)
Muito show já fiz de tecido mas atoalhado é bem mais prático parabéns.
This is a good idea. The plastic toothbrush holders can get so yucky and these would be super easy to throw in the laundry as needed. I might need to make some of these (individual ones I think) before we head to camp.
This is so cute! I’m like you, I’ve always just dumped my stuff into a plastic ziploc back or grocery bag – this is so much nicer. Thanks for the idea and tutorial. :))
Looks really neat! Thsnk you for sharing!!!!
Perfect little personal travel companion for the entire family. Such a cool idea.
This looks great!!! I’m definitely trying it.
I just have to make a conversion into centimetres.
Cute!!!