Thanks again Bloom for hosting my tutorial yesterday! I’ve really enjoyed so many of Bloom’s topics since I first found their blog. I especially loved the post on handmade gifts for Christmas, it really helped reign me in and made me realize what was most important – spending time with my children.
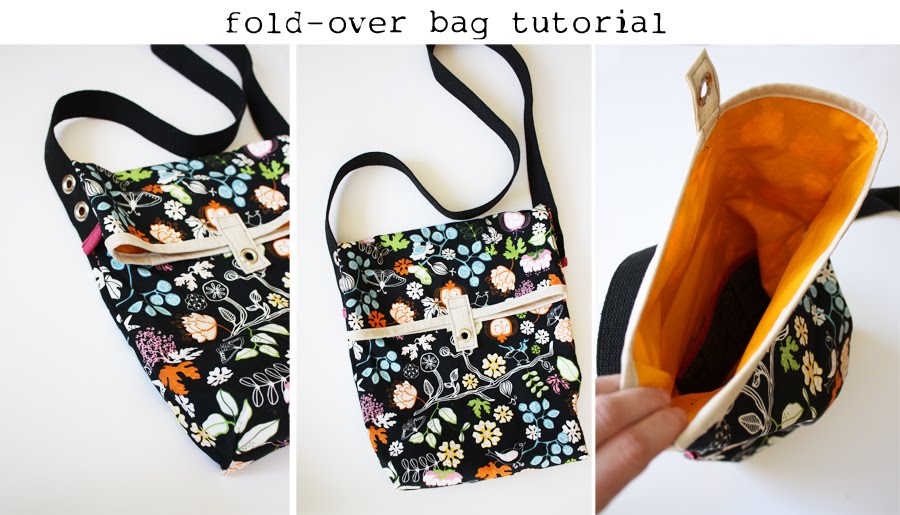
Now before I get too sappy, here it is: the fold-over bag – a casual and fun spring bag!
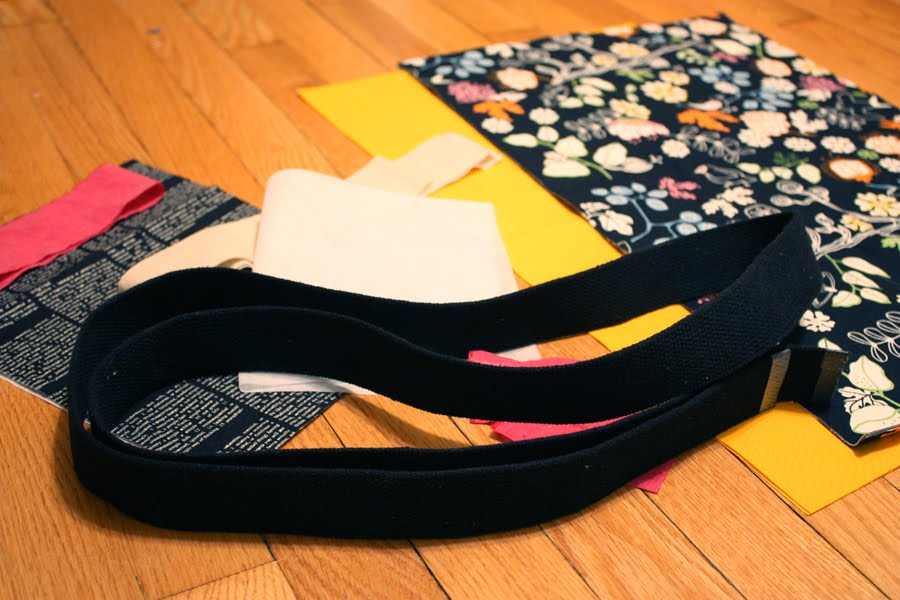
Materials needed:
1/2 yard material for exterior (you’ll need about 3/4 of a yard if you have a fabric with a directional print)
1/2 yard material for lining
scraps for pocket
double fold bias tape (I made my own, but it’s really easy to pick some up at the store, too!)
about a 1/2 yard of medium weight fusible interfacing
2 yards of cotton webbing (1 1/2″ wide)
(5) 3/8″ grommets
the usual sewing tools: rotary cutter/mat, thread, pins, etc.
Let’s get going!
Preparing your material:
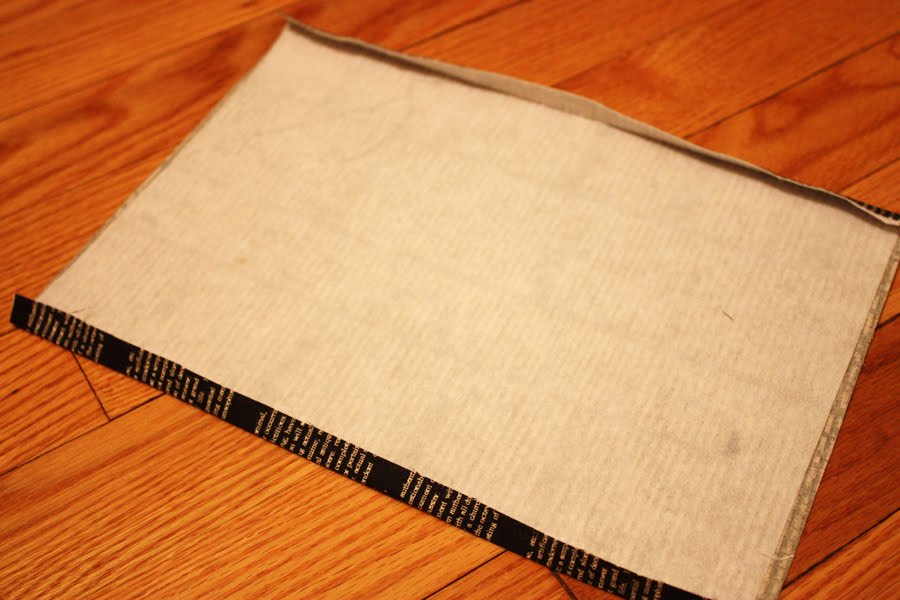
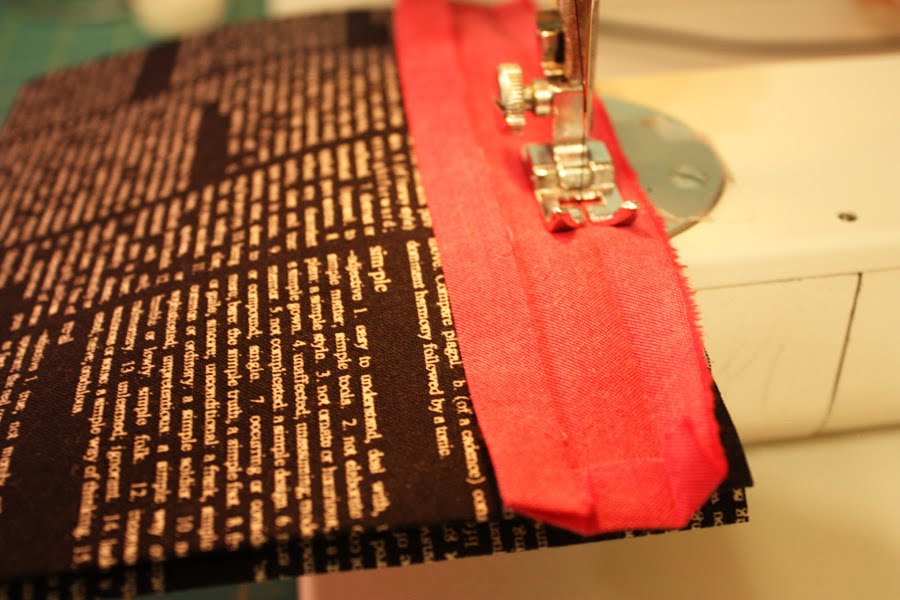
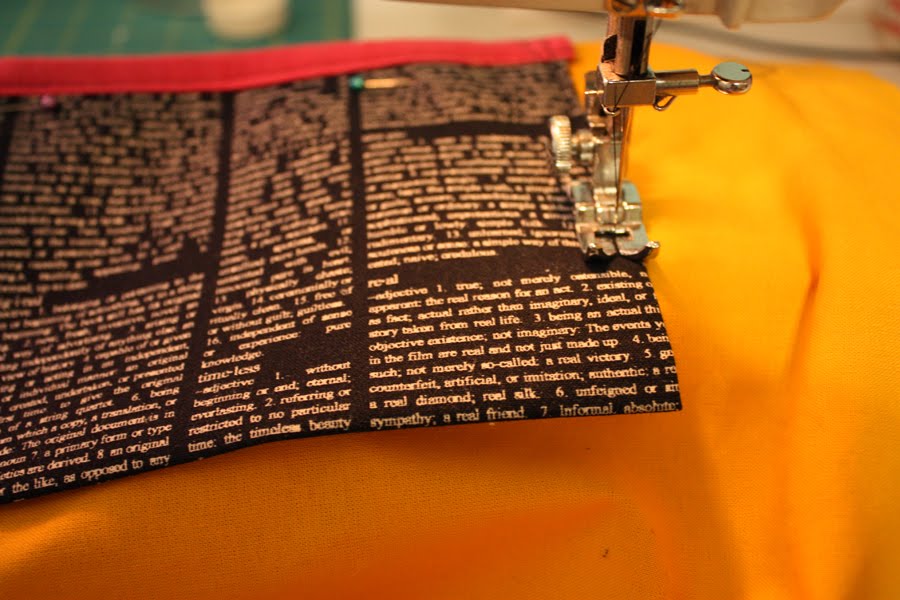
First cut your exterior and lining fabrics to 14″ wide by 22″ tall (2 of exterior, 2 of lining). For the pocket, cut a piece of fabric 8.5″ wide by 11″ tall (iron on your fusible webbing to the wrong side of this pocket piece). You’ll need to use a piece of bias tape approximately 8 3/4″ long to use for the top of the pocket and about a 32″ piece for the top edge of the bag. In both cases my bias tape wasn’t actually bias tape (since we’re not using it around any curves it isn’t necessary) – it was cut straight across the grain.
For the inside pocket:
You can adjust this pocket size as you see fit, I wanted it to hold my two most important things – my keys and my cell phone. I also like a nice stiff pocket (that’s why I’m using the interfacing – so if you don’t care about that you can just omit it).
Fold each side in 1/2 inch and press, then fold entire piece wrong sides together in half and press again.
Attach bias tape to the top of the pocket. Tuck in each raw edge of bias tape on each end by folding it Wrong sides facing by 1/2″. Next, take one piece of your lining and fuse on a scrap piece of interfacing to the wrong side. (This will help your pocket from ripping away from the lining if you get a little crazy digging in the pocket looking for your rigging cell phone.) I place the top of my pocket about 13″ from the top of my bag opening.
Sew pocket in place along both sides and bottom (I’m showing the inside of the lining so you can see how I stitched the pocket in place). You may also choose to divide the pocket by sewing a single line of stitching down the pocket.
For the bag:
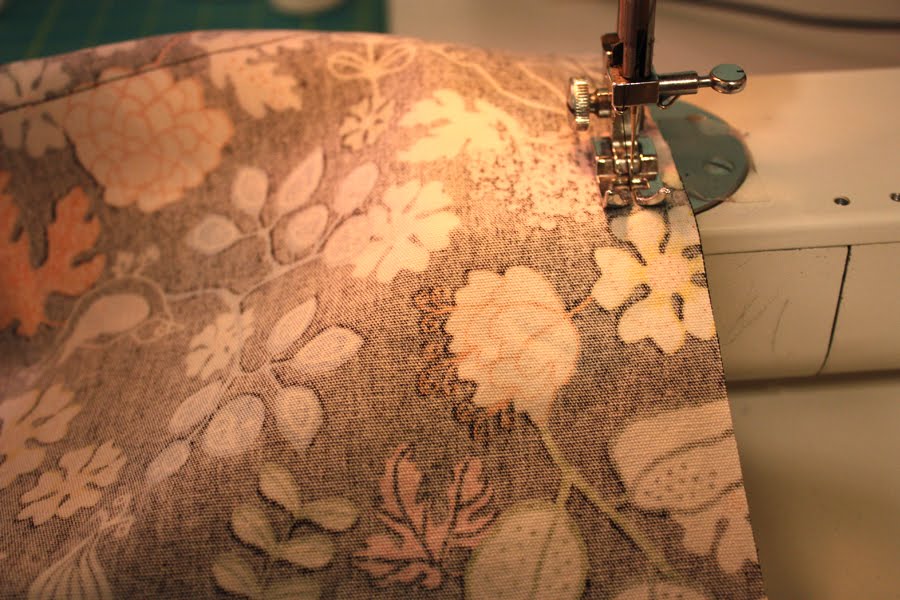
Next, take the two exterior pieces and place them right sides together. Pin. With a 1/2″ seam allowance sew both sides and bottom of bag together, leaving the top open.
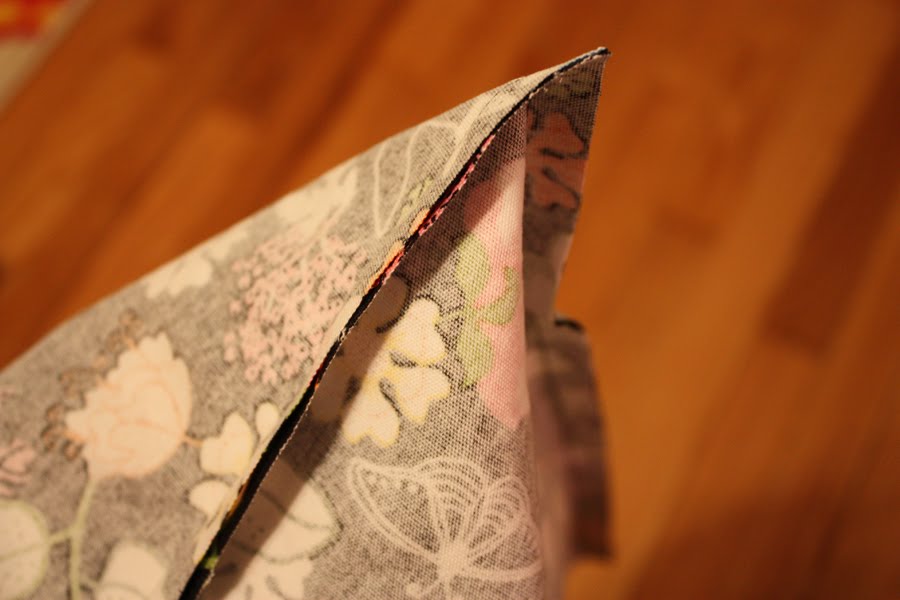
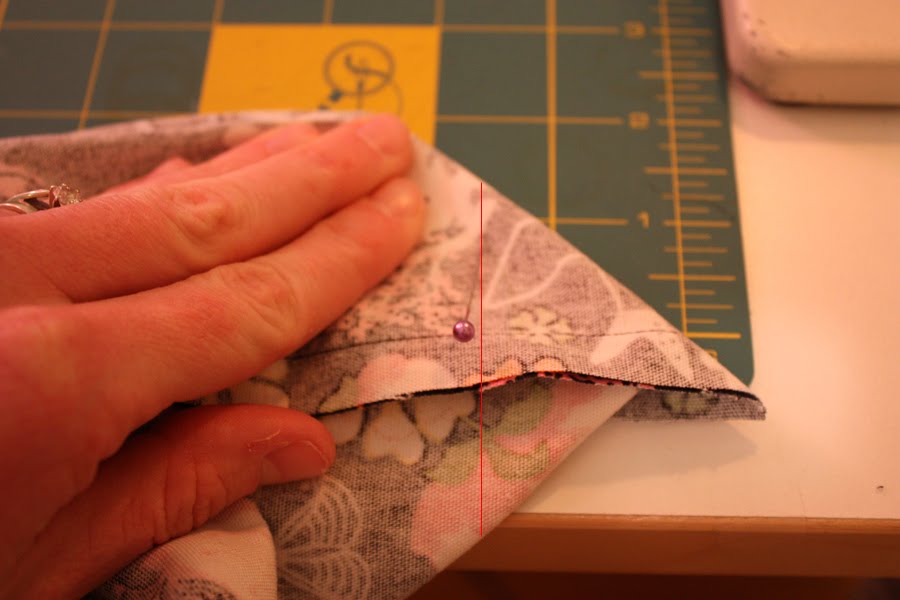
To make the boxed corners place your hand inside the bag corner and press together the two seams making a triangle.
Now measure 1 1/2″ from the tip of that triangle and make a mark (I use a pin – but that’s kind of a lazy and less precise way to make the line) perpendicular to the seam. Sew along that mark.
Trim tip off leaving a 1/2″ seam allowance. Repeat for other corner.
Do the same steps above for the lining of the bag.
Assembling the bag:
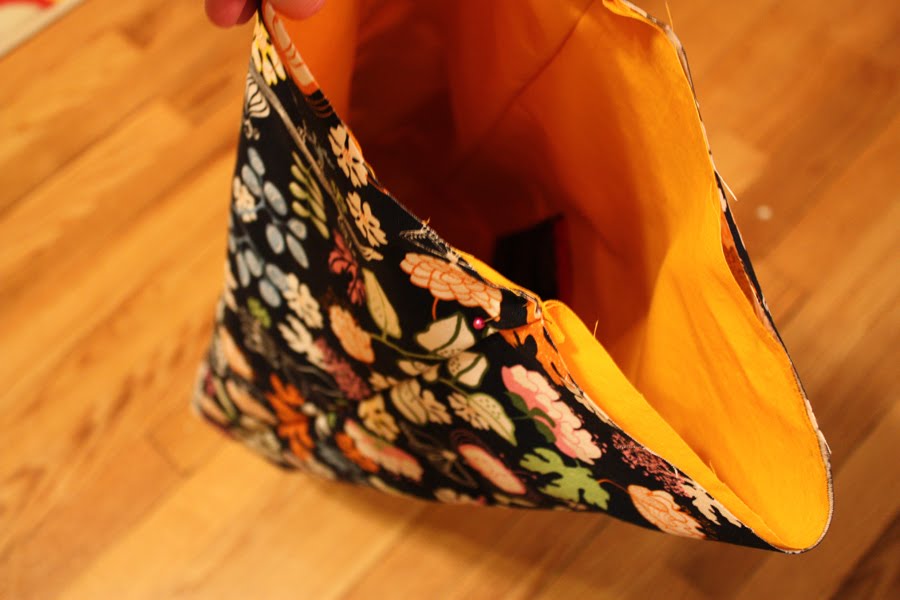
Place lining into exterior of bag WRONG sides facing together. Align side seams and pin in place.
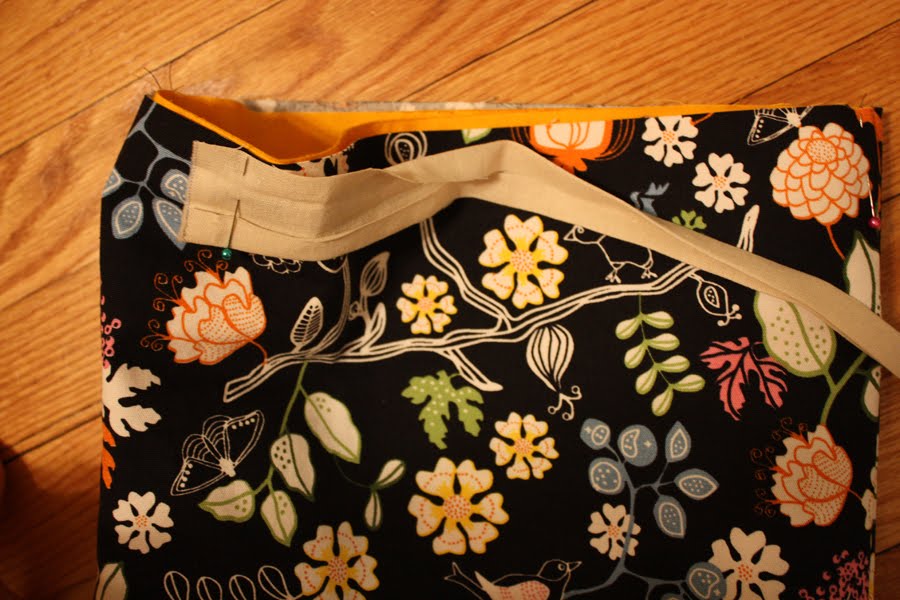
Take your bias tape and pin in place, aligning raw edges to the raw edges of the top of the bag. Start sewing along the fold about a 1/2″ in, leaving a little tail unsewn (we’ll take care of this in the next step).
Sew all the way around the top of the bag.
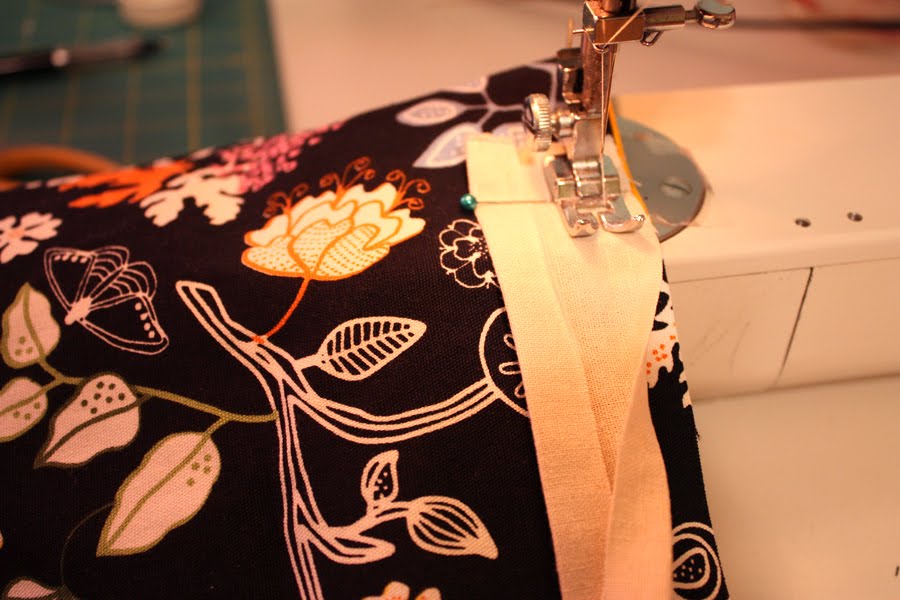
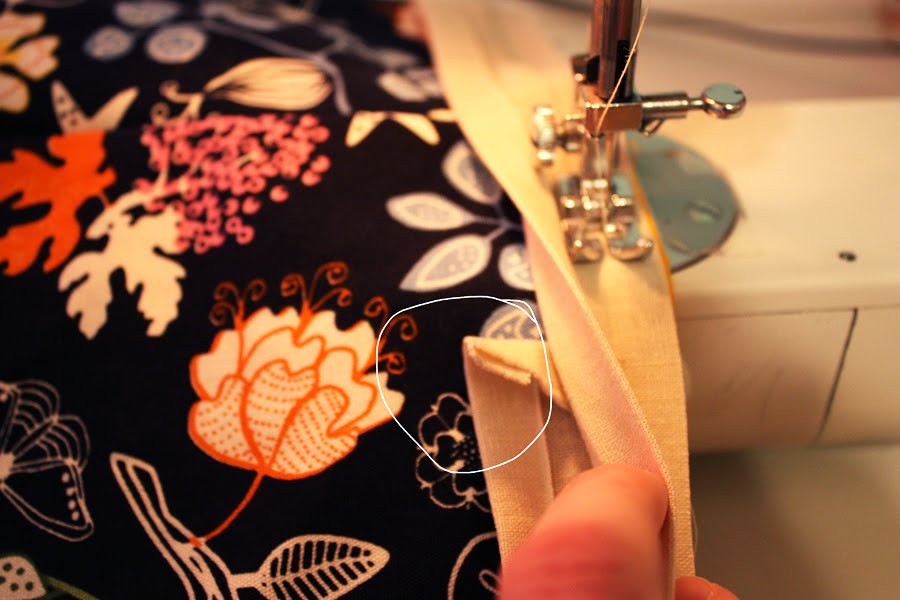
Now, fold in that little tail, that’ll leave a nice finished edged when you flip the tape over.
Flip tape over and pin in place, sew close to edge. I had success sewing the bias tape on with the lining side up, but you may want to sew it with the exterior side up since that’s the side that you’ll be seeing most.
Fold over the top of the bag and press (you can fold it over however far looks good to you, I folded mine down about 6.5″ from the top. Looking pretty spiffy now.
Attaching the strap:
I cut my cotton webbing about 49 inches long, but you can pin your strap on the bag and adjust it to fit how you like it. I wanted a cross-body type strap.
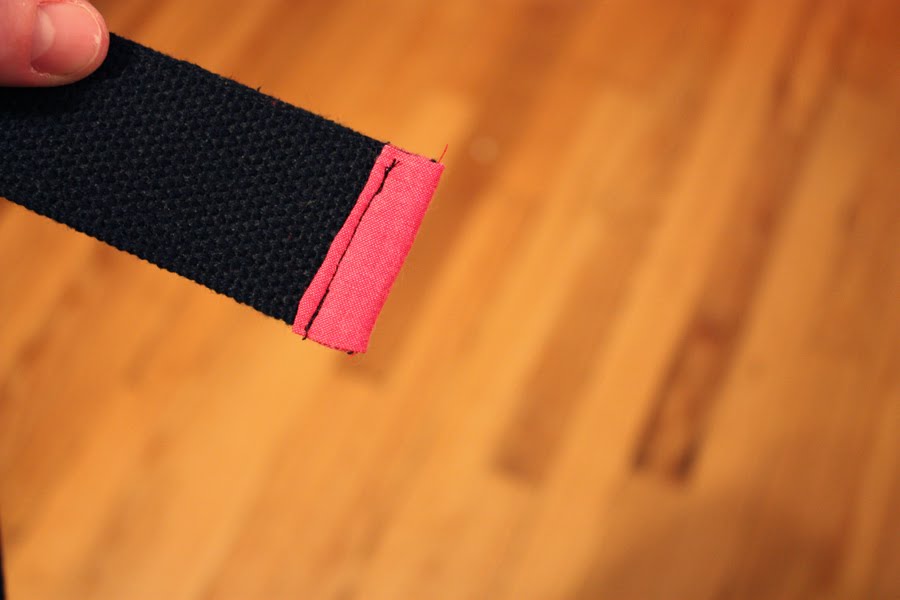
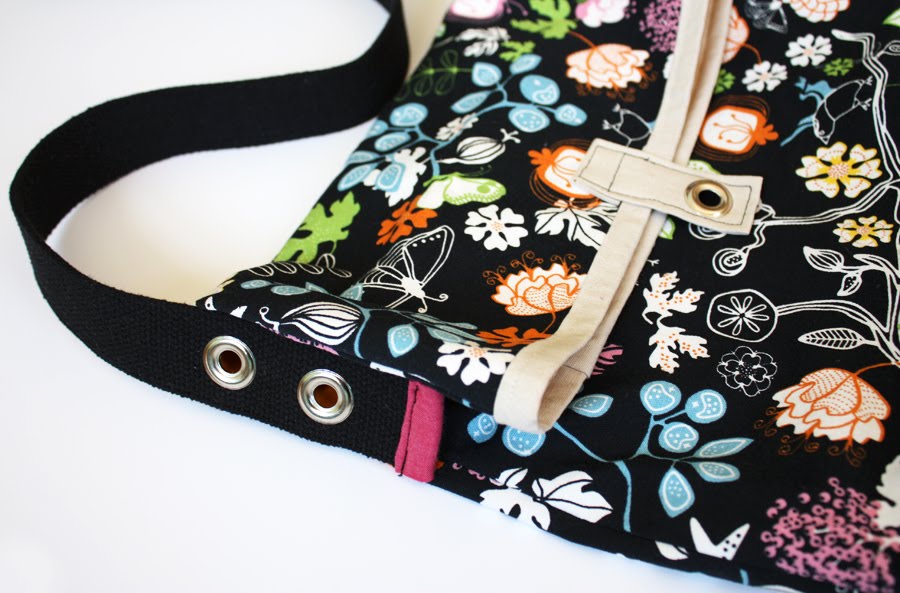
For an added punch of color (or pattern if you wish), take a few small pieces of scrap fabric and make them into double fold bias tape. Sew onto raw edges of cotton webbing – this will cover up the raw edges. My first bag I was able to tuck the webbing underneath to hide the raw edge, but the black webbing was pretty thick – so this was a nice alternative. Pin the strap in place centered on the side seams with a tail of it hanging about 4″ down from the top of the fold. Mark where your grommets will be placed, cut the holes through all layers of the fabric, insert grommet, hammer into place (be sure to read the directions on the back of the grommet package for full directions). Place two grommets on each side of bag. {If you don’t have grommets, or don’t like the look, you can also just sew the straps in place, but it can get a little tricky}. Just be sure to make sure your straps aren’t crossed and that they are parallel to the side seam when you go to insert your grommets.
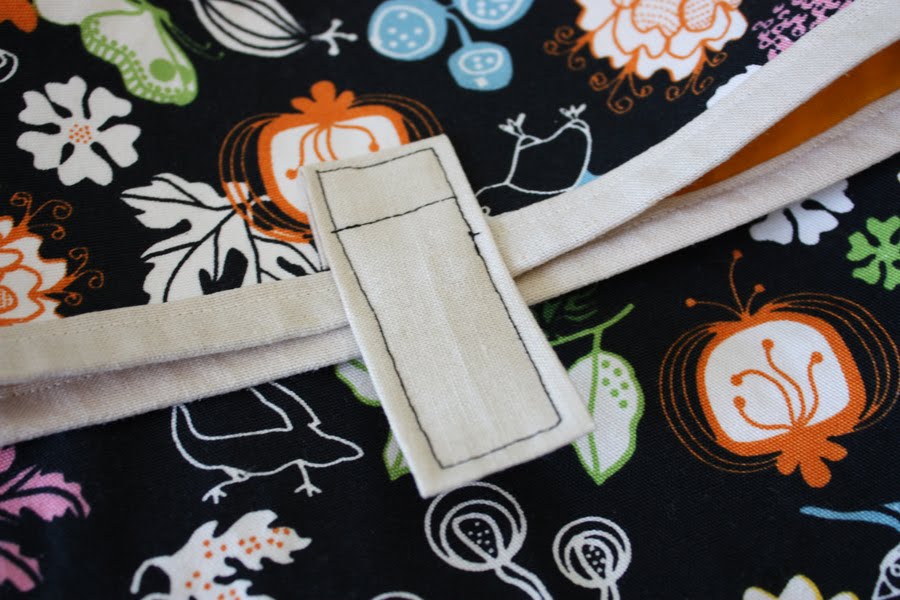
Making front tab (this is mostly decorative, but it sort of functions as a pull tab for when you want to open the bag):
Take another piece of scrap fabric 2″ wide by 6″ long. Fold in long sides 1/4″ and press. Fold tab in half with WRONG sides together and press. Tuck under the raw edge about 1/2″ at the top and pin in place on bag with this end facing the top of the bag. Sew in place by topstitching all the way around the rectangle and making a square with your stitching where it meets the bag. Attach grommet.
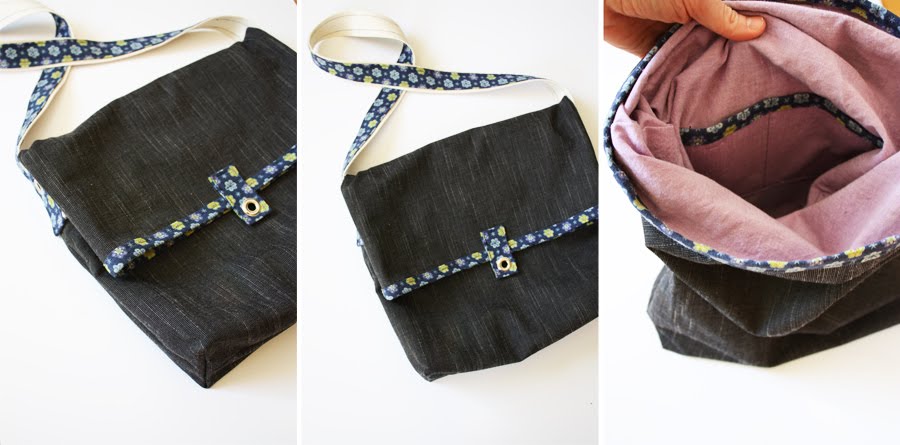
You’re done! This can be a really fun and functional bag. I used a home dec weight fabric from ikea for the exterior of this bag, but you could also use a regular quilting weight cotton. You might want to interface it with some medium weight interfacing if you choose to use a regular quilting cotton, unless you want a really ‘slouchy’ bag. Enjoy! Here’s an alternate version I made using slightly different bag measurements, but the same concept: