pattern

kidlets for the kidlets

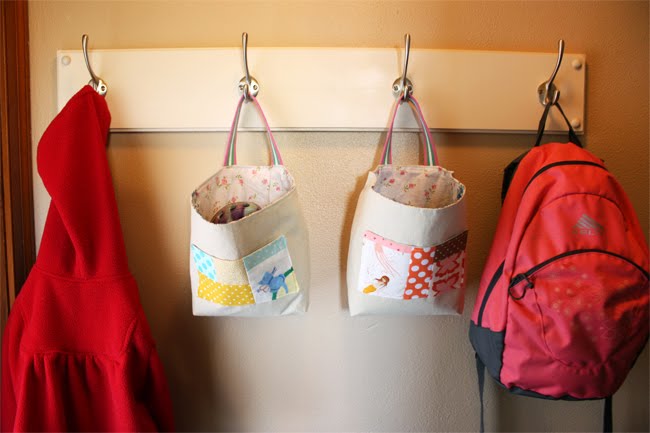
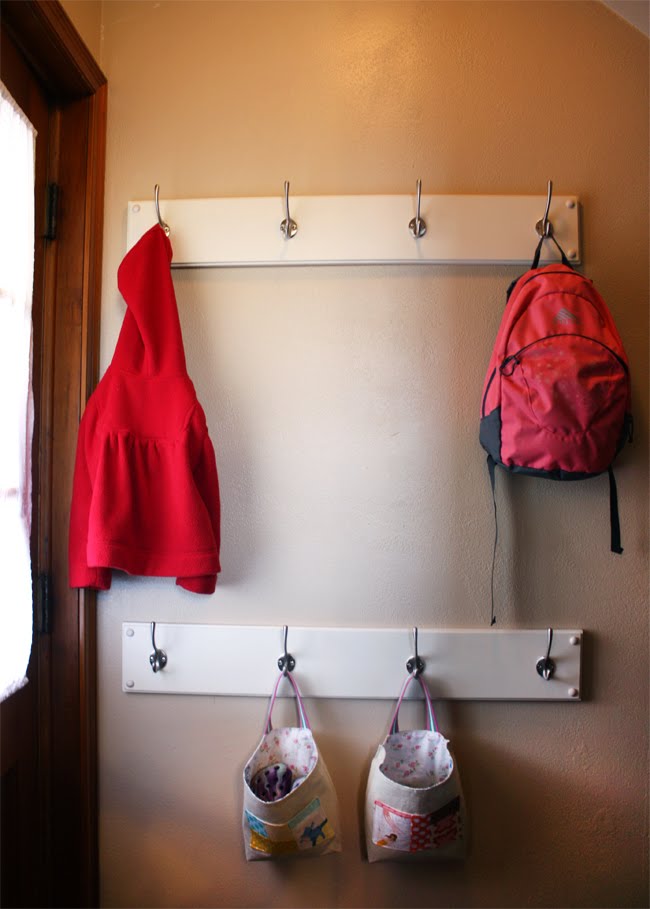
Trying to tidy up the joint bit by bit.  I’ve loved looking at everyone’s kidlets in JCasa’s flickr pool.  Yes, I love all of JCasa’s creations and it’s been fun seeing her on Sew, Mama, Sew each month!  Anyways, I had wanted to make two for the girls for their hats and mittens during the winter, but for now they’ll just hold some sunglasses and maybe a pair of crocs. 

My dad helped me out big time with the coat racks.  He helped make and install them a while back and it has been so nice!  Adults get the upper rack and kiddos get the lower one – perfect.  No more coats dangling off of every chair in our house.

I made the blue/yellow version for Emily since she is so obsessed with kitties (probably because we don’t have one).  She’ll crawl around like a kitty, meow like a kitty, and of course be the first to point out a kitty in a book or at the store.  The kitty was actually part of a vintage hankie I picked up at an estate sale, I got lucky that time. 

Also just wanted to say a special thank you to everyone who bought my first ever pattern!  Your kindness and encouragement is overwhelming.  And just to let you know the free tutorial is still over on my tutorials list. 
pattern

gathered clutch – the pattern!

 
I’m really excited to share this with everyone today.  I’ve finished putting the final touches on my first ever pattern for sale.  I couldn’t be happier about everyone’s responses on my gathered clutch tutorial and wanted to take it one step further by making it into a pattern.

Don’t worry, I’ll still be sharing lots of free tutorials, but I wanted to accomplish a few things with the pattern:

  • I wanted fellow sewists to be able to make the clutches and sell them either online or at local craft fairs or farmer’s markets (of course on a home-based production scale only).
  • I wanted to share a few additions/alterations to the clutch for those of you who want to mix things up a bit and maybe don’t want to figure it out on your own or don’t know how to.
  • I added a few tips on sewing with zippers and how to shorten them and a few other suggestions on the pattern that I just couldn’t squeeze into the original tutorial.

The pattern is a 18 page PDF with full color photographs, step-by-step instructions and lots of helpful tips.  To purchase the pattern, please go HERE! {there is also a link in my shop}

I hope to put together a post of links to shops that will be selling them online. {just send me an email if you’d like to be included in the list}

Thanks everyone for your support and all your nice comments.  And I want to send out a HUGE thank you to my mom (and dad) and my husband who allowed me extra time to finish this project by entertaining the girls.  And of course a shout out to Dana of MADE for giving me the opportunity to share my tutorial as part of her Celebrate Mom series, sometimes you just need a deadline, you know?!

pattern

spring top week entry 2

This was the only pattern I bought for Spring Top Week, and at 99 cents, not too shabby.  I was really afraid of having the top too big, so I went with a size 6 (even though I think it would be better in a size 8 or so – it’s pretty tight across the chest area). 

I used a lightweight interfacing like the patterns calls for, but it still feels too stiff, I think I would use it without if I ever made the top again. 

Of course the fabric is Anna Maria Horner’s Little Folks voile.  It was nice to work with and very light weight, which is nice for spring/summer.  It was so hard to choose which fabric from her line that I wanted to use, they’re all so pretty.