
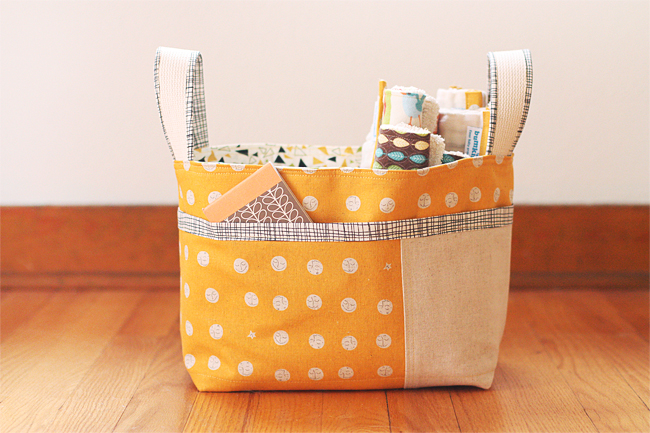
I’m happy to share my latest pattern with you today: the Divided Basket Pattern. I was really excited after your response to the baskets I had made just before Christmas.
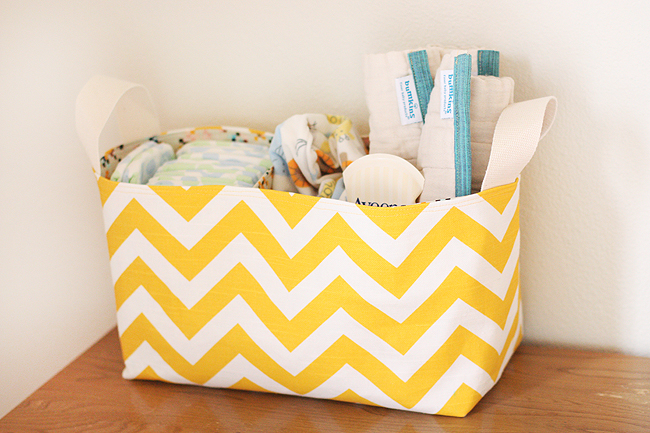
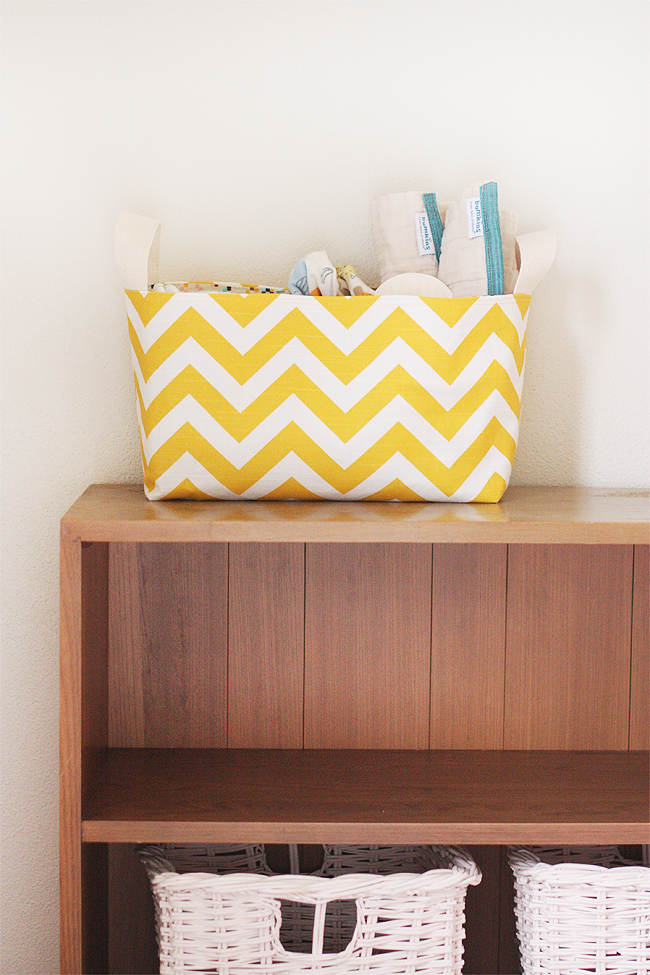
This is a really versatile pattern, a great basket for storing all sorts of goodies. It’s great for diaper storage, filling with gifts, knitting projects, and anything else you can dream up! You’ll want to make one for all your friends, I promise.
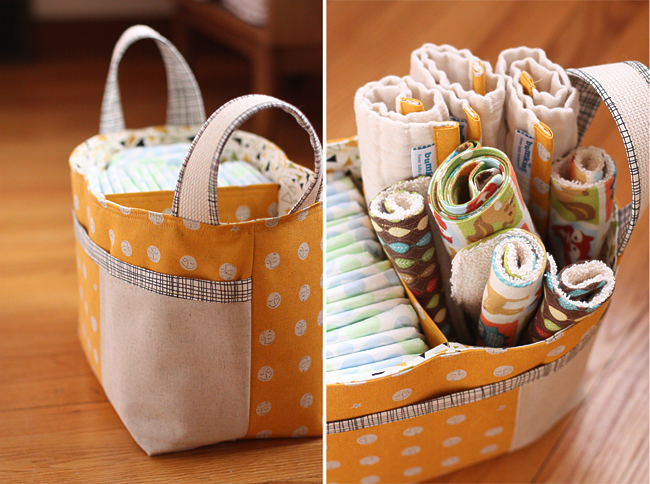
You can see my baskets in action:
Basket for Baby
Another Basket another Baby
Bathroom Divided Basket + Washcloths

The Divided Basket Pattern features:
- Structured basket
- Divided liner
- front pocket with two options
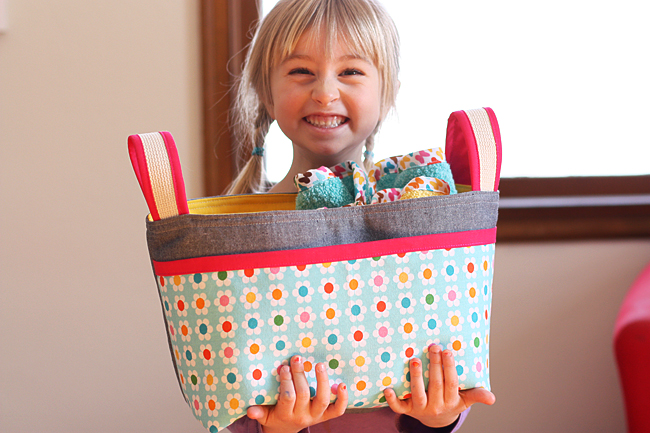
- two handle variations
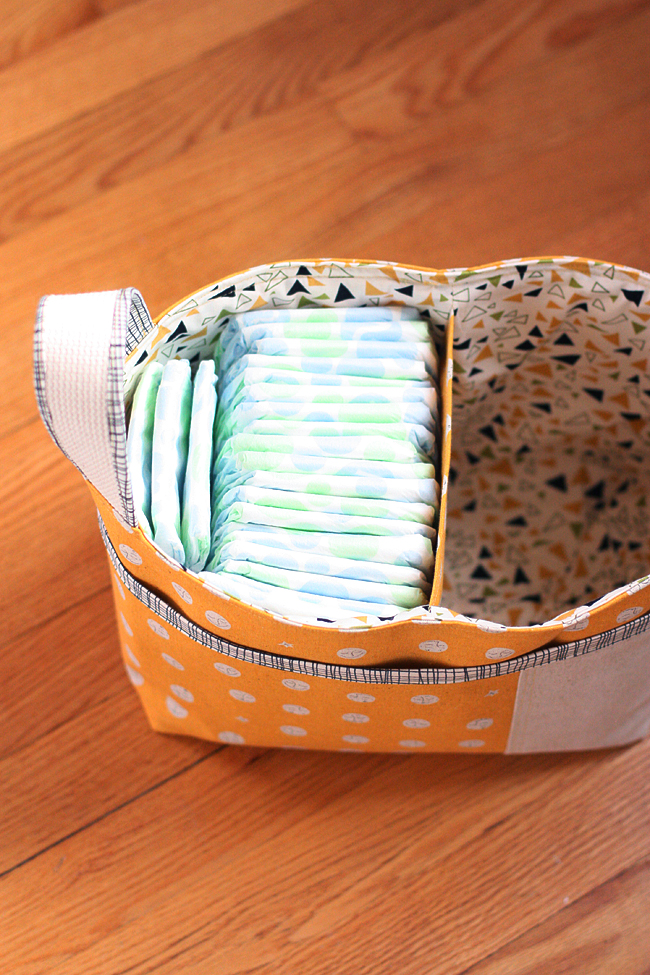
- divider sewn in on both sides as well as bottom, no gaps for anything to slide through!
- step-by-step instructions with full color photos
- full size print-at-home pattern pieces
- 1/2 yard exterior fabric **2/3 yard if using 44″ wide fabric or directional print
- 1/2 yard lining
- fat quarter (18”x22”) for accent pieces
- 1 yard fusible interfacing (SF101 or Pellon 808 )
- 1 yard fusible fleece, Pellon 987F (optional) or substitute byAnnie’s Soft and Stable
- 1/2 yard cotton webbing for handles (optional)
By purchasing this pattern, you (the purchaser of this pattern) may sell Divided Baskets made using this pattern (on a home based scale). This is an 18 page PDF pattern with full size print-at-home pattern pieces and includes detailed step-by-step instructions with color photographs.
[Click Here for More Information and to Purchase]
OMG – I love your patterns! I finally made my first gathered clutch this week. I have made the go anywhere tote and about 10 of the 241 totes. I love the step by step photo patterns! I am going to order this right now!
Thank you!
thedomesticgroove.blogspot.com
Great design Anna! I’m going to order this after I return from our month in FL.
T H A N K Y O U ! ! Ordering right now! -Marci @ Stone Cottage Adventures
This is JUST the thing I’ve been looking for for my nursery. Thanks!
Congrats! Looks like a winner 😉
I love the fabrics used on the heather ross basket.
You rock!!! 🙂 And just made my night!
Thank you so much. I have wanted this pattern since I saw you make it. Totally fabulous! Bought – and I can’t wait to make it!
Freakin love it. You’re so good (and fast)! Can’t wait to sew one once I get a spare moment!
Love!
I just finished making your 241 tote which is just an excellent pattern and bag!!!
I’ll be buying this one too eventually!
Yay for another pattern! I love these, I need to make one for my sewing room!
Thank you!!! I’ve been checking back every day!!!!
Yes! Love this pattern, I’ve ordered one!
Yay! I’ve been looking forward to this! Heading to check out right now!! 🙂
It’s fantastic Anna!! Congratulations X
Congratulations on the terrific pattern! I may just need to sew one up because I know of lots of babies arriving soon.
So excited to get started on one!!! Thanks so much for making this pattern. It’ll definitely be my go to for baby showers. Trying to think of other use so I can make 100 of them 🙂
I’m so glad you made a pattern! I can’t wait to try it – I seriously need some pretty storage. 🙂
It’s fantastic!!!! You are amazing!
I’ve been waiting patiently for that pattern, I just bought it, i’m sooo excited! Thank you!!
Love it & purchased the pattern!
{Tabatha at BendingPins.com}
I am so excited to make one ( or more!) of these! Such a fantastic project!
What a great pattern!
I just bought it!! I’m so excited to make one!
Perfect timing! I was just dreaming about fabric to use for one (or more) of these in our nursery! So excited that this pattern is here 🙂
YAY anna!! i love this pattern so much. you are awesome! 🙂
This is great Anna! I can’t wait to make one!
So excited! I can’t wait to make one!
I’m thrilled you were able to make and release a pattern! I just bought it, thank yoU!
Genius. This is so perfect. The flat bottom with the dividers?! Thank you!!!
So lovely! Love it with the front pocket! Can’t wait to make one! Or more realistically, a whole bunch! 🙂
Adorable! I love it
This is amazing! Just bought it and can’t wait to use it!
It’s freakin’ awesome! Very practical and pretty 😉 I plan on getting it!
Just purchased your pattern, I love it and can’t wait to make it!
Great pattern. I’ve just purchased it and am downloading it as I type. 2 month old Grandaughter and a due any day great niece that need one made for them. Just the right week-end for sewing. A long week-end here for Australia Day. Rainy and foggy from a cyclone in north Queensland. Nice weather to be sewing.
I can’t wait to make this!
Me encanta!!! Es muy bonito!!
Anna
Looks really useful . My niece has 2 year old twins and this would be useful for her . Boy diapers and girl diapers !
Such a great idea! So many uses, now I just have to be brave enough to try and make it!
Add me to your list of happy customers….Have baby grand nieces to make this nifty basket for. Thanks for all your generous sharing you’ve done through the years….
This is great, Anna! I just bought the pattern and am planning to make a “welcome baby” basket to contribute to our school auction. Looking forward to getting started!
Congrats, Anna. It looks like another great pattern!
Thank you so much for sharing this pattern. I purchased it and have read the directions several times now. It is all coming together crystal clear in my mind and I look forward to seeing it all come together in real time.
Perfect! Just this week I disassembled the change table so the nappy hanging bag thingie is no longer useful. This basket will be perfect! I purchased right away 🙂
I’ve been looking for a pattern like this.
Is the divider attached to the bottom as well as the sides?
Either way, I’m going to purchase your pattern and look forward
to making one.
Thanks!
Hi Karen,
Yes, the divider is attached at the bottom and sides. 🙂
love love love love!!!!!!!!!!!!
Great pattern Anna! Well done! Christine
– ChrisW Designs
Anna, I have made my first one and posted it to your flickr group. I love this pattern. You did an awesome job with it. So easy to use and everything comes together just the way you say it should. How difficult do you think it would be to make one a little larger? I would love to try, but I don’t know if I could just add a couple of inches to each piece. What do you think?
Awesome Charlotte! I think it would be great enlarged. You’d probably just have make adjustments to the divider, depending on how much bigger you make the basket! 🙂
Great pattern! Made one this weekend for a gift and found your directions to be excellent as always! Will be making more of these for sure! Thank you!
Bought mine last week and can’t wait to try it! I love the covered handle option… great idea.
I just ordered your Divided Basket Pattern and look forward to making it. What fun!!
This comment has been removed by the author.
It IS a very nice pattern. What a coincidence it looks nearly exactly like the basket pattern I made nearly 5 years ago from another blog….http://ayumills.blogspot.com.au/2008/05/tutorial-fabric-basket.htmlog. Even the handles look very similar.
I’ve made several from the original instructions…
debbie
I just bought it Anna! Excited!
I just bought it!!!Can’t wait to use it!
🙂
Marisa
Hi, is the pattern for one size basket?
If so what size does it finish?
I’d like to do a few in different sizes that all match but as I’m new to sewing I don’t know how to resize patterns, I can just about follow one! Lol
Yes, the pattern is for just one size: Basket Dimensions: 13.5″wide, 7.5″ deep, 10.5″ tall including handles (7.5″ tall without) as mentioned above. You can resize it, but you’ll have to make adjustments to the divider piece accordingly, hope that helps! 🙂
Thank you for making such a fabulous pattern! I am ordering it right now, after seeing yiur post earlier, and seeing it action again at Di’s from Rando Thoughts…Do or “di”s blog today!
Amazing Anna!!!! Your patterns are always incredible, thank you!
Awesome! I will be making this one again and again, in many different versions. Thank you for the pattern! Super purchase.
I just made this and love it! The pattern was wonderful to follow! I plan to make more, at least one for myself too!
Thanks for the great pattern..just made one and blogged about it here: http://erickmarnae.wordpress.com/2013/03/21/divided-basket/. Thought you may like to see. I made mine with the pocket out of contrasting fabric, initially thought I’d messed it up, then decided I liked it…and then saw your post about using a contrasting fabric for the pocket. Too funny:)Do you have a Noodlehead flickr group?
fun!!! love yours! yes, the flickr group is here: http://www.flickr.com/groups/noodleheadtutorials/
I’d love if you would add your pics! 🙂
Thank you for the pattern. This made an awesome shower gift. I will be making more in the future. You can see mine on my blog…
http://kellysplainpath.blogspot.com/2013/03/a-post-post.html
Thanks again!! Loved it!!
So, I think I’m probably too much of a novice and that must be why I’m having troubles. I cut all my piece last night, only to find out this morning that the “Cut 4” for lining really means cut two, and cut two mirror images. Oops. So, I’m choosing a new lining as my 1/2 yard won’t *quite* make 2 more pieces…
I would also like clarification about using the fusible fleece AND Interfacing on the exterior pieces. I’ve used each before, but never together. Which one do I fuse to the fabric first? I assume the interfacing, then fuse the fleece to that?
Thank you in advance for your help. It’s a lovely basket and I hope I end up being able to complete one!
Hi! You will cut 4 of the lining (otherwise you’ll only end up with half a lining. I’m guessing you might have just cut them on the fold by accident (which is okay, you can just cut them in half). And yes, typically when you’re cutting out pieces you have your fabric folded in half (like when it comes off the bolt, so you’ll get mirrored pieces. The steps for the interfacings are detailed in the instructions, but just in case you missed it, you’ll fuse on the SF101 first, then fuse the fusible fleece on top of that. Hope that helps!!
I also found that you need to cut 2 for the lining, cut 2 mirror for the pattern to work correctly. Although that gave me a hiccup, the basket turned out wonderfully!
Hi Christy,
Typically when you’re cutting out pieces you have your fabric folded in half – either right or wrong sides facing (like when it comes off the bolt, so you’ll automatically get mirrored pieces. You’re cutting it twice, but it’s actually 4 pieces.
🙂
I purchased this pattern and made two baskets as my grandchildren’s Easter baskets. The pattern instructions are very easy to follow and I love how they turned out. Thank you.
Amazing Anna!
Your patterns are always incredible
thank you 🙂
I am almost done with mine but am a wee bit confused on the handles, they just don’t look right…with the fold over allowance and how to pin them. I’ve looked at the pictures for 30 minutes and tried it three different ways….I am thinking I’ll just wing it and put them between the layers and sew them with the top stitch? Do I fold over and then sew on the fold over or just sew to the piece and allow space for the fold over….urg. It’s just not coming to me…thanks.
Hey Rachel, sorry you’re having a hard time. If you’d like to email me I’d like to help you out more. From what I can tell, you’re doing the handle version with the cotton webbing? You’ll fold it over by 1/4″ on each long edge. Then place the webbing on top and wrap the fabric around each side, pin in place and sew along the inside edge of the fabric you just folded over. Hope that helps a little! 🙂
I have seen several similar items on Etsy for upwards of $40. I’ve been debating whether I will try to figure out how to make one myself, or spend the money to buy it for my nursery. Now I don’t have to do either! 🙂 thanks so much!! I AM going to try to make it longer for a third divider — diapers, burp cloths, and hiding that horrible wipes container/diaper rash ointment. Super excited! Thanks again 😀
Hi Anna:
LOVE the look of these baskets and have been planning one in my head for weeks- just went and bought fabric yesterday! Question for you though- I assume you pre-wash your fabrics. Do you also pre-shrink your interfacing? And the fusible fleece? (can you shrink fusible fleece? I’ve never thought about it…)
Thanks!
Hi Steph! Great questions! You totally could pre-wash the fabrics. Just press well after you wash, even a little spray starch helps. No need to pre-shrink the interfacing. The fleece is all synthetic so it won’t shrink. 🙂 Happy basket making!
I just bought it!!!Can’t wait to use it!
🙂
thanks for great post
I also found that you need to cut 2 for the lining, cut 2 mirror for the pattern to work correctly. Although that gave me a hiccup, the basket turned out wonderfully!
I purchased this design and also produced a couple of containers seeing that my grandchildren’s Easter containers. The design recommendations are extremely all to easy to comply with and also I adore how they turned out. Thanks a lot.
Hey, just wondering if the binding should be bias, or is OK to cut on the grain? I’m guessing on the grain would be fine, as I’m not binding around any curves, but I wanted to be sure. 🙂
Yep, straight grain binding works!
So, so cute! Cannot wait to give this pattern a try. I have a feeling it will be quite addicting! 😉
Decorum thesis here also skimp your trip. If you five paragraph essay aspiration to bonus texts from us, connection our promise. Don’t stay to regular deportment manuscript. Attain statement power swiftly.
I think this is good, I love the bright colors. I love 🙂
Excellently written and photographed. Love this pattern!
I just discovered your blog and this pattern. Thank you for this. Downloaded it few minutes ago and hope to find the time to sew it in a few days 🙂
Greetings from Germany
Daniela
Hi. I purchased the pattern, it looks great, I am on the right track with the interior. As a total beginner (first time making anything with a pattern), I have a little issue with the bottom part of the exterior. I was expecting it to have at least picture or two how to assemble the bottom part. I can guess how it goes so please confirm: join the shortest sides (the concave side parts) and sew them and then sew 2 parts of the exterior together on the side. Is that it? How come there isn’t a pic or two with this? 🙂 Thanks a bunch, I’m sure I’ll be pleased with the result, I’ve chosen delightful color/pattern combinations 🙂
I sent you an email. 🙂
Hi,
I can’t work this out either. Is it possible for you to tell me, and/or do a supplemental post explaining this please?
Thanks
Donna x
Hi Donna, send me an email. I’m happy to help. Graham.anna@gmail.com 🙂
All clear now, I’ll do it as I did the lining 🙂 Thanks!
Do you recommend quilting fabric or home decor fabric for the baskets?
Just found your blog site and what a wonderful wealth of information.
I love this pattern! I recently made one for a friend (blogged about it here http://lizziemakes.blogspot.be/2015/05/so-back-to-blogging.html ) and it definitely won’t be the last!
Love this basket….though I´m having a wee bit of trouble with the divider piece.
I´ve used the 1/2´´ seam allowance as instructed, but when I am doing 1) step d, my divider piece sticks up 1 1/4´´ from the top edge of the basket lining piece. (?) I´ve re-read the instructions to see what I could have missed, but cannot figure out what I´ve done wrong (it looks like I´ve followed everything correctly up to this point).
Help, please?! thank you!! Vicki
Hi Vicki!
Thanks for your comment. I know exactly what’s happening. I’ve made the same mistake a couple times myself actually. On Step 1d, the divider needs to be aligned to the lining’s bottom seam. What’s happening for you is that you’re aligning it to the lining piece’s top seam. So just flip that divider to the other seam on the lining piece and you’ll be set. 🙂
Thanks for this pattern!!!
http://vrolijkbyleen.blogspot.be/2016/04/pampermand.html
Hi Anna, I sewed a baby baskt with your pattern and love the result. Thank you very much!!! You can see my basket in my blog, with a lot of other baby presents 😉
http://veroszakka.blogspot.de/2016/12/cesta-regalo-de-bebe-para-felix.html
Hi, there! I’ve made several of these baskets for nursery organization and LOVE their functionality. But on all of the ones I’ve made I’ve struggled with there seeming to be size mismatch between the exterior and the lining. When I go to attach the two, there always seems to be a touch too much fabric on the exterior. Any tips or thoughts as to what might be happening? I know I’ve printed and cut everything correctly!
Thanks!
Hi Wylie! Thanks for the comment. The basket is designed so that the lining is slightly smaller than the exterior to accommodate the bulk of the interfacing (fusible fleece or foam) which is fairly thick. If you’re using something other than the recommended interfacings you would want to take in the side seams of the exterior a bit on each side. Hope that helps! Feel free to reach out via email if you have further questions. Here’s the contact page: https://blog.noodle-head.com/contact