So honored that Kathleen asked me to join in on the fun of free pattern month. There has been so many awesome patterns already, and hopefully you’ll find this one handy for summer.
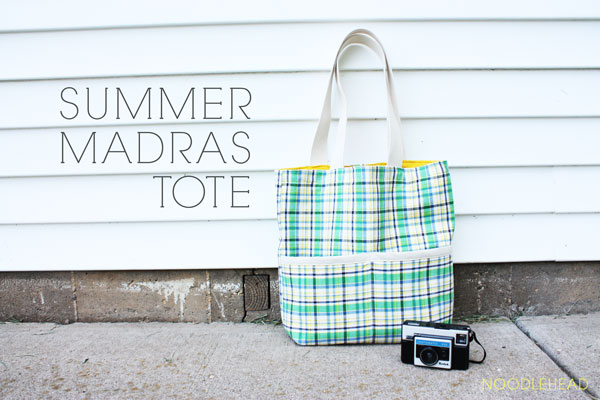
I scored lots of madras last week for $2 a yard and couldn’t think of a better project than a fun and functional summer tote.
There’s always room in your collection for another bag, right?! I hope so.
The best part is that the exterior and lining of the bag is made with 1/2 yard cuts, so I think in total my bag cost me around $8, not to shabby. Plus I won’t feel bad kicking it around at the library, ice cream shop, and around town.
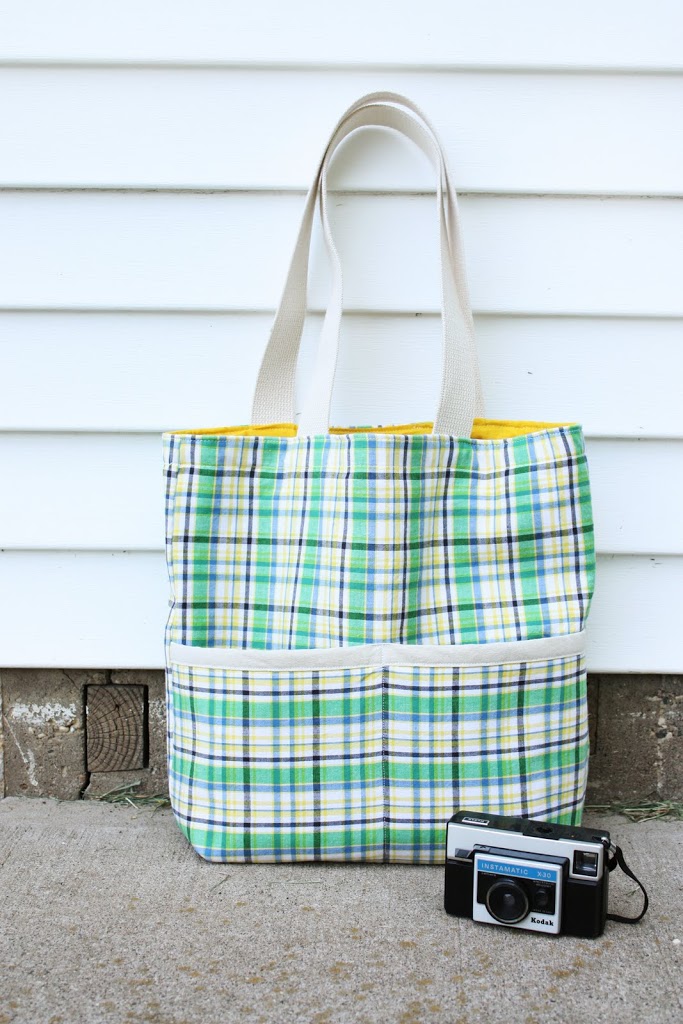
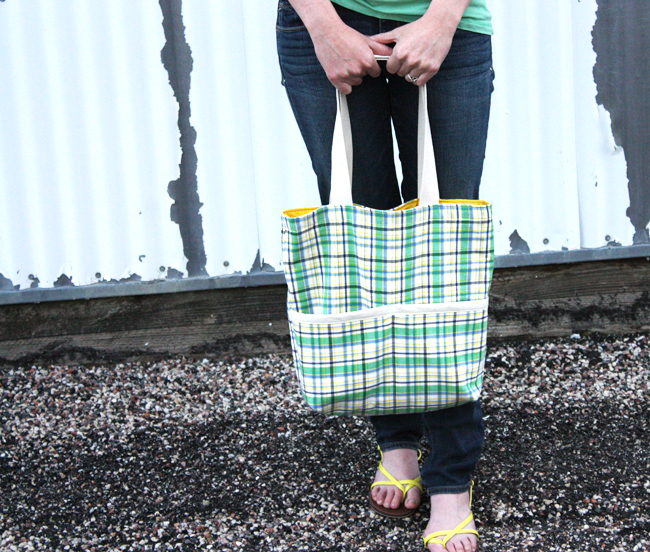
With two exterior front pockets my super important stuff won’t ever get lost at the bottom of the bag, and this tote is a big one.
Materials:
- 1/2 yard exterior
- 1/2 yard lining
- 1/2 yard cotton canvas – used as interfacing
- cotton webbing for handles, I have 1.5″-wide available in my shop, or 1″-wide webbing (both widths available natural and black by-the-yard)
- small strip of straight grain double fold bias tape, you can make it yourself with a piece of scrap!
- size 14 needle
Cut:
2 pieces of each exterior, lining, and canvas to 17″ wide by 16.5″ tall.
1 piece of each exterior, lining, and canvas to 17″ wide by 9″ tall
1 piece for the bias tape 17″ wide by 2.5″ tall
2 – 24″ pieces of cotton webbing
[1/2″ seam allowance included unless otherwise noted]
Prepping the exterior pocket:
Start by making the bias tape strip. You’ll need to fold it in half lengthwise WRONG sides facing, open up, turn raw edges to pressed line and press again.
Take the three pocket pieces (exterior, lining, and canvas) and place them WRONG sides facing with the canvas in the middle.
Open up the bias tape, pin along top edge of pocket. Sew along first crease line.
Fold the bias tape over to the back (lining) side of the pocket and sew again close to the edge.
Baste along remaining edges of pocket piece. Set aside.
Assembling exterior:
Place one piece of exterior fabric on top of one piece of canvas. Then place the assembled pocket piece exterior facing up on top.
Sew down the middle of the pocket piece, marking a line with a water soluble pen if desired. This creates your divided pocket. You might also want to do a few stitches across the top just to reinforce the pocket.
Now place the remaining exterior piece RIGHT side down, then the remaining canvas piece of top of that. Pin along both sides and bottom edge. Sew along all three edges.
Now stick your hand inside the bag and pinch the bottom corner so that the side and bottom seams are aligned. With your water soluble pen mark a line that is 2″ from the tip of the corner, perpendicular to the seam. Sew along that line.
Clip corner. Repeat for remaining corner.
Assemble lining:
Place lining pieces RIGHT sides together. Pin. Sew along both sides and bottom leaving a 5″ opening along the bottom edge for turning. Again as with the exterior, stick your hand inside the bag and pinch the bottom corner so that the side and bottom seams are aligned. With your water soluble pen mark a line that is 2″ from the tip of the corner, perpendicular to the seam. Sew along that line. Clip corner. Repeat for remaining corner.
Handles:
Align the raw edges of each handle with the raw edges of the top of the tote. Baste in place so that the handles are 5″ apart.
Finishing the tote:
Slip the exterior into the lining piece RIGHT sides facing. Sew around top opening of the tote. Turn right side out through the opening you left in the lining. Tuck in raw edges of lining and sew shut using a small seam allowance. Push lining into the exterior and press along the top edge.
Sew two rows of top stitching along the top edge. I suggest using a slightly larger stitch length for top stitching.
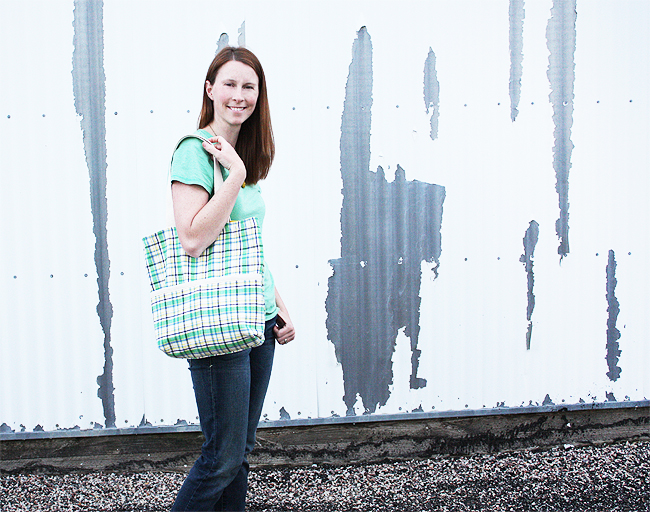
Sling it on your shoulder and you’re ready for a fun summer! Thanks so much for having me Kathleen.


This looks like the perfect sized bag for big and small adventures! I think I need to make one…..
Just a quick note to let you know that a link to this post will be placed on CraftCrave today [01 Jun 10:15am GMT]. Thanks, Maria
Totally unrelated- I love those yellow sandals! where did you get them?
This bag is too perfect. I need to get my machine out!!
love this, can’t wait to try it!
This could possibly my favorite tutorial from you, although all your tutes are great! I love this bag so much!
Love that your sandals’ color is matching with the lining of the bag!
Anna, I featured this on my blog today! Thanks so much for sharing 🙂
I whipped up a bag following your tutorial this last weekend. LOVE it!!! Great job on the tute, great bag. Can’t wait to put mine to use. Thank you! You can see my bag at: http://tssimplecreations.blogspot.com/2011/06/my-new-summer-tote-bag.html
Too cute! I hope you don’t mind but I posted your tote bag tutorial on my blog!
http://www.deeindesign.com/blog/2011/08/bags-totes/
Cheers 🙂
Thank u very very much! I just did one and it’s amazing and very simply. Love this! Can I add on my blog a link to your blog for this good tutorial? my blog: http://www.sijte-eko.blogspot.com/
I cut out the pieces a year ago when you posted it and never got around to the sewing part. Finished it up yesterday and I love it! Thanks for a great tutorial. I’m now thinking about a second one 🙂
Hi Anna,
I’m so glad that I found your genial blog, particulary I love the bags, wallets and zips.They inspire me, thanks so much for sharing tutorials. Your girls are so fun and lovely !
I’ll like you to visit my recently blog, I love sewing and now finally I have time to create and learn more .
A friendly hug from Portugal
Ana (like you :)) Lopes
http://www.lovecraft2012.blogspot.com
What kind of sewing machine do you have? The stitches are beautiful! I’m in the market for one.
hi! here’s a post on my machine: https://www.blog.noodle-head.com/2011/01/my-new-sewing-machine-and-some-tips.html
Thank you so much for this great tutorial! I just made it this afternoon, with just a couple of adjustments… (I used fuse-able interfacing. Plus added a small interior zippered pocket – if only you’d had a tutorial for that!)Here’s a link to my version: http://greenlass1968.wordpress.com/2012/07/22/400/
Hello!
I stumbled upon this tutorial a long time ago and then pinned it. Later for my wedding I knew these totes would be perfect for my bridesmaids! Thank you for the great tutorial.
P.s it opened the door for my many sewing projects! 🙂
very pretty!
I linked to your tutorial on my blog – thanks for sharing!
doro K.
Love your bag tutorial. I just finished my third bag today following your pattern. I have made slight adjustments such as making 3 pockets on the front of the bag instead of 2. I just ran the strap all the way down to the bottom of the bag and sewed into place which then formed the 3 pockets. Your tutorial is always the one I refer back to when needed. Thanks.
Great tutorial. Thank you. I hope I can get started on this very soon.
I love plaids and I love your bag!
OMG! Where do you find madras? All I see is the patchwork kind and I REALLY don’t like it!!
I got mine at Hancock Fabrics, but I’m sure Joann’s or Hobby Lobby might have some. It’s kind of a seasonal fabric, so they should be stocking up now. 🙂
Hi Anna, I LOVE this pattern so thank you for sharing. I made one up at the weekend in Melody Miller Ruby Star Orange Clocks 🙂 I’ve just started my own blog & featured my make with a link to this tutorial on my 1st post. I hope you dont mind!! Here is the link if you want to check it out – http://fabricah.wordpress.com/2013/06/24/totes-are-my-new-favourite-thing/ x
great for bathroom totes for teens, who don’t want any one into their stuff. Making one for each of the grandkids for Christmas and filling it with all their bathroom needs.
What a great gift idea! Thanks
Thanks for the detailed instructions! I am teaching myself how to sew again after 30+ years! I thought you might like to know that I pinned your blog post. You also might like to know about a vintage fabric giveaway I’m hosting on my blog: http://livingvintageco.com/2015/02/sewing-ideas-using-vintage-linens-giveaway/.
ive made SO many of these they are amazing and my go to gift for baby showers!!!!
I love the pattern with pockets. I am striking out finding the cotton belting/webbing. I cannot find it online or at my local fabric store. JKMribbons list it but only the nylon webbing shows up. I definitely prefer the cotton in beige or natural.
Hi Jeanne,
Thanks for your comment. I had purchased mine at my local Hancock Fabrics or Hobby Lobby. I also have purchased from an etsy shop: https://www.etsy.com/shop/AGraffSupplies
I’m planning to make this bag this week. What other options could I use for a stabilizer besides canvas? I haven’t been able to find a great deal on it so looking for something less expensive. Thanks for the great tutorial!
Hi Jasi,
Thanks for your comment. You could try Pellon SF101 or Pellon Craftfuse 808/809. 🙂
Thank you for the tutorial. I just used it to make a bag for a damqg tote swap and am now sad because it won’t be mine.
Great tutorial!! I have tried and it’s wonderful..thanks!!
Been looking for the perfect, straightforward tote bag for months and months. Now found it. Thank you so much.
Thanks for this pattern! I wonder if I could replace the canvas with thin batting and make it a quilted tote? May give it a try!