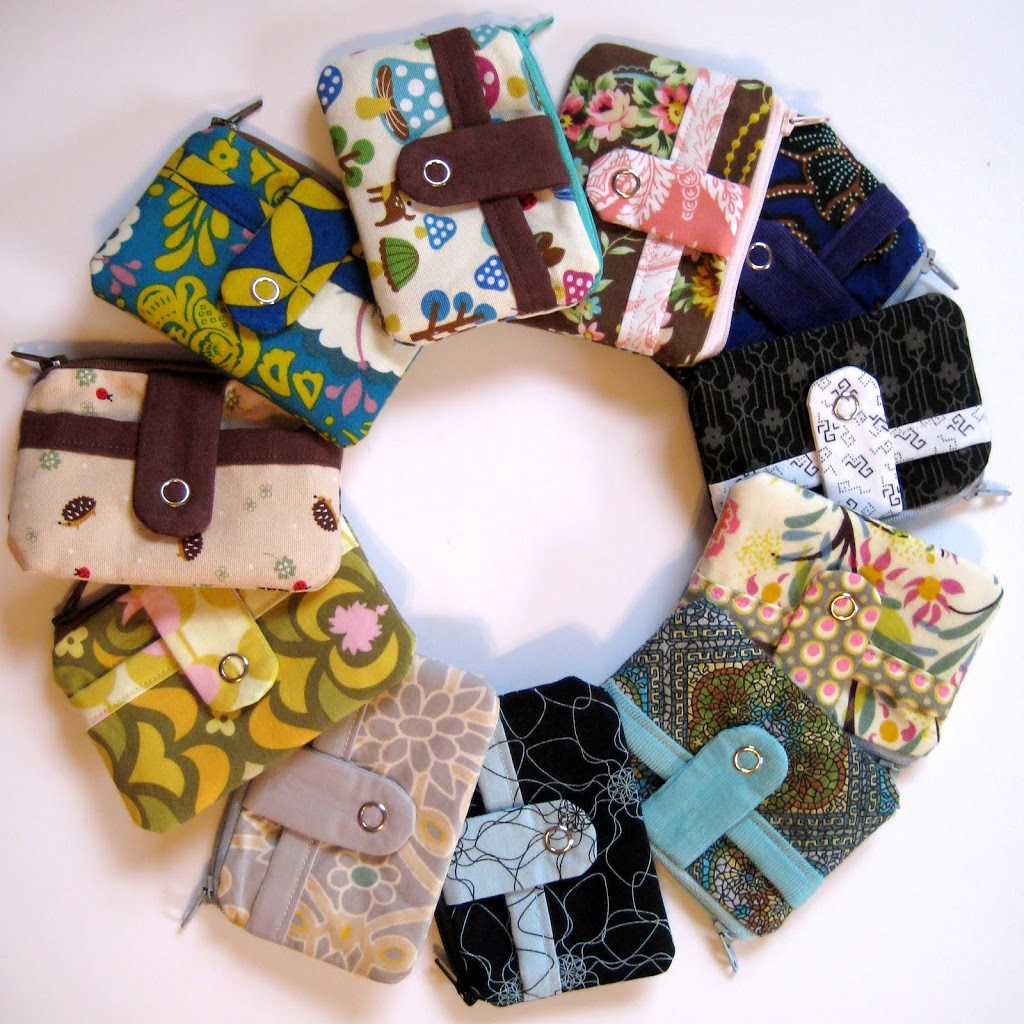
The Zippy Wallet Tutorial is here! Bear with me, this is my first tutorial. Although I’ve probably followed and read a couple hundred tutorials, you never know.
{Key chain tabs not included in instructions}
Here’s what you need:
1 piece of exterior fabric 5″ x 9.5″ (interfaced)
1 piece of lining fabric 5″x 11.5″ (this is also the binding & lining for the exterior pocket)
2 pieces of fabric (same as lining) 3″ x 1.75″ for tab (interfaced)
Must have:
sewing machine
coordinating thread
7″ zipper (you could use a 6″ zipper or larger, but this is what I had)
interfacing
snap, button, velcro (we’ll discuss this later)
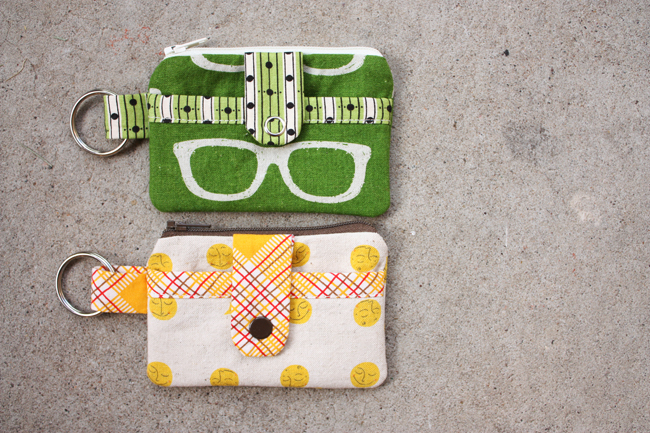
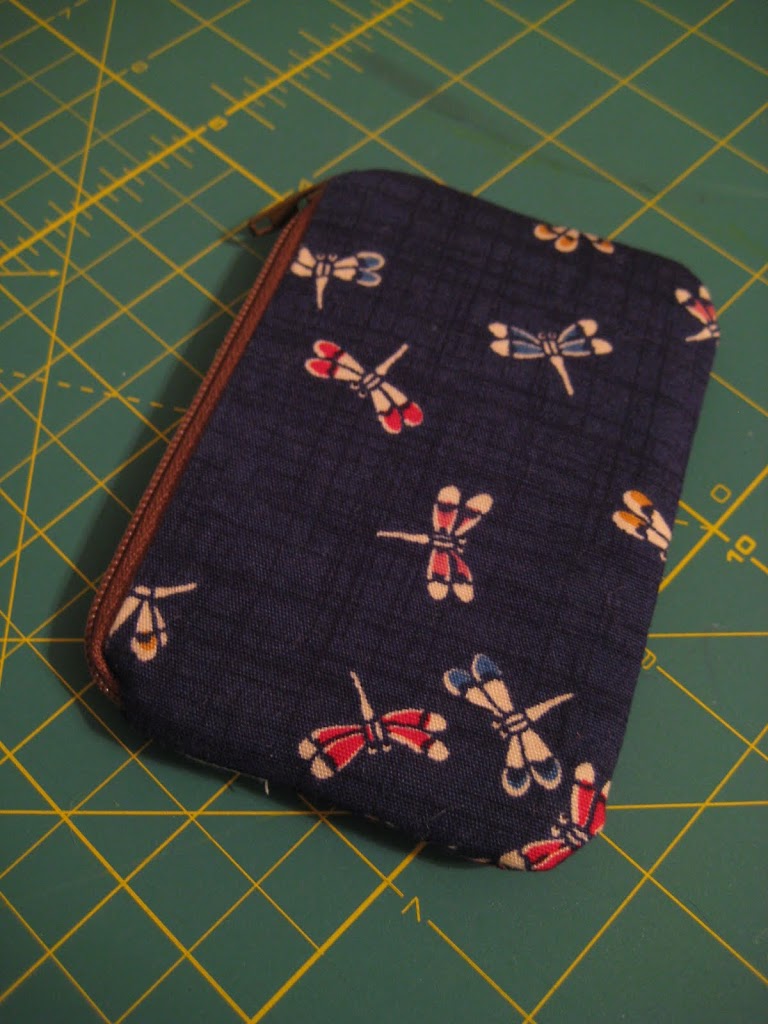
Finished size is approx. 4.5″ wide by 3.5″ tall.
It would be nice to have:
clear ruler
self healing mat
rotary cutter
Let’s go!
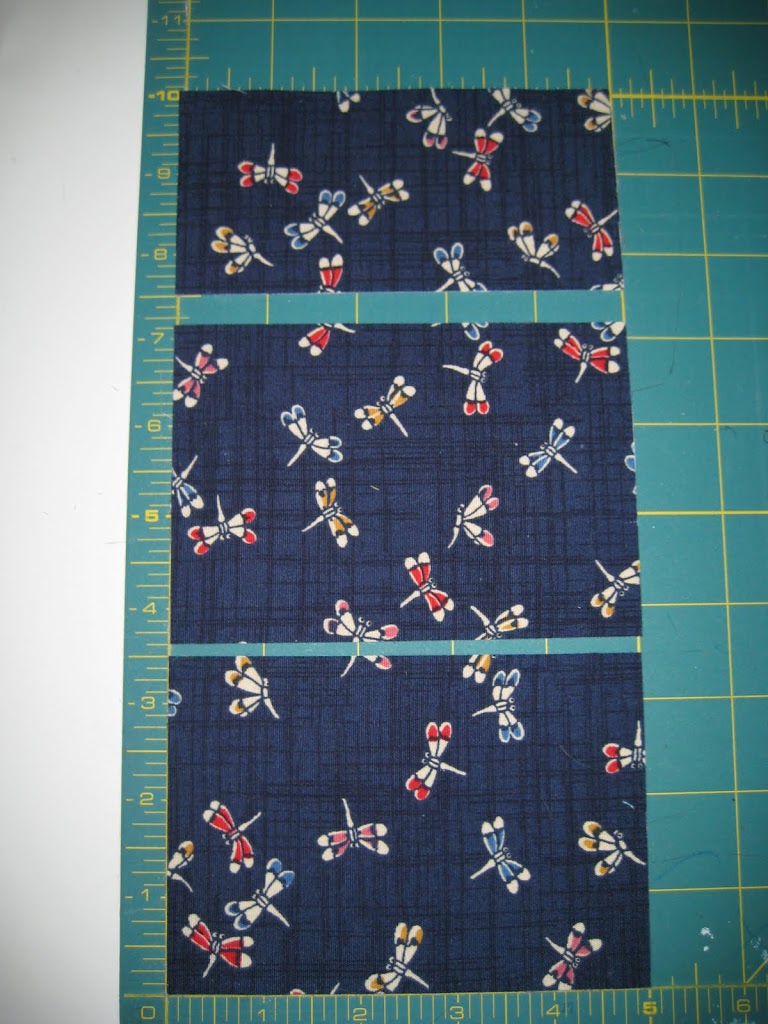
Cut your exterior fabric into 3 pieces: 5″ x 3.5″, 5″ x 3.5″, 5″ x 2.5″ (for the exterior pocket)
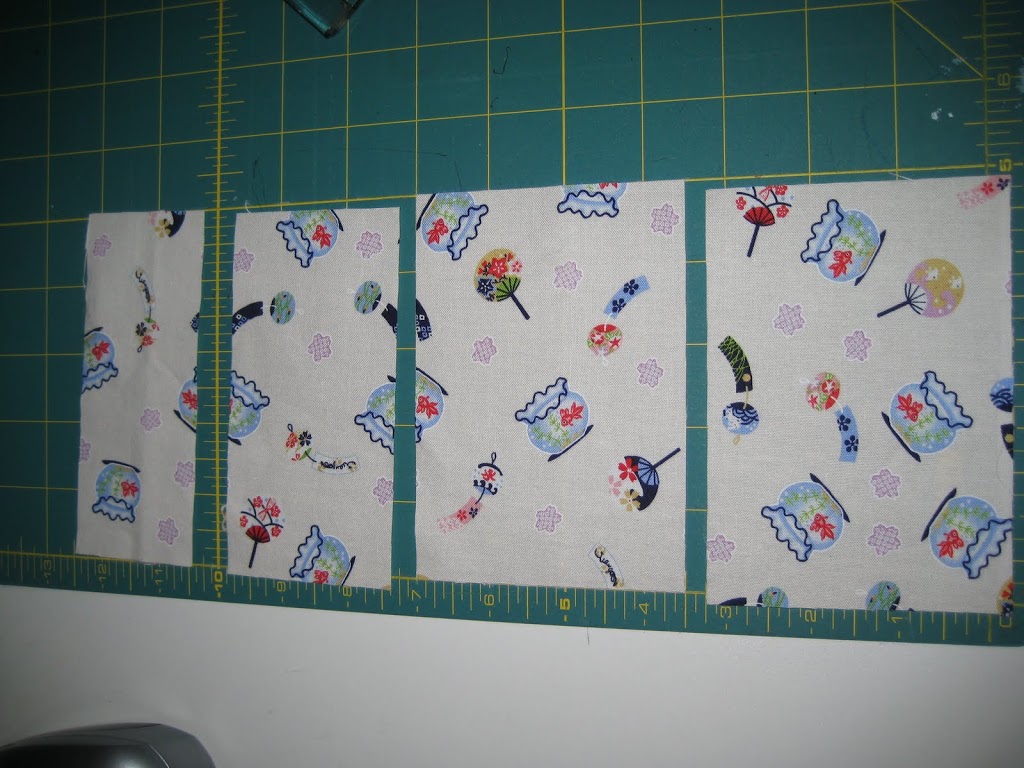
Cut your lining fabric into 4 pieces: 5″ x 3.5″, 5″ x 3.5″, 5″ x 2.5″ (lines the exterior pocket), 5″ x 2″ (make into binding for exterior pocket)
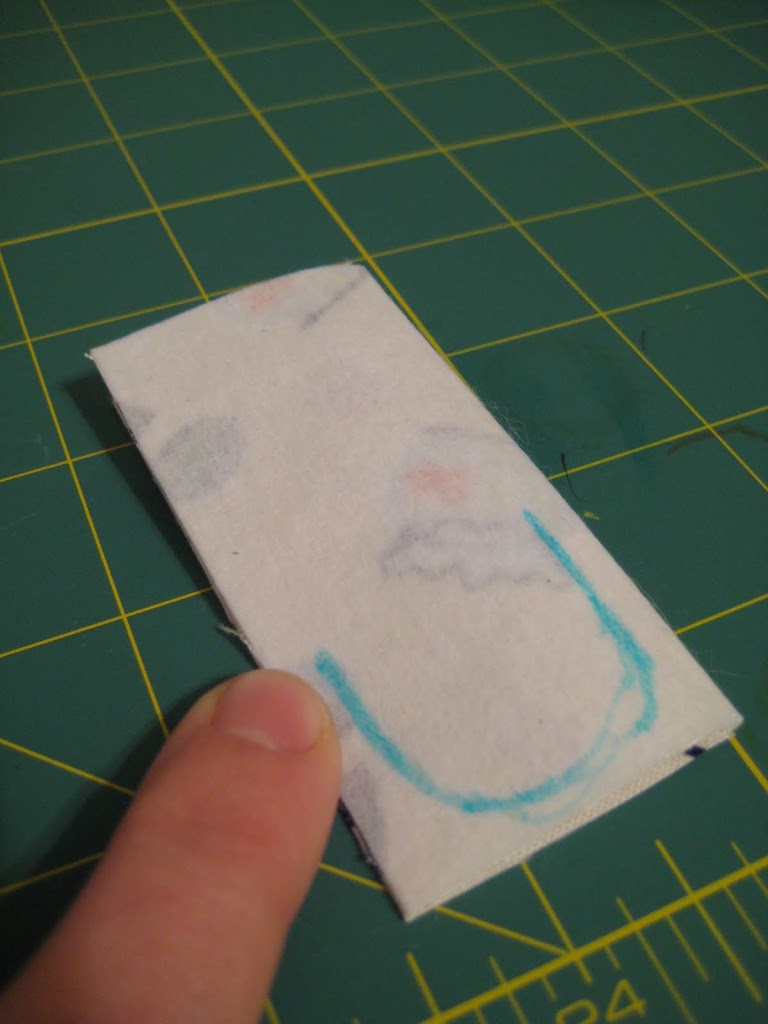
Place the pieces for the tab right sides together, draw a semicircle where the curved bottom will be (you could also make this square or pointed, whatever floats your boat!). Sew along that line. Clip curves, turn right side out. This can be a little tricky since it’s pretty small. I just shove it all into itself and poke a pencil to push it through. Press and set aside.
Take your binding piece, fold in half, press, open up and press raw edges toward crease. Press.
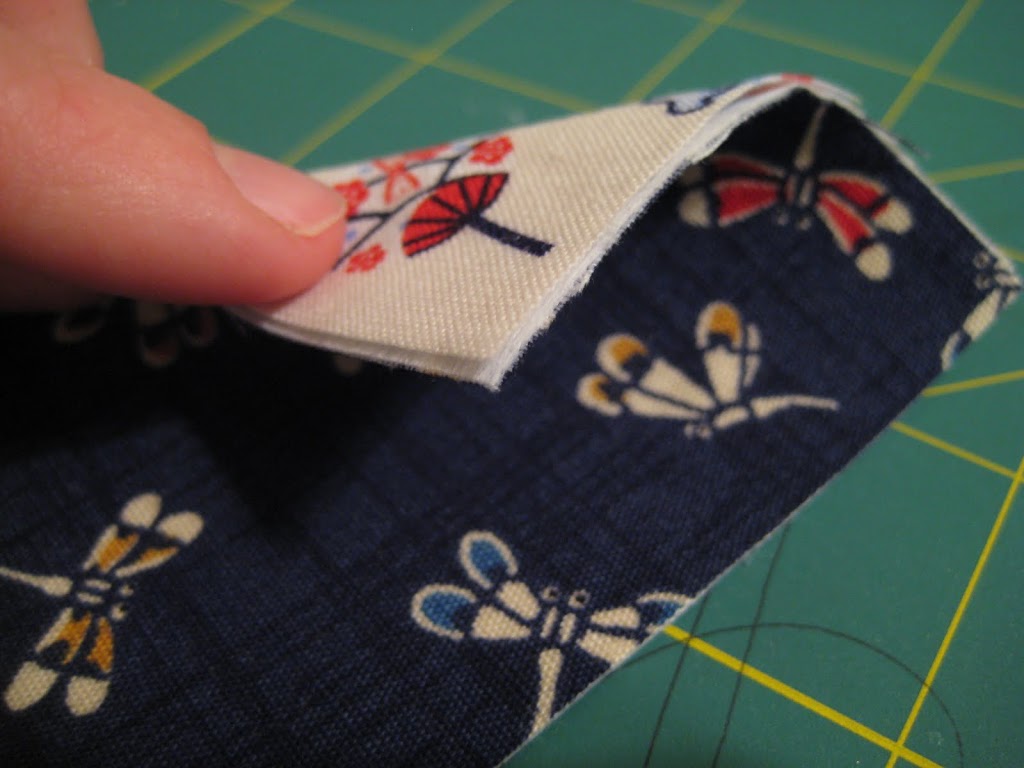
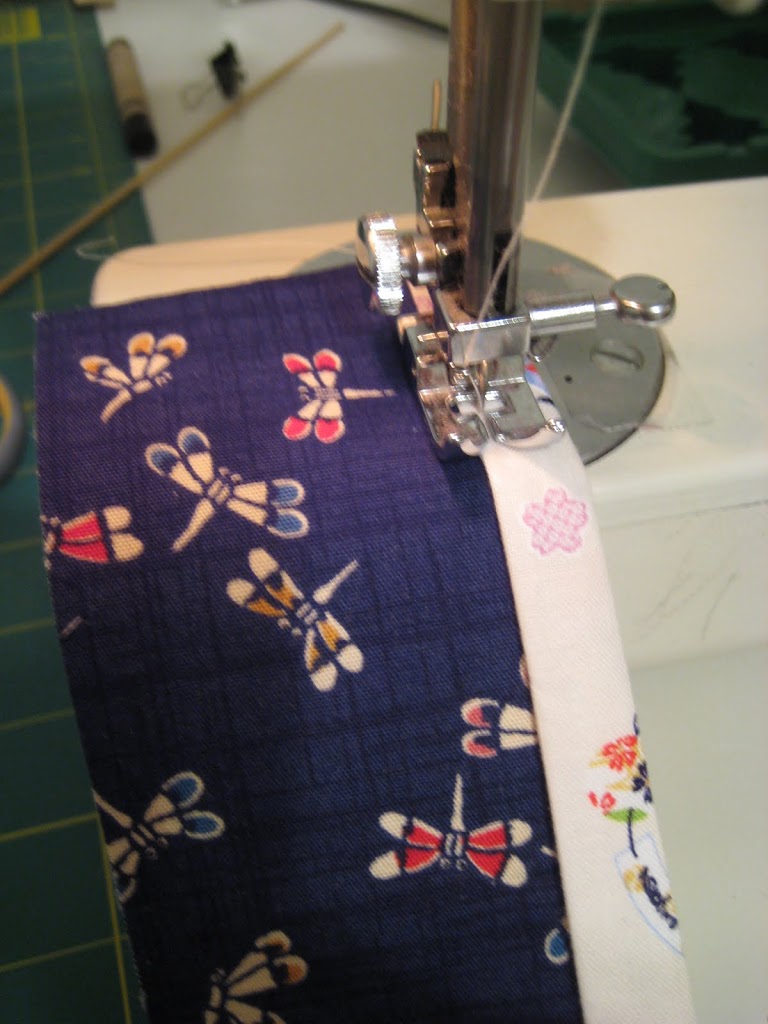
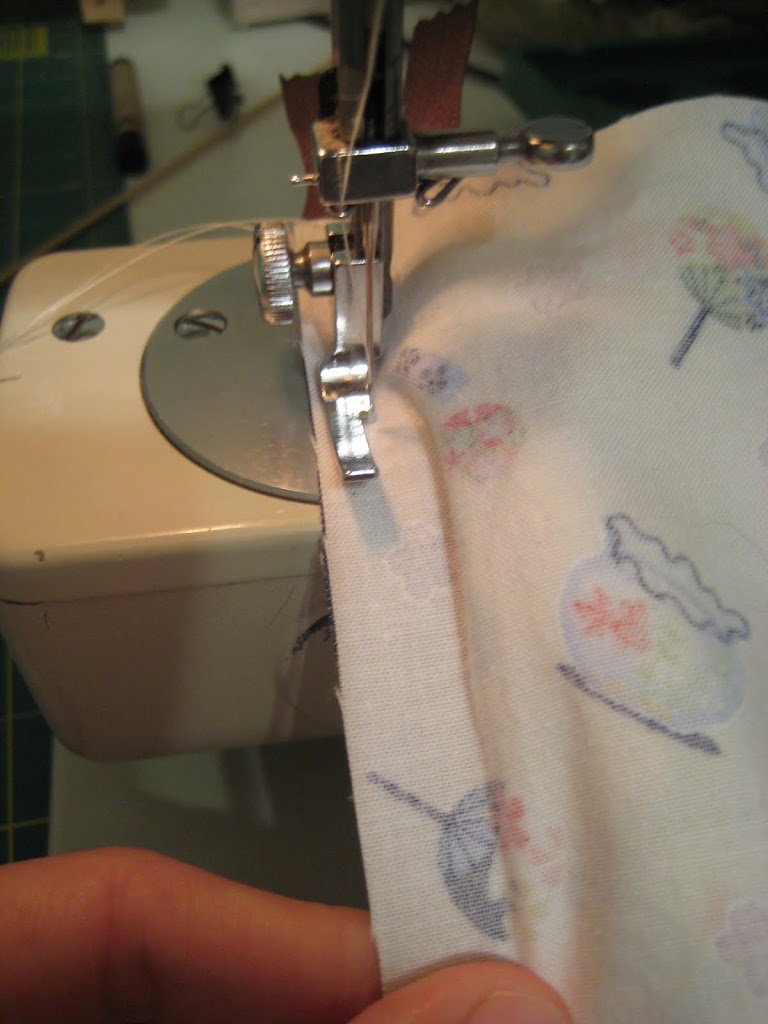
Place your exterior pocket pieces, one of exterior fabric and one lining fabric (5″ x 2.5″) WRONG sides together. Take your binding and sew it into place along one of the long edges. It’s pretty easy, I’m assuming everyone can get this part, just let me know if you have any questions.
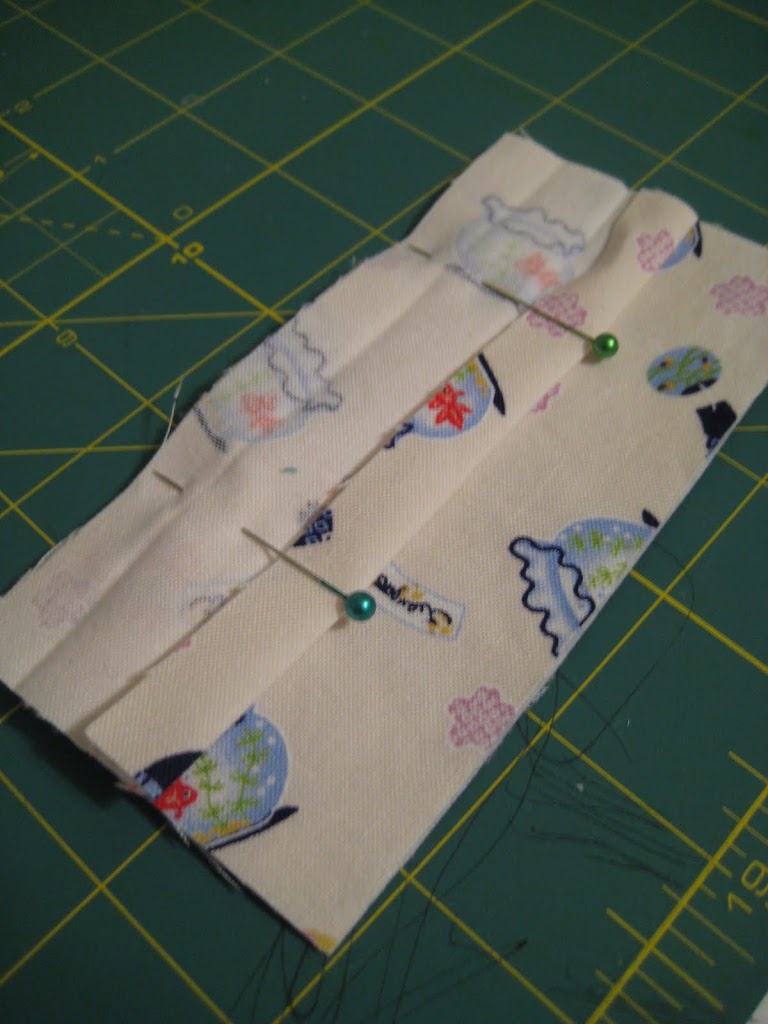
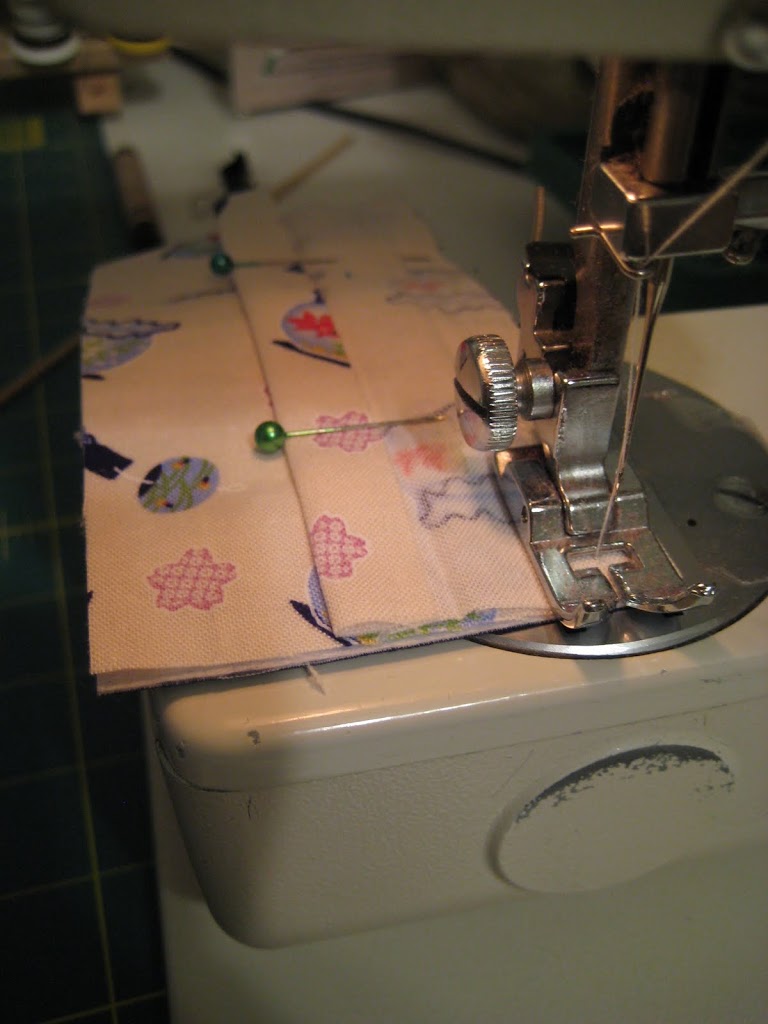
Take one of the exterior pieces, place the exterior pocket along the bottom edge and baste.
Now onto the fun part! Ready?
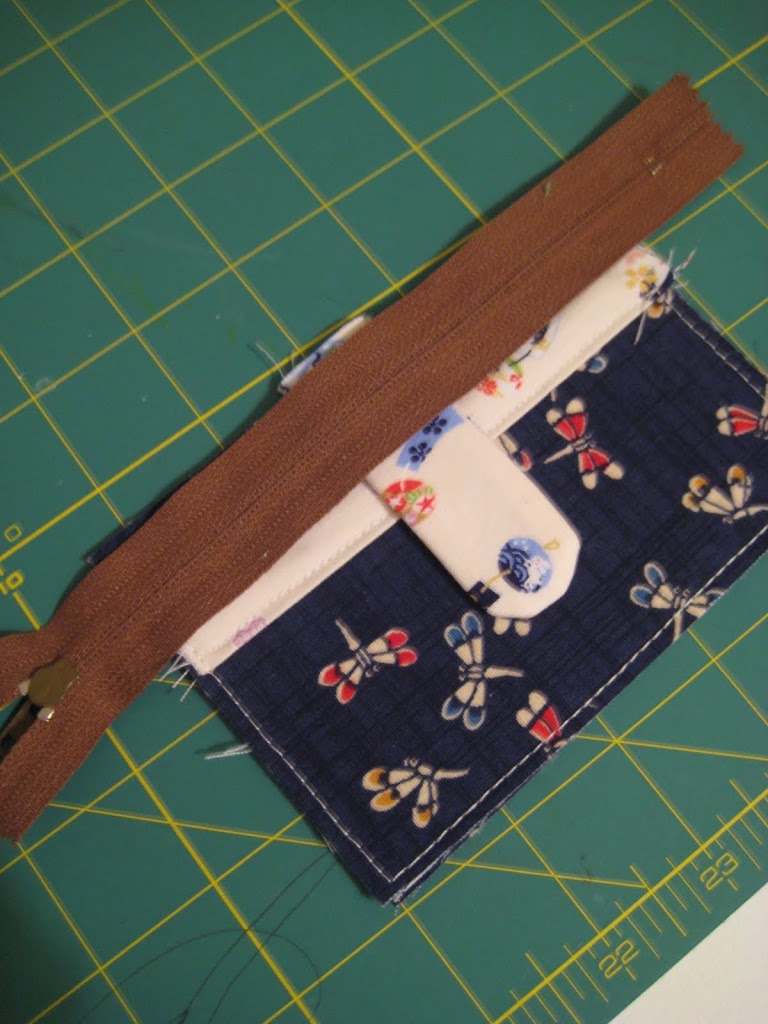
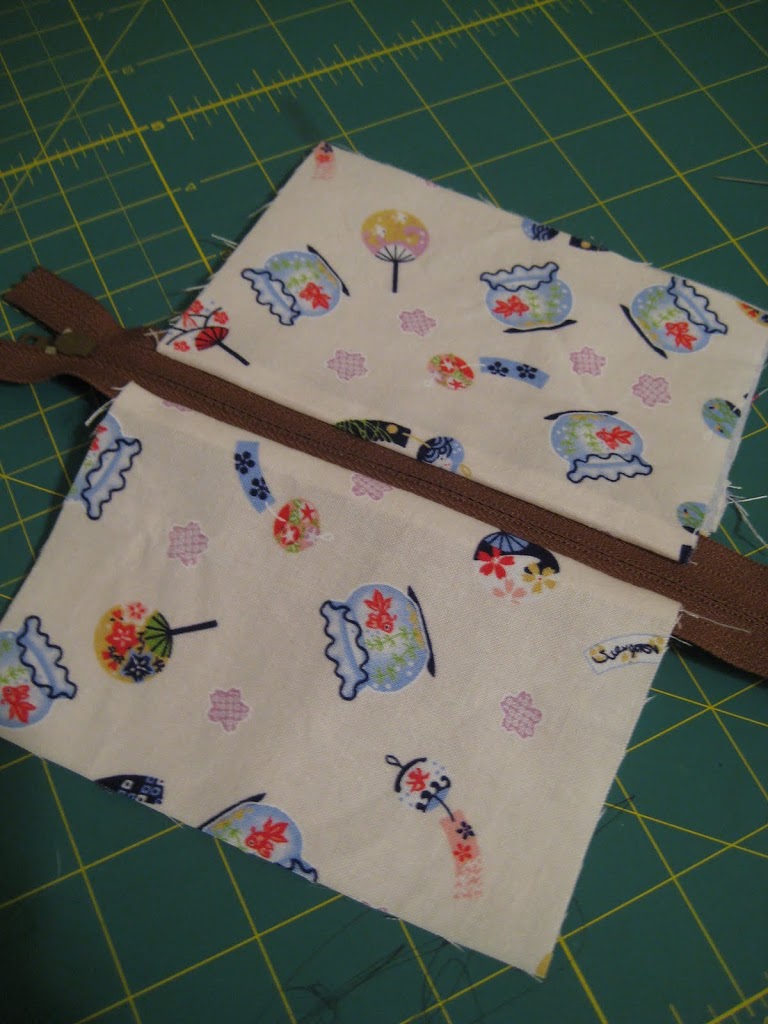
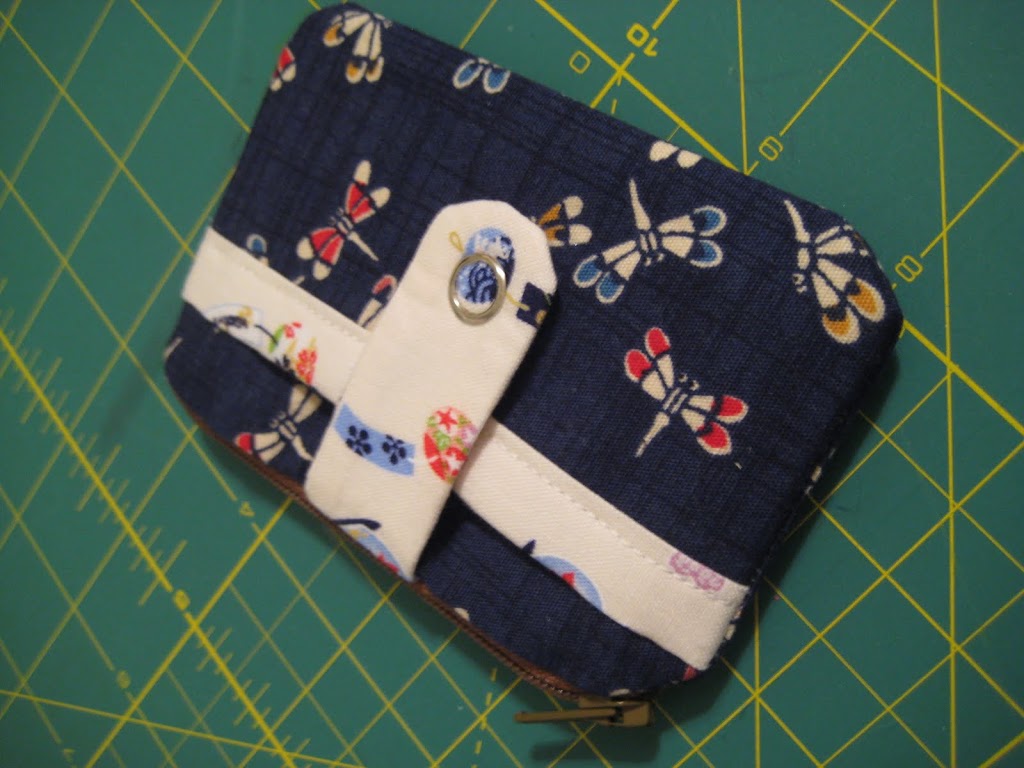
Take the exterior with the pocket basted to it and line it up with the top edge of the zipper (zipper teeth side down and the pull tab on the left). You also add the tab here, sandwiched between the exterior piece and the zipper (just make sure about a 1/4″ sticks above the zipper).
Then take your lining piece and place it RIGHT side down also lining it up with the zipper. Pin & sew with zipper foot. Make sure you try to hold that tab in place. You could baste it beforehand, but I didn’t. Flip so fabrics are WRONG sides together.
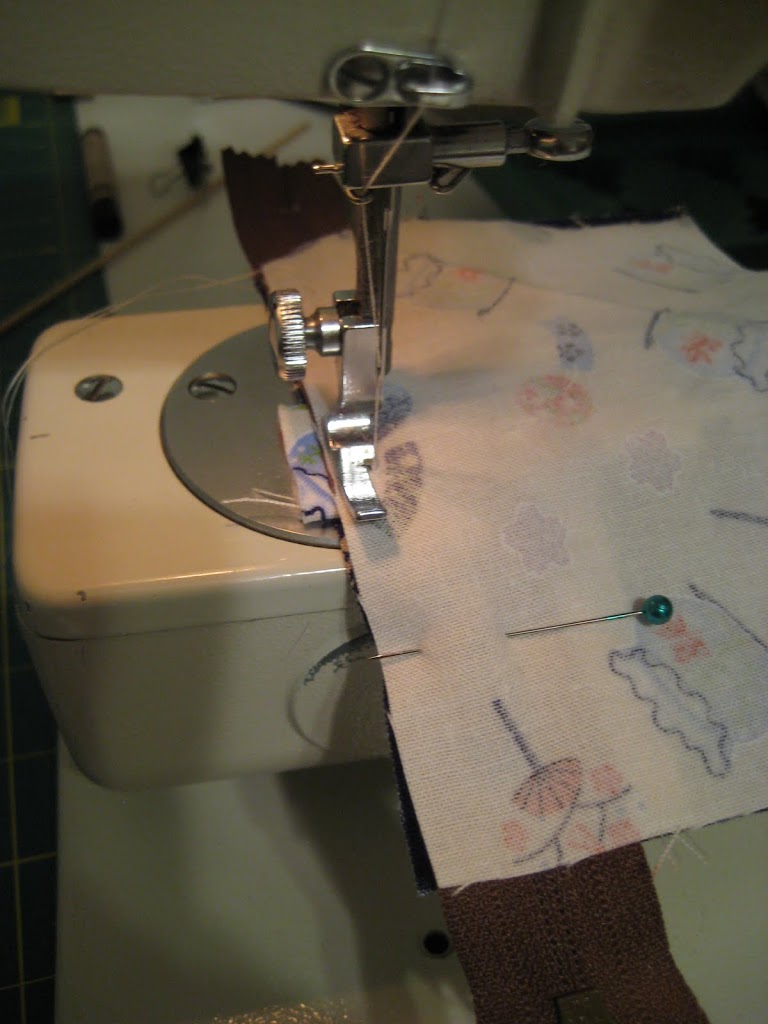
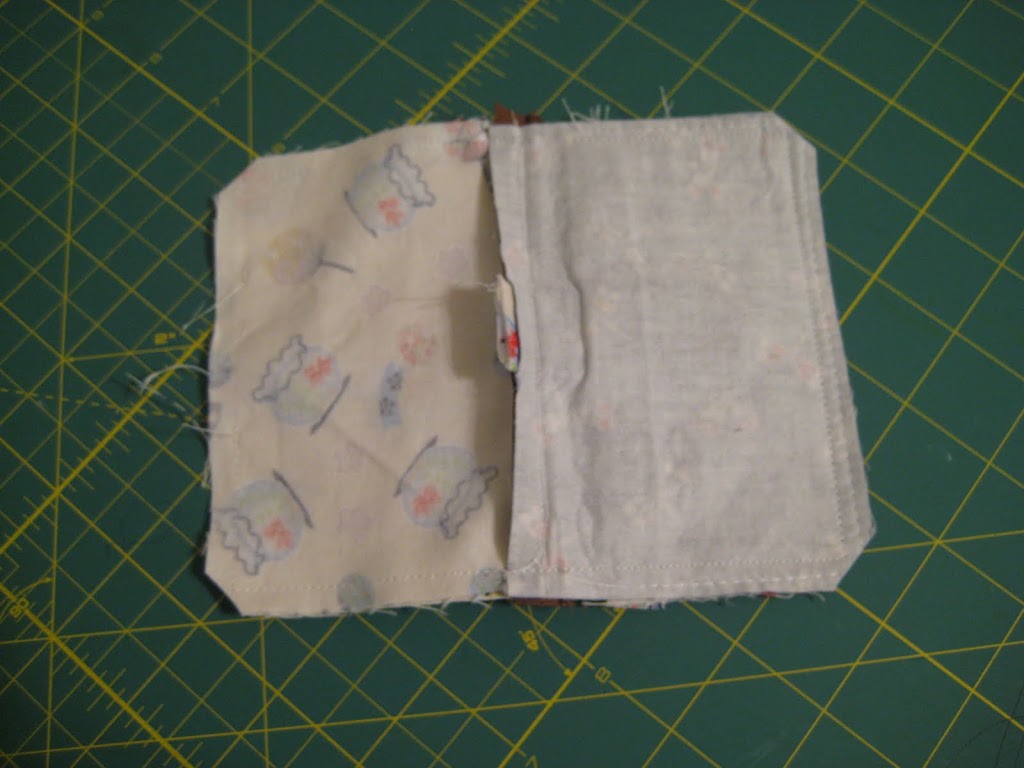
Now take your remaining exterior piece and place it Right side facing you, lay the zippered layers you just sewed together aligning the top edge again zipper teeth facing down, but now the pull tab on the right hand side.
Place remaining lining piece RIGHT side down once again aligning it at the top of the zipper. Pin & sew with zipper foot.
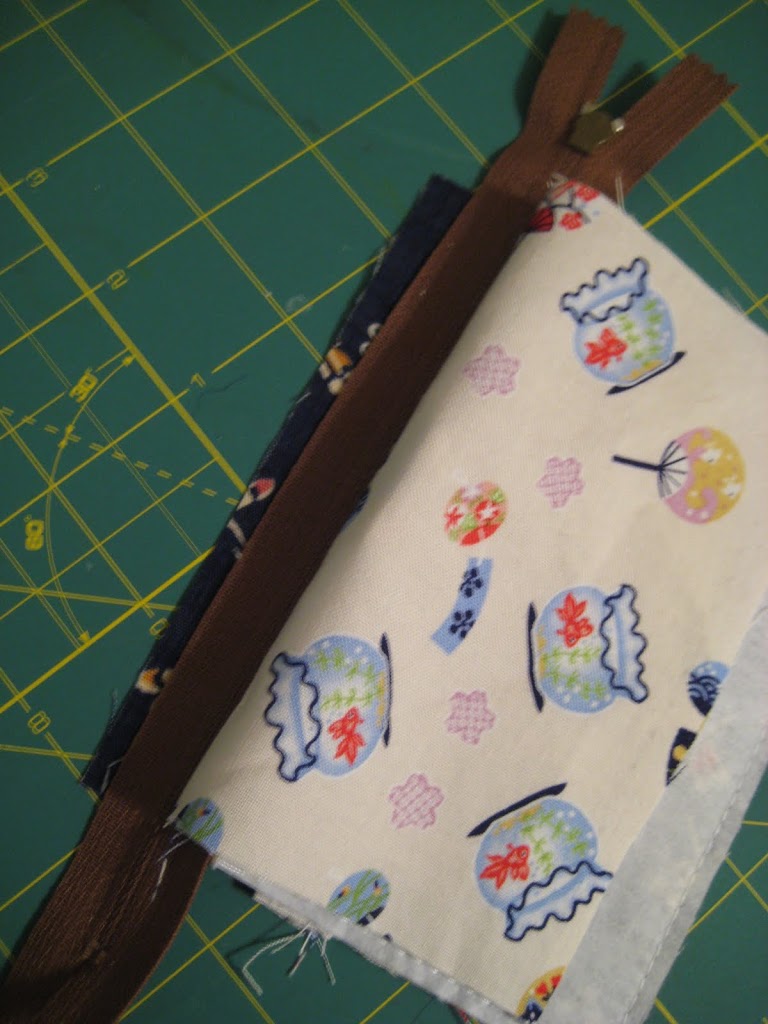
Flip so both sides of the zipper have the fabrics WRONG sides together and press!
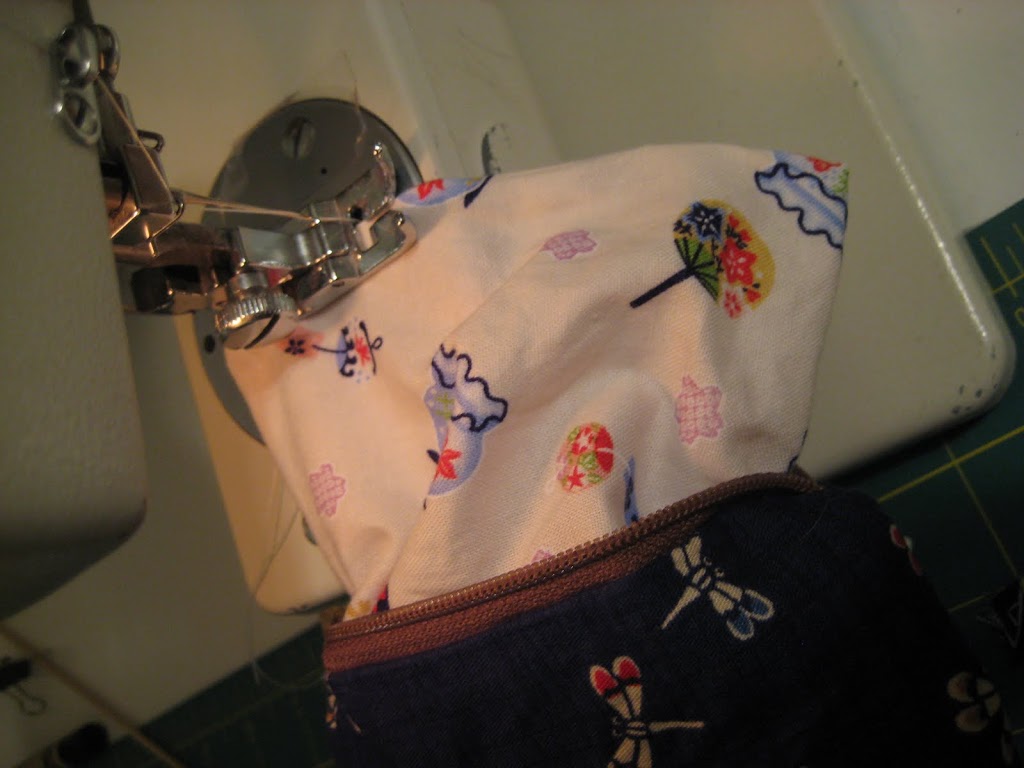
Next, take the exterior fabrics and place them RIGHT sides together and the lining fabrics and place those RIGHT sides together. Be sure to slide open your zipper now or you’ll be doing some seam ripping later! Sew with a 1/4″ seam allowance all around the edge leaving a 2″ opening in the lining for turning. Clip corners. Turn right side out through the opening.
Stitch the opening closed with a very small seem allowance. Push the lining into the exterior. Press again! You’re almost done!
Lastly, add your snap, button or velcro to the tab and exterior pocket and presto! you have a new zippy wallet. Perfect for stashing the essentials, and you’re pretty stylish too.
Give yourself a pat on the back, you did it!
Hope that makes sense, let me know if you have questions. I’d be more than happy to help. Hint Hint, there’s a
giveaway in the works, so stay tuned…


That is super cute! I’m going to have to add this to my must-make list. I saw it on Craft Gossip and just had to click over. I’d love to link to this if you didn’t mind.
Anna, these are sew cute! 🙂 I know I’ll probably spend a lot of time on your blog…thanks for the inspiration!
We are planning on seeing you around Thanksgiving (did Jeremy invite ourselves?) if you’re up for a visit!
Wow–this one’s far more complicated than mine, Anna! Great job!
Thanks for the tutorial. I have put a link to it on my freebies blog if thats okay..hugs Khris
Thanks for the tute! It’s a lovely purse!
so cute! thanks for sharing!
Zippers give me hives :o) but this is so cute I may just give it a try. I found you from Pink Chalk Studio.
YAY! LOVE IT LOVE IT LOVE IT!!! I’m making shelf sitter dolls for Christmas with felt clothes. Thanks for the chance to win! *fingers & toes crossed* 🙂
thanks so much for this!!
Thanks so much for this tutorial, I made 2 yesterday 🙂 🙂
You did an excellent job on the tutorial.
Super cute! I’m sure I have everything I need sitting near my machine–except the time to make it. Want to come babyhold?
Oh Yay, you just solved a Christmas mystery for me!
Great tutorial! Thanks for sharing.
Wonderful tutorial – very well written and great photos! I love making zipper pouches, but I have yet to make one with a pouch too. Can’t wait to try!
Love it! Will save your tutorial for a rainy day to duplicate! 🙂 Cheers, Julie
Anna, Thank you so much for this great tutorial…I am a beginner and am always looking for tutorials on the web to practice sewing. I just loved this one and the result was great even tough I had to use my seam ripper once!!
Thanks again and looking forward to another tutorial from you…
Hey! I love the tutorial. . . made a zippy wallet for myself last night to attach to my key chain to carry my business cards. I was curious if you allow items made from your tutorial to be sold (etsy, etc) and if so if you have any guidelines to follow. Thanks!
Thanks for the great tutorial! I made one.
http://picasaweb.google.com/fayette/Misc#5394560133043712722
Hello!
I really like your how to. I was wondering if I could translate it in French and add it to my list of how to as explained in my french post (http://www.petitcitron.com/index.php/form_howto.html)
Of course, your website would be quoted and there would be a link!
Thank you,
Perrine
Sure Perrine, that sounds great!
Anna
My wallet just ripped so I made one for myself. Perfect! I have had so many complements that I’ve already made three more for friends. Thanks for such a great pattern! Very impressed.
I’m also interested in selling these in my Etsy! Please reply! fallinorion@gmail.com
Great pattern and tutorial well done. I was doing a search for a Diaper wallet when I stumbled across this. Will have to bookmark for later use!
Anna, I could’ve just emailed you to say how wonderful your tute is, but I think EVERYONE needs to know….it was so quick and easy to make and understand. From woah to go, it took me just over an hour, which included reading the tute, selecting fabric and finding a zip. Thnak you sooo much. Hugs Naomi from Adelaide, Sth Australia
Me encanta tu billetera , puedes poner un traductor en la página soy de Argentina.
Besos♥
great tutorial, I like it a lot.I’m also interesting in selling these but not in Etsy, I live in Indonesia, and I want to start crafty business, thank’s. please reply ni_cham2003@yahoo.com
Great tutorial! I made one for a friend’s birthday. Pics posted here:
http://www.kundhi.com/blog/2009/11/30/loving-this-little-zippy-wallet/
Thank you!
I thought I left a message on here to let you know I put your link on my freebies blog…thanks for sharing your tutorial…hugs Khris
Patricia
I’m interested in selling these in my Etsy and other website. Please reply!
Patricia Garcia -njn3691@yahoo.com
Thank you This is supper cute can’t wait to make one. Jenn from Cali
thank you for such an explanatory tutorial! haha i was wondering though…what fabric do you recommend for this project? i wanted something sturdy to hold shape, but not too bulky. what did you use? please send response to my email! thank you!
Christina Guay
christina.guay@gmail.com
thank you so much for the Tute! Im headed to the fabric store today to make a purse for my friends BD. I love this pouch and may tether it to the purse with a clip and homemade bias tape in coordinating fabric. She can put her cell in it or use it as a keychain wallet for quick in and out trips to the store…….
Oh I saw one Wendy made on her blog and loved it! Thank you so much for the great tutorial! I can’t wait to make one!
I LOVE this little zippy purse! Just made my first one using your fab tute and i must make more! if you want to see the finished product I will blog it shortly but here it is at flickr;
http://www.flickr.com/photos/75579312@N00/4393180383/in/photostream/
I did it! I made 4 in a short time. I need more zippers. and you helped me solve a problem I had on another of your tutorials. thanks so much. I look forward to the next tute,
http://latenightstamper.blogspot.com/2010/03/zippy-winners.html
This comment has been removed by a blog administrator.
Very cute! Wondering if you allow anyone to sell them on etsy? Thanks so much, love your blog.
Amy-sorry, I no longer allow people to sell items using my tutorials. I did for a short time allow a few people – so you might see a few on etsy.
I made one for a friend for her birthday and had to make one for myself and my daughter….. her BD is Sunday. So now when I make a gift purse it just doesnt seem complete without a co-ordinating zippy pouch too! My zippers didnt turn out as pretty as yours- I couldnt figure out when you sew the lining and the outside how the sewing should go over the zipper…. it still is functional tho’.
thanks so much for this explanation! love the pouch!
Thanks for posting this, it is lovely and I am adding it to my “I have to make this” list!
Beautiful work!
This comment has been removed by the author.
ery similar to a tute that was posted on Crafster in July of ’09 http://www.craftster.org/forum/index.php?topic=311957.0
Great tutorial. I made my first and posted a link to your tutorial on Craftster:
http://www.craftster.org/forum/index.php?topic=347456.0
Wow! Thank you! This is greate!
Synnøve from Norway
This is soooo cute!! If you like: I have a blog post right now in which you can add a picture and a link to your blog or Flickr-album. I’d be delighted if you add something!
Annemarie
http://www.annemariesbreiblog.blogspot.com
This was such a fun little tutorial to make. I did have to get the seam ripper out a couple of times but it was still really easy! I’m so happy I’ve found a small project that will use up my giant accumulation of scrap fabric! Thanks for posting this!
Very cute wallet. Excellent tutorial. And I’m always looking for ideas of items to make for fundraisers. Currently working on a fundraiser to help local animal shelters. And I think this will work great. Thank you so much!
I’m also going to add this to my list of favorite tutorials! Excellent!
SewCalGal
http://www.sewcalgal.blogspot.com
Great tutorial again!
I have big wallet so it’s sometimes uncomfortable. But with your wallet design I can make a better one! You’re very talented person 😀
i love this! i made one using your tutorial, check it out over at peacelovesew1.blogspot.com 🙂
Hello, I name is Lucia, I’m from Porto Alegre, Brazil enjoyed your tips, your work is beautiful.
I finally made one of these today for my sister-love it! super easy and the pocket is awesome! Thanks Anna!
Thank you for the tutorial! I loved making this. This was my first ever sewing project. Any tips for zippers? Mine seems all poofy like on top, and weird, but otherwise, super cute 🙂 I’ll post a pic and link you 🙂
Dear Anna, your tutorial is a great help. But i have problem with the zip. When machining both the lining and exterior fabric, do i go over the zip or tuck the ends of the zip in. I have tried going over the zip but when the pouch is turned over, the corners with the zip does not turn out neat and nice like yours. Please adv, thanks.
hey anonymous, I do sew over the zipper. You might want to try trimming the seam allowance by the zipper ends a little closer, and don’t be afraid to really get the chopstick in there and poke things into place! hope that helps!
I tried this and absolutely love it!!! Yay!!! Success with a cute wallet!
Thank you for sharing this.I made one and i know i am gone do some more.
Love this and love the fact that my business cards fit in the front pocket! This will definetly always be in my purse!
I have been looking for a easy but stylish wallet and this is perfect! Thanks for the tutorial.
♥Adeela♥
I made one using this tutorial and it turned out great.
http://sewkool.blogspot.com/2011/04/zippy-wallet.html
Thanks for the tutorial. I’ve made one so far & you can see it here:
http://blueadt.blogspot.com/2011/04/and-another-one.html
Thanks again for this pattern, I’ve made another one:
http://blueadt.blogspot.com/2011/05/birthday-gifts.html
Love, lOvE, LOVE this little coin purse!! I’ve blogged about it here…
http://iamserendipity.blogspot.com/2011/05/mothers-day-gift.html
And everyone that I have given one to has loved it! Thanks for the clear, concise and easy to follow tutorial! From someone who is teaching herself to sew, I appreciate it!!
Featured you!
http://allawesomelinks.blogspot.com/2011/06/zippy-wallet-tutorial.html
Thanks, great tutorial… I just made one, planning to make a few more! and maybe try to make it a little bigger, but this small size is really cute. I’ll make some for my kids! I usually avoid sewing zippers, or procrastinate doing it (I have a few unfinished sewing projects only needing a zipper) but your tutorial was easy to understand, and the pictures helped a lot, and it was a really fun sewing project. I just discovered your blog, and I also love your tote patterns. Thanks! Chantal
thank you so much for this tutorial! I just finished making it and it’s my first zipper project. I love it! it’s so cute and functional!
Hi, I just found your Blog, and it’s great! Love this tutorial.
Thanks
Dian
I plan on making the clutch and this wallet to match as a gift for who knows who.
Thank you for the fabulous tutorial! And your generosity to share! I always try to make homemade gifts, now more so with the economy not so great. And for chemo baskets made up for the patients when they go to chemo or come home… fabulous little perk in there for holding some calming tea for them!
Thank you again!
packaging supplies
thanks for the tutorial…I just whipped one up….so fun 🙂
Oh boy….. I just made two of these little purses this evening!! One for the young girl next door for Christmas and possibly one for me!!!!
Fab, fab, fab tutorial – thanks so so much.. And Merry Christmas x
I did it! It is perfect, so cute, my daughter will love it. Gonna make another one. Thanks Noodlehead for all your work on our behalf. 🙂
this was a super fun project – thanks for sharing!
I’d love for you to check it out:
Phoebe Bag & Zippy Wallet
Looking forward to trying this one out soon! I linked your tutorial at http://wishfultinker.blogspot.com/2012/02/speaking-of-fabrics.html
thx for your wonderful tute…just whipped one up and it came out so cute!!!thx again 🙂
This tutorial is absolutely awesome!
I put a link in a post on my blog, sewlicious-lisa.blogspot.com
Thanks for sharing this! 😀
I enlarged your pattern to 5 x 8 and made them as clutch purses for 5 graduating college seniors on a softball team. Used softball themed buttons and zipper grasps. So much fun and they will absolutely love them!!
Sherry
Hi, thank you for sharing. Such a great tutorial! I posted your tutorial on my blog with a link back to your blog, hope it’s ok http://makeitandwearit.blogspot.com.au/2012/05/mothers-day-diy-gift.html.
Please write me if there is a problem makeandwear@gmail.com.
At what point do you have to tuck the zippers in? I made mine but one end of the zipper is sticking out and it looks strange 🙁
Okay. you are really confusing at the part where you say to put the pocket onto the other spot. I see that you already sewed the edges and the bottom to the piece, but yet you do not state you sew it into place. ??
the last couple words say baste in place, meaning you’ll use the longest stitch on your machine and sew on the sides and bottom of the exterior pocket. Let me know if that makes sense or you can email me… 🙂
Love these! I just made some for Christmas presents. Thank you for the tutorial!
Dankeschön für diese Anleitung! Toll!
Liebe Grüße Petra
Just made 6 of them. I’ve been wanting to make these for a LONG time now. Finally got to it. Fun little project to use up scraps 🙂
HI Anna, I just caught the end photo of this tutorial atcoatsandclarksewingsecrets – glad I came over here – think this would be great to make for some xmas prezzies, we’re living frugally this year
Thank you for the wonderful tutorial! It turned out so cute!
I did my cutting today…my nieces will have cute wallets from their Auntie thanks to you!!
Many thanks for this great tutorial. The zipper thing was so easy!
Greetings from Vienna, Austria!
can you make a video on this?
OMG! Thank you for posting:) I just finished this little cutie. I think I will make one for all the chicks in the family. I LOVE it! zeb312@yahoo.com
You didn’t mention which piece size to use for the tab ?
2 pieces of fabric (same as lining) 3″ x 1.75″ for tab (interfaced), it’s listed at the top of the page. 🙂
Love your tutorials
Wedding dj Mitchy Burnz located in Adelaide South Australia. A hospitality professional with over 10 years experience as an Adelaide dj.
Thank you very much for your tutorial. With it I finally managed to sew a cute little coin wallet 😀
Jiipppiiiiiaaahhhhhheeeeeeeee !!!!
Thanks so much all the way from switzerland !!! This ist such a lovely and not-so-much-hours-eating project. I will make many of these with all the scraps from Heartpillow sewing for Breastcancer Patients. So I always have a little Thanks or Giveaway for Helpers and Donations.
Thank you so much for this great Tuto and the Idea anyway.
Big Hello from Kathrin
Thanks for the tutorial. I made one this afternoon and it was so much fun and easy to do! I wish my zipper looked as nice on mine as it does on yours, though. I’m still learning and my results are still a little “blah”, but still, love my little pouch!
Hi I made this little purse today, instructions so simple so thankyou thankyou, am super proud of myself lol.
Hi this is so cute… loved the fabrics too
Thank you for your great tutorial! I made two purses … so lovely 🙂
Hi just found this on pinterest, I know it has been ages since you have made this but since I am a first time sewer, I cannot for the life of me understand how to sew on the exterior pocket. I lose myself after the binding. I am hoping to find someone who made a video but no luck. Maybe you can maybe elaborate a bit the steps? Thanks if you do 🙂
Thank you ! your tutorial is nice ! Thank for sharing !
So cool and very useful! I need a new wallet so why not make my own?
Hi there, thanks for your tutorial. I’m a complete beginner, learning project by project and I found it easy to follow. In the UK so had to look up what basting was (tacking). This was my first time with zips (I didn’t even realise I had a zipper foot!) but had no problems (although I didn’t realise you could just snip the ends off zips after sewing!). I even managed to do a reasonable key chain. Most importantly my 5 year old son loves his new fancy wallet! Thanks again…
So great to hear that! 🙂
Great. Many ion mind for Granddaughters. Found it in Sew Can She.
Great pattern. I found it on Sew She Can. I made it a larger to hold a cell phone for my Mom for Mother’s Day. It comes together so quickly. I know my family members will want one as soon as they see it.
I need help 🙁 I am struggling with the zipper part and don’t know how you do it. Please email me at panda.teigh@gmail.com thanks
I made one using regular dimensions, and then resized the second one so that it measures 5×7.5. I added a wrist strap to it so it is now a wallet! thank you so much for this tutorial, it is foolproof 🙂
how cute!! Always love ur posts, the wallets are so pretty and it’s always so nice to sew for the children.